
Nowadays, customers can shop from anywhere, at any time, making it harder than ever to get ahead of the competition! Remember that a single bad customer interaction can cause up to 50% of shoppers to not come back.
Therefore, it’s important for businesses to focus their attention on the quality of customer service they provide. Indeed, the better experience customers have, the more repeat custom and positive reviews you'll receive!
By smartly leveraging technology and making use of eDesk’s powerful features, support teams can easily create a 5-star customer experience. Here are some key best practices for them to follow!
Reply fast but keep it personal
➡️ Snippets
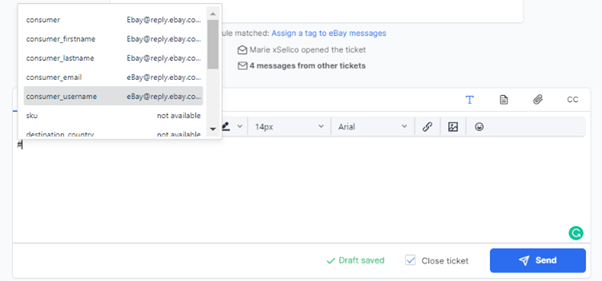
eDesk offers a wide range of snippets to help you customize your replies. No need to spend time searching for the customer’s name, the product they ordered or even the estimated delivery date... It’s all in there and ready for you to use!
Hit # in the reply box to display a list of all the snippets available: #consumer_firstname#, #product_name#, #expected_delivery_date_from# etc… add them to your reply and eDesk will automatically replace the snippet with the relevant information for each customer!
 Pro Tip: interested in creating your own snippets? You can do it directly within your eDesk account under Settings → Smart Tools → Snippets. Simply click Create a Snippet to get started!
To find out more about eDesk snippets, click here.
Within your eDesk account, you’ll be able to set up powerful autoresponders to acknowledge your customer’s emails and keep them informed with the right responses.
Go to Settings → Smart Tools → Templates and click + Add a Template → Auto Reply to get started!
Create the message for your autoresponder then select exactly when you want to send it! It’s super easy!
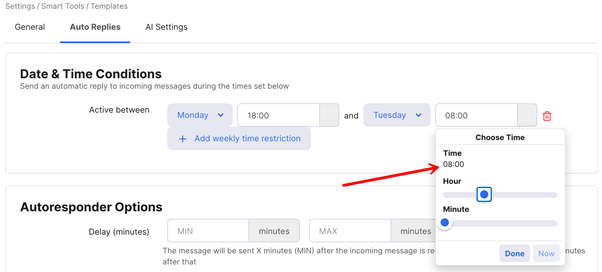 ⭐ Practical Example: if you contact a business and don’t hear back for a while, it’s very frustrating! You can end up wondering if they even received your email in the first place? With eDesk, you can set up an autoresponder during outside office hours to let your customers know you received their email and will get back in touch with them ASAP.
To find out more about eDesk templates, click here.
➡️ Auto-Translate
You can set up eDesk to automatically translate your customer’s messages into a language you can understand, and automatically translate your own responses into the language they understand. This super powerful feature allows you to go global and support your customers in multiple languages!
To get started, go to Settings → My Account → Profile Preferences → General and select your preferred language. When you open any message in a foreign language, click on the translate icon and it will be auto-translated into your preferred language.
 Pro Tip: If you speak multiple languages, go Mailbox → Languages I understand, and select one or more languages. Messages that are in these languages won’t be Auto-translated.
Whenever you reply, write your message as normal in your preferred language. When you hit Send, a popup opens that shows your response auto-translated into the customer’s language and asks if you want to use this automated translation.
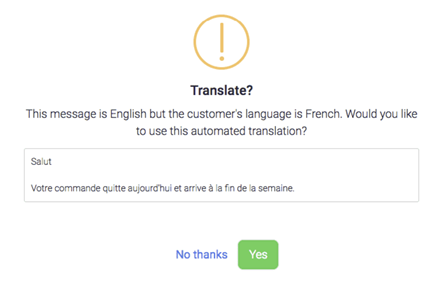 ⭐ Practical Example: you sell on Amazon ES but you and your teammates don’t speak the language. If a customer writes in Spanish, you can use the auto translation to type your reply in English and eDesk will automatically translate it to Spanish for you!
To find out more about Auto-Translation, click here.

Stay detail-oriented and organized!
➡️ Business Hours and SLAs
Service Level Agreements (SLAs) define the level of service a customer can expect from a seller or marketplace. You can set up SLA timers in eDesk to help your agents meet SLA response targets. A SLA timer represents the time period in which agents should respond to a customer message.
If you have your Business Hours set within your account, the SLA timer will only count down during your set hours. This ensures your response performance metrics are not affected when your support team is out of the office!
To get started, click on Settings → Company Settings → Company → Business Hours.
 To find out more about Business Hours, click here.
After adding your business hours, you can go to Settings → Mailbox Settings → Channels to set up either a Marketplace-specific SLA or Company-specific SLA. When you’re done, the SLA timer will display in the Time Left column for a To Do ticket in the Mailbox.
Practical Example: if you set up 24hrs SLAs on your tickets, your team will know exactly how much time they have to respond to a customer thanks to the timer showing in eDesk. It helps not only provide a great level of service but also gives guidance on what is expected from your support agents!
To find out more about SLA timers, click here.
➡️ Custom Fields
Within your eDesk account, you can create custom fields allowing you to link additional information to your customer’s queries.
To get started, click on Settings→ Smart Tools→ Custom fields then select + Add Custom field. Set up what type of custom field you’re looking to add and hit Save.
The custom fields you create will be automatically added to each ticket in eDesk so you can add more information if necessary.
 ⭐ Practical Example: you sell car parts and it’s very important to know the part’s reference number when a customer gets in touch for a refund. Add a special custom field so you and your team can write down that number directly onto the ticket.
To find out more about custom fields, click here.
Constantly review your performance
➡️ eDesk Insights
eDesk offers a range of powerful insights on Tickets, Agents and Products. You can consult these stats and data to have a better understanding of how your team, products, and entire business are performing.
- Tickets Insights: if you want to try and understand how your team is managing all tickets within your eDesk, you’re in the right place! This section will give you information such as the number of active and new tickets in your inbox, the average tickets per order, the number of outgoing messages, your team’s average response time, SLA compliance etc.
 ⭐ Practical Example: if you notice the tickets per order number going up for example, it means that customers are getting in touch more than usual. This could be an issue with the products you’re selling or your delivery courier being late? Identifying the source of the issue rapidly will help your business stay on track!
To find out more about Tickets Insights, click here.
- Agents Insights: this is the section in eDesk where you will find all the data related to your team! You’ll see the number of tickets each agent is dealing with as well as their status, a heatmap of busy times and also the number of chats achieved.
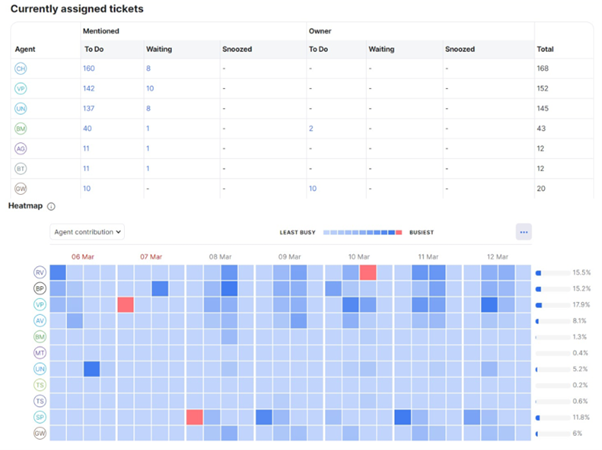 ⭐ Practical Example: if you notice lots of red areas on the heatmap or that your agents have a lot of To Do tickets for example, this might be a sign for you to hire additional support team members to help as the stats show the team is under a lot of pressure!
 To find out more about Agents Insights, click here.
- Product Insights: this is the section in eDesk where you’ll uncover hidden costs regarding the products you sell and see how they are performing! You’ll see the Top 10 Products creating the most tickets, products with the best/worst reviews as well as highest earning, most sold and eBay most returned products.
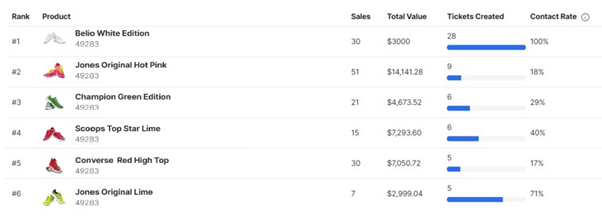 ⭐ Practical Example: the Contact Rate displayed will give you an idea of how often a customer inquiry has come through for each of the top products you sell. The higher the contact rate, the more resources and time you're using when dealing with tickets for this particular product so you might want to look at that.
 To find out more about Product Insights, click here.
➡️ Enterprise Reports
Another powerful reporting tool available within your eDesk account are the Enterprise reports. These reports will allow you to view and download various types of account data to help you better understand usage patterns and allow you to make informed business decisions.
Pro Tip: You’ll need to be on the eDesk Enterprise plan to access this feature. To find out more information, click here.
To get started, select the Insights icon on the left-hand side. After that, go to Reports → Enterprise Reports.
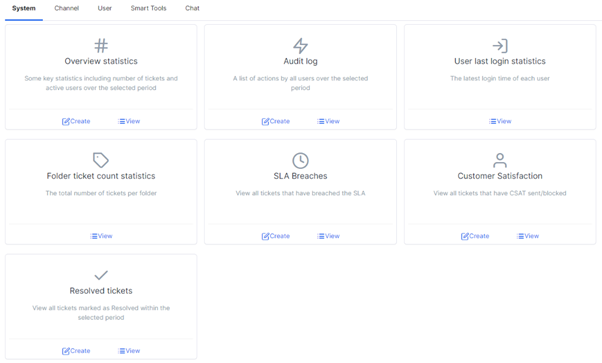 Right away, you’ll see a list of all reports available that you can easily view and download directly from your account.
⭐ Practical Example: interested in finding out what your customers think? You can download a customer satisfaction report to get an overview of all CSAT surveys left to keep record of them.
To find out more about Enterprise reports, click here.
➡️ Mobile App
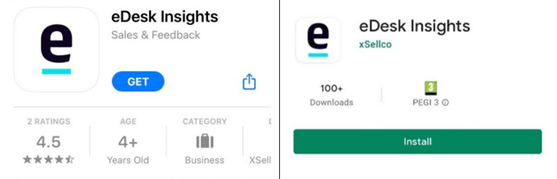
Within eDesk, you’ll be able to download our brand-new mobile app eDesk Insights to help you consult your business metrics in real-time.
To download eDesk Insights for Apple, click here.
To download eDesk Insights for Android, click here.
 When downloading eDesk Insights, you can track:
-
eCommerce sales and orders in real-time, with daily, weekly and monthly Dashboards.
-
ticket volumes per channel, tag, or query type. See SLA compliance and follow your first response rate.
-
changes in your feedback performance, review historical Amazon negative feedback, and review historical eBay positive and negative feedback (eDesk Feedback only).
To find out more about eDesk Insights, click here.
We took inspiration from what successful sellers use with eDesk to compile all of these best practices. They’re here to help you become an expert at saving time and providing customers with a 5-star experience!
Interested in exploring more best practices?