

Engage your website visitors with a smooth chat experience using eDesk Live Chat.
This help file will guide you through the Widget Settings that you can use to build and customize the look of your chat experience to suit your business.
Before you start
-
Some features of the eDesk Live Chat such as Custom Fields and Chatbot are only available on certain plans. To find out more, check out our pricing page.
-
You’ll need to have access to Smart Tools > Widgets in your Settings. If you don’t have access, you can request it from an Admin user within your business.
Chat set-up is split into 4 tabs:
- Customization
- Behaviour
- Prompts
- Installation
01 Customization
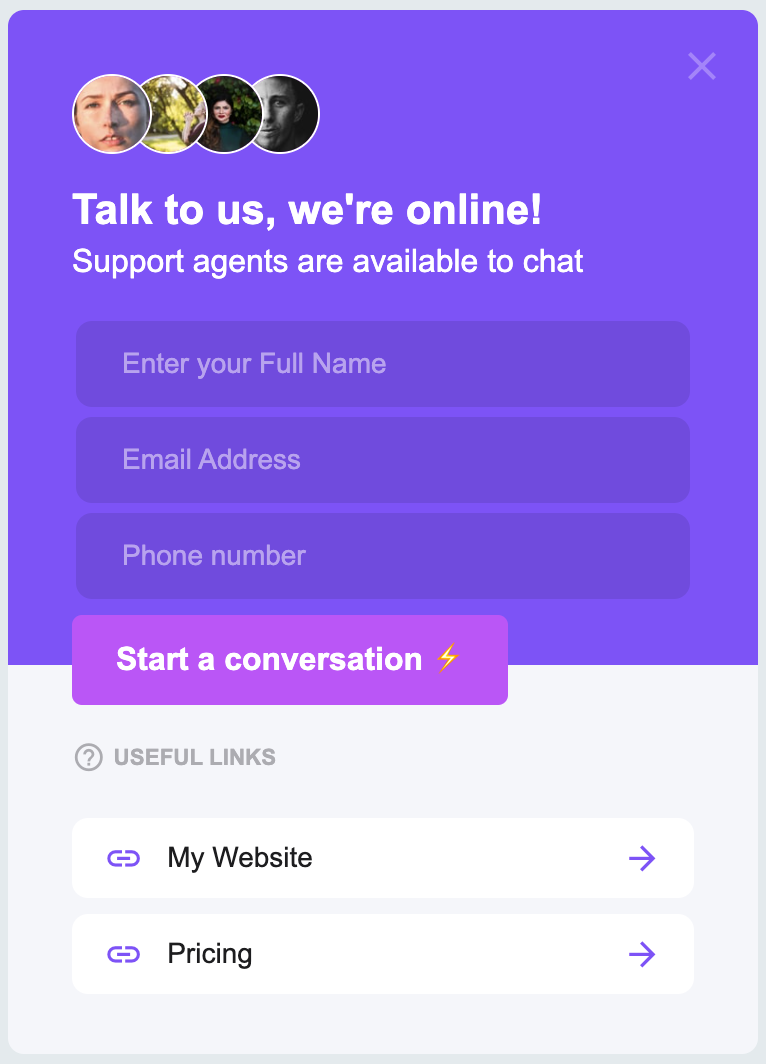
In the Customization tab, you can choose the colors, links, Tone of Voice and the Chat Transcript in the Live Chat box that will be added to your website.Appearance
Here you have the option to choose the language of the pre-set text such as name and email. You can also choose up to 2 brand colours to style your widget.
- The first colour is the main colour for the widget.
- The second option is the Send button on the initial Chat form.
.jpg)
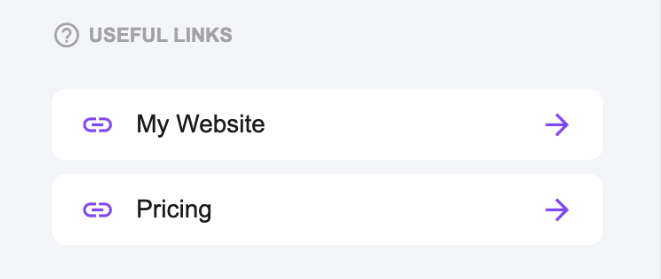
Useful Links
These links will appear on the first screen when a Chat is started.
- Any URL can be added here and the link title will be displayed on the widget on the website.
- This may be a help or FAQ section or a sale link etc.

Agent Avatars
This section configures the avatars for Agents. The avatar is the little picture in a circle that is beside the Agent's name. You can choose to have no avatars on your Chat or to use Agents avatars - which they can upload under Settings > Account > Profile preferences of their account.
- Hide avatars
Enable this if you don't want an Avatar of any kind.
Omnichannel Support
This section applies to WhatsApp only and is relevant only if you have integrated WhatsApp. Learn more about using WhatsApp with eDesk's Live Chat here.

Tone of Voice
- This is what the customer will see when they first click on the Chat button.


- After every chat, your customer is sent a transcript of the chat to the email they came in on. The 'Customize the follow-up chat transcript we send to your clients' fields are what will be on the header and footer of this email.
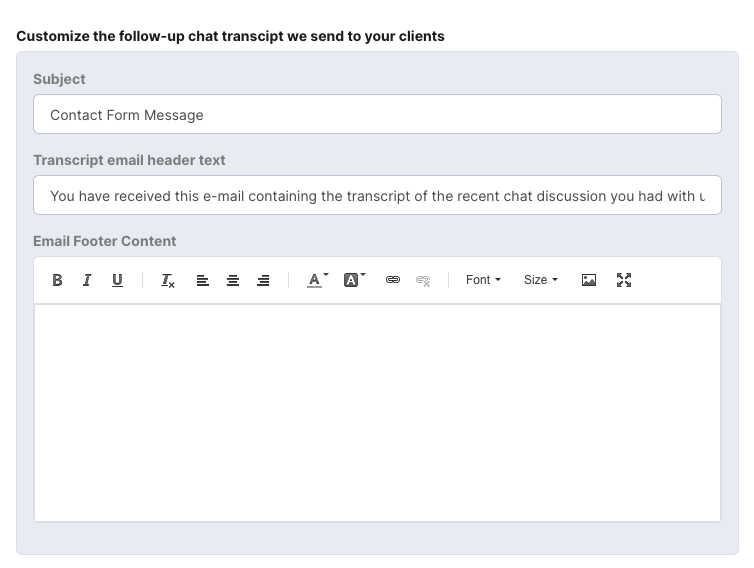
Note: This transcript of the recent chat discussion will be sent regardless of whether an open or closed ticket has been created and there is no option to stop it from being sent.
02 Behaviour
The Behaviour tab is where you set the text in the chat box, configure how to capture customer feedback, set up a contact form to display to customers when your Agents are offline, and design how the transcript will look when it’s shared with the customer.
Associated Tags
The tag selected here will appear on every Chat that is started and subsequently any ticket created after a Chat is finished.

Custom Fields
The email and the full name of the customer is captured by Chat by default. If you want your customer to add more details, you could enable an option under custom fields - for example, phone number - so that an extra field shows for them to fill in.
- Information entered in these fields will appear in the Details tab of the Chat and then on the right-hand side of the ticket when the Chat is finished.

Note: This feature uses the Custom Field in Smart Tools, so you must create the Custom field there first. To find out how to set up Custom Fields for Chat, click here.
Chat online
- Enable Live Chat
Switch on if you want to enable Live Chat. If this is enabled and no Agents are online, it will be disabled automatically. Live Chat will be available automatically as soon as an Agent goes online.

Chat Rating
This option allows you to ask for feedback after Chat has been completed. Upon closing the Chat, your customer will get the option to select a rating and leave a comment.

- This rating will appear inside the ticket and on the Chat dashboard.
- The text fields allow you to display a header and message on the Chat rating window.
Chat Offline
If there are no agents available, by default, a Contact form will show instead. The customer can send a message, which will create a ticket inside the eDesk account and the customer will then wait for a response via email.
If you choose to 'Disable Chat Window if no agents are online', then no Chat window will appear on your site when agents are offline and your customers will not be able to reach you via Chat. (Note: If you are using a Chatbot with your chat widget, you will not need to set up a Contact form. A Chatbot will appear whether agents are online or not).
If the 'Disable Chat Window' is toggled OFF, a Contact form will show for your customers.
- The header and message field placeholder option allows you to customise the text displayed.
- This can also be used if you do not want the Live Chat feature, but would still like to give your customers the ability to contact you straight from the website through a contact form.

Note: If this 'Disable' toggle is turned on, the Chat icon will not be displayed when there are no agents online.
This option is for if you have our AI Chatbot, Ava, enabled on your account.
If you do have Ava enabled and you select a Chatbot from the dropdown here, customers will come through to this Chatbot before they are routed to an Agent, thereby deflecting a large number of your chats.

From the Chatbot dropdown, select the chatbot you want associated with your Chat widget.
Each field is then editable so that you can customise your own text.
The above fields would look like this in the chat window:


For more information on chatbots, see here.
03 Prompts
You can create prompts that automatically prompt a customer to stimulate customer engagement. Click here to learn all about Proactive Chat and the settings in the Prompts tab.

Note: Prompts will show even if you have a Chatbot enabled on your Widget.
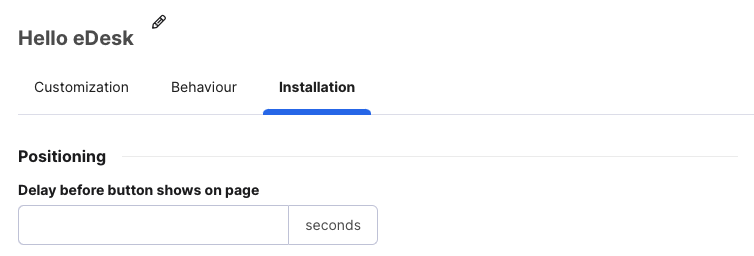
04 Installation
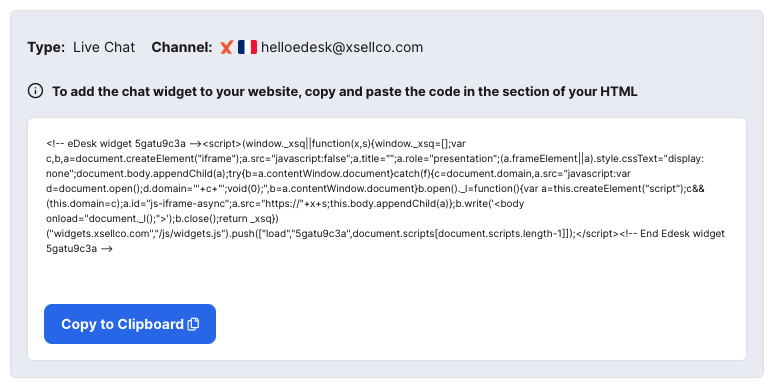
Now, all that’s left to do is to add the chat widget to your website or web store. We provide a code snippet for the widget, which you’ll need to add to the html in your website. You’ll also position the Live chat box/contact form on your web page.Positioning
In the Delay option, you can choose the number of seconds the customer must be on the page before the Chat button appears.
Button and Chat Window Position
You can select your Button and Chat window position from the drop-down menu and then customise them further using the Size and Offset options.

Allowed Domains
If you want to prevent your Live Chat widget from being used on other web pages, enter the URL of your website here. If you want to use the Chat Widget on multiple websites, then you can leave this field blank.

When you're finished customising, click Save Changes.
Finally, the snippet of widget code that you need to copy is located on the right-hand side of the page. Once copied, you can paste it into the
 The Chat Widget has now been created, customised, and added to your website. Well done!
Further Readings
To find out more about Proactive Chat, click here.
Interested in learning more about Website Contact Forms? Click here.
For an introduction to our Chatbot, click here.

