This help file explains how to extract reports in eDesk.
Before you start
- Report extracts are available to customers on our Professional and Enterprise plans. Learn more about our plans here.
01 What are Report extracts?
The Report extracts feature allows you to generate reports based on your Tickets, Pre-sales, HandsFree, Channels, Tags, Languages, Agents, Chats, Chatbots, SLA breaches, Custom fields, User log, AI automations, Feedback, Templates and Agent sessions by extracting only the data you're interested in and putting it in a downloadable .csv file.
02 What Report extracts can I generate?
We provide an example of all available Report extracts here. There is one sample Report extract per worksheet and we include a description of each column. The following Report extracts are available:
- Ticket report
Provides a ticket-level overview that includes a summary of ticket contents and details of the actions taken for each ticket, including metrics like Average response time. - Pre-sales report
Available if you have Pre-sales enabled through our AI Assist suite.
Lists the tickets that have been classified as Pre-sales and includes information such as lead time, i.e. the time elapsed between the customer's pre-sales enquiry and when the associated order was received. Learn more about Pre-sales here. - HandsFree report
Available if you have HandsFree enabled.
Lists the tickets handled by the AI HandsFree tool in eDesk. Learn more about HandsFree here. The report is designed to enable you to review the tickets that have been handled entirely by eDesk AI. - Channel report
Provides an overview of the activity per channel including SLA compliance. - Tag report
Provides an overview of the activity per Tag. - Language report
Enables you to inspect data per Language to help you assess how well your multi-language support is performing. - Agent report
Provides an overview of the activity and performance of individual Agents. - Chat report
Provides an overview of the support that customers have received via online chat. - Chatbot Q&A report
Available if you have Chatbot enabled.
Shows the questions customers asked and the answers provided by the chatbot. It helps you identify knowledge gaps, which you can address by adding content to the chatbot Training Content.
Note: Customer name/email is not always gathered during chatbot conversations and is not in this report. - SLA Breaches report
Lists the tickets that breached SLA. It is designed to enable you to identify areas of improvement in the response times for your customer care. - Ticket Custom Field report
Provides details of any custom fields you have in your tickets. - Order Custom Field report
Provides details of any custom fields you have in your orders. - User log report
Lists the actions that individual users performed - such as replying to a ticket, leaving an internal note or sending an external message. - eBay Case report
Lists the tickets that were created as a result of eBay cases.
Note: This report extract will be populated only if you have connected eBay and eDesk, and are permissioned for eBay Cases. Learn more here. - AI automations report
Lists the tickets that were resolved by AI in the selected time period. Learn more about AI Resolutions here. - Feedback report
Available if you are subscribed to eDesk Feedback.
Lists the orders placed in the selected time period and details whether customer feedback has been requested for that order. - Templates report
Lists the tickets for which a template was used in the selected time period and provides details about the ticket, order, channel, owner, and the template information. Learn more about Templates here. - Agent session report
Shows the log in, log out and session duration of each agent. It's important to note that the user must click Log out in their eDesk for it to be recorded on this report.
03 How do I generate a Report extract?
1. Go to Insights > Reports > Report extracts
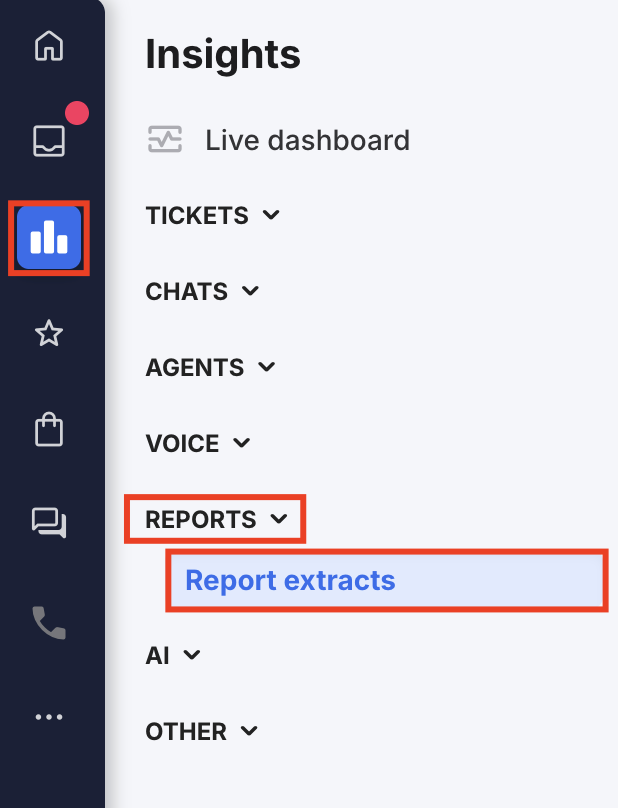
A Reports page opens showing the Current Reports tab. All the reports you've generated in the last month are listed here.
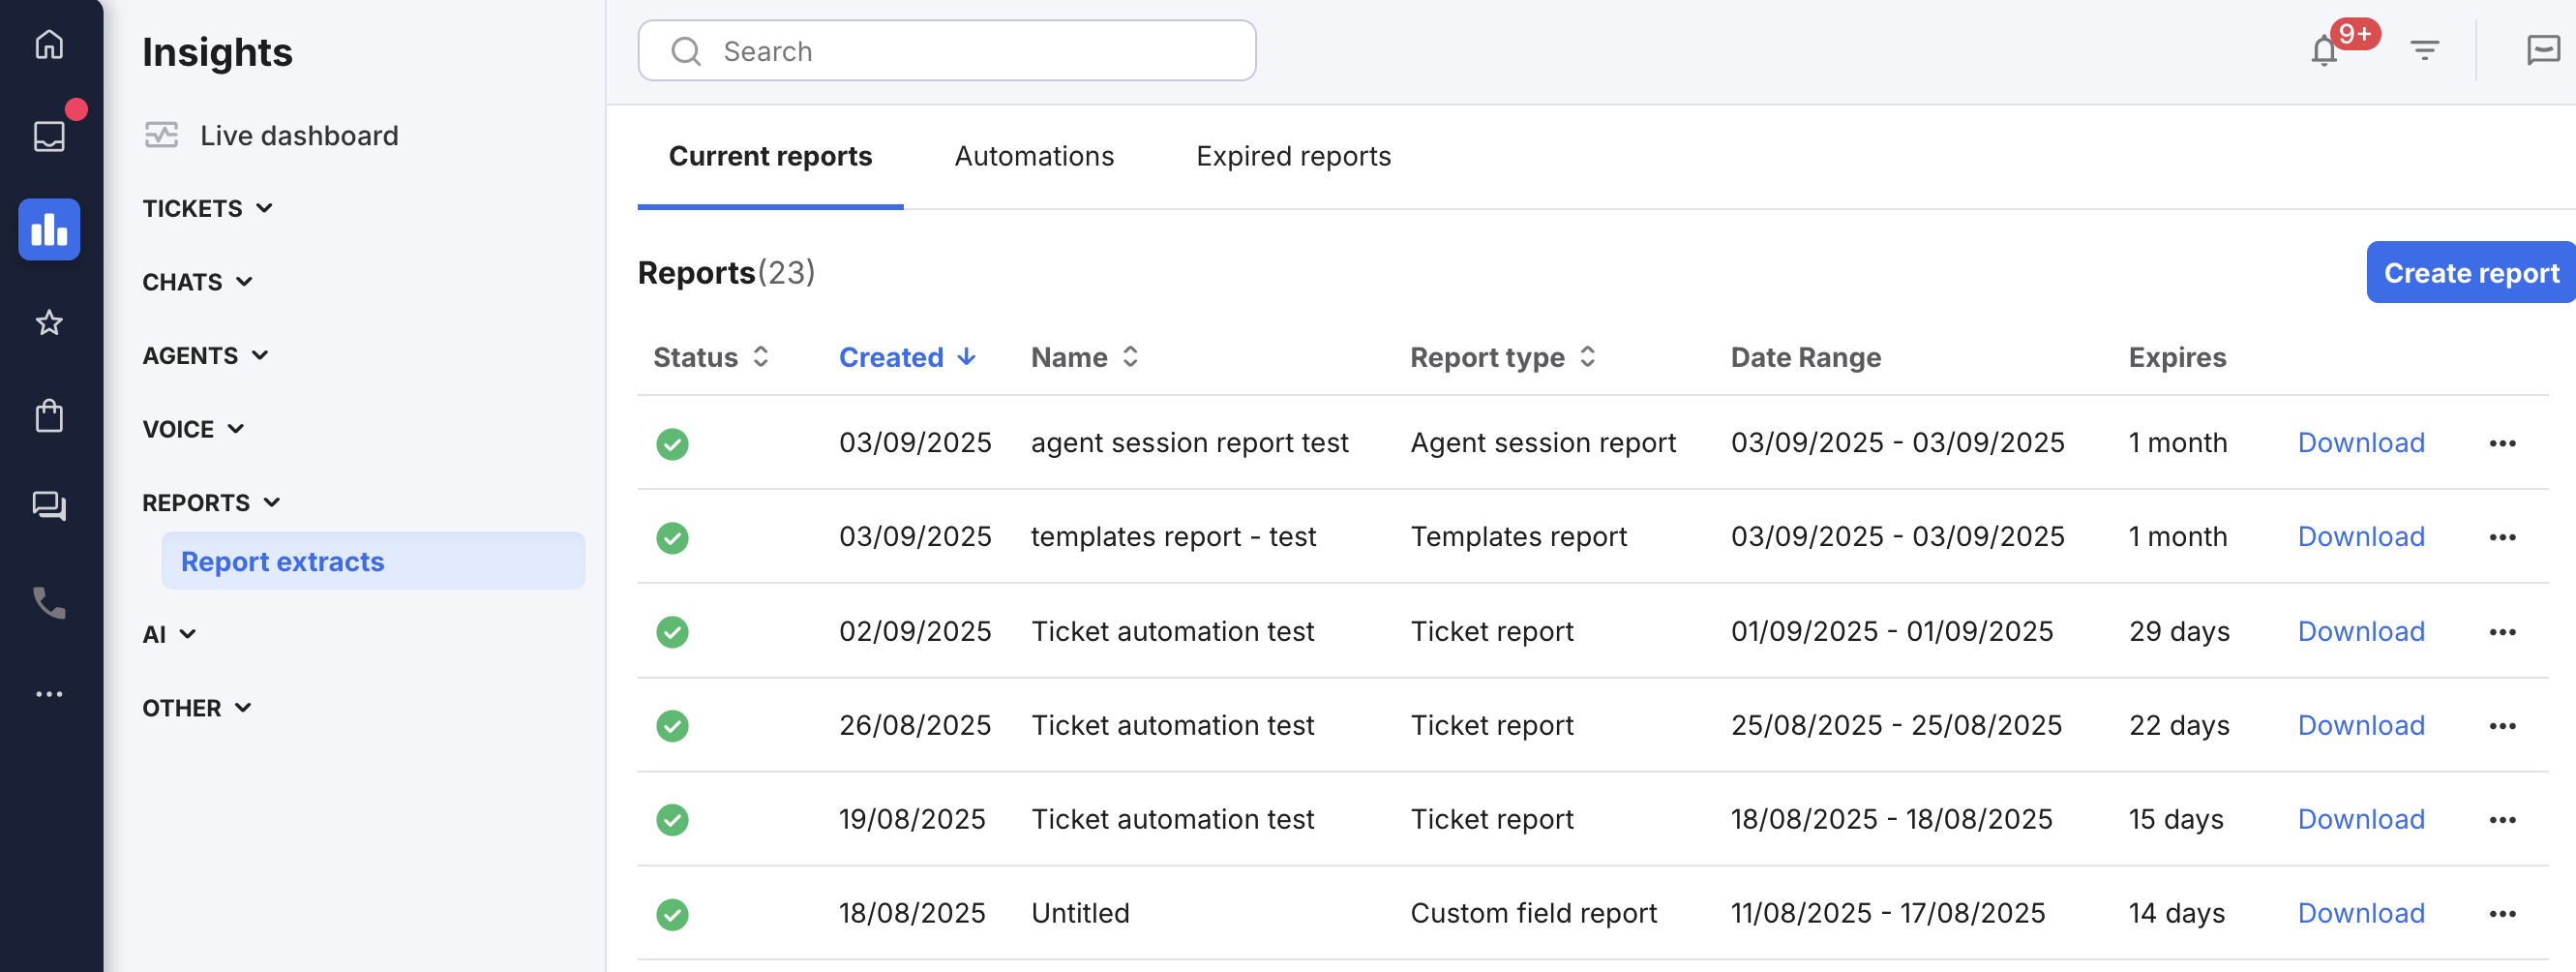
2. Select Create report to generate and download a report.
The Create report window opens, showing fields based on the report type. In this example, Ticket report is selected, so the fields shown are for Ticket report extracts. Each report type you select will display different fields.
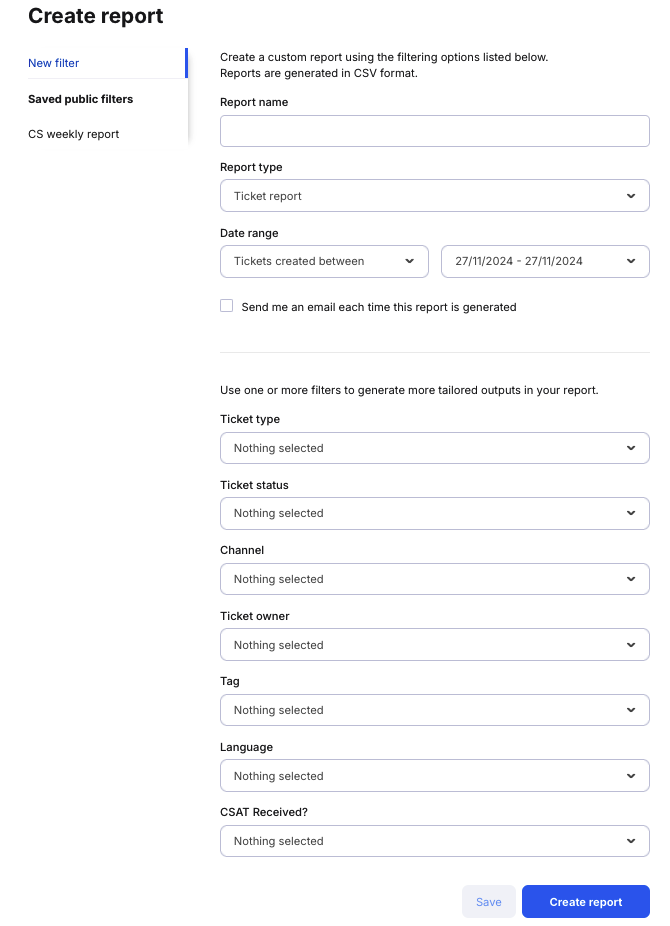
3. Complete the following:
- Report name
Enter a name for the report (required). This name will appear in the Reports page list and in the filename of the exported .csv file. - Report type
Select the type of report you want to generate. - Date range
Select the date range for your report.
Note: For Chatbot Q&A reports, the date range is defined as Conversations created between [start date] and [end date], which will produce a report that lists all chatbot conversations for which a ticket was created between the [start date] and [end date]. - Send me an email each time this report is generated
Tick this box if you want to be notified by email when a report is generated.
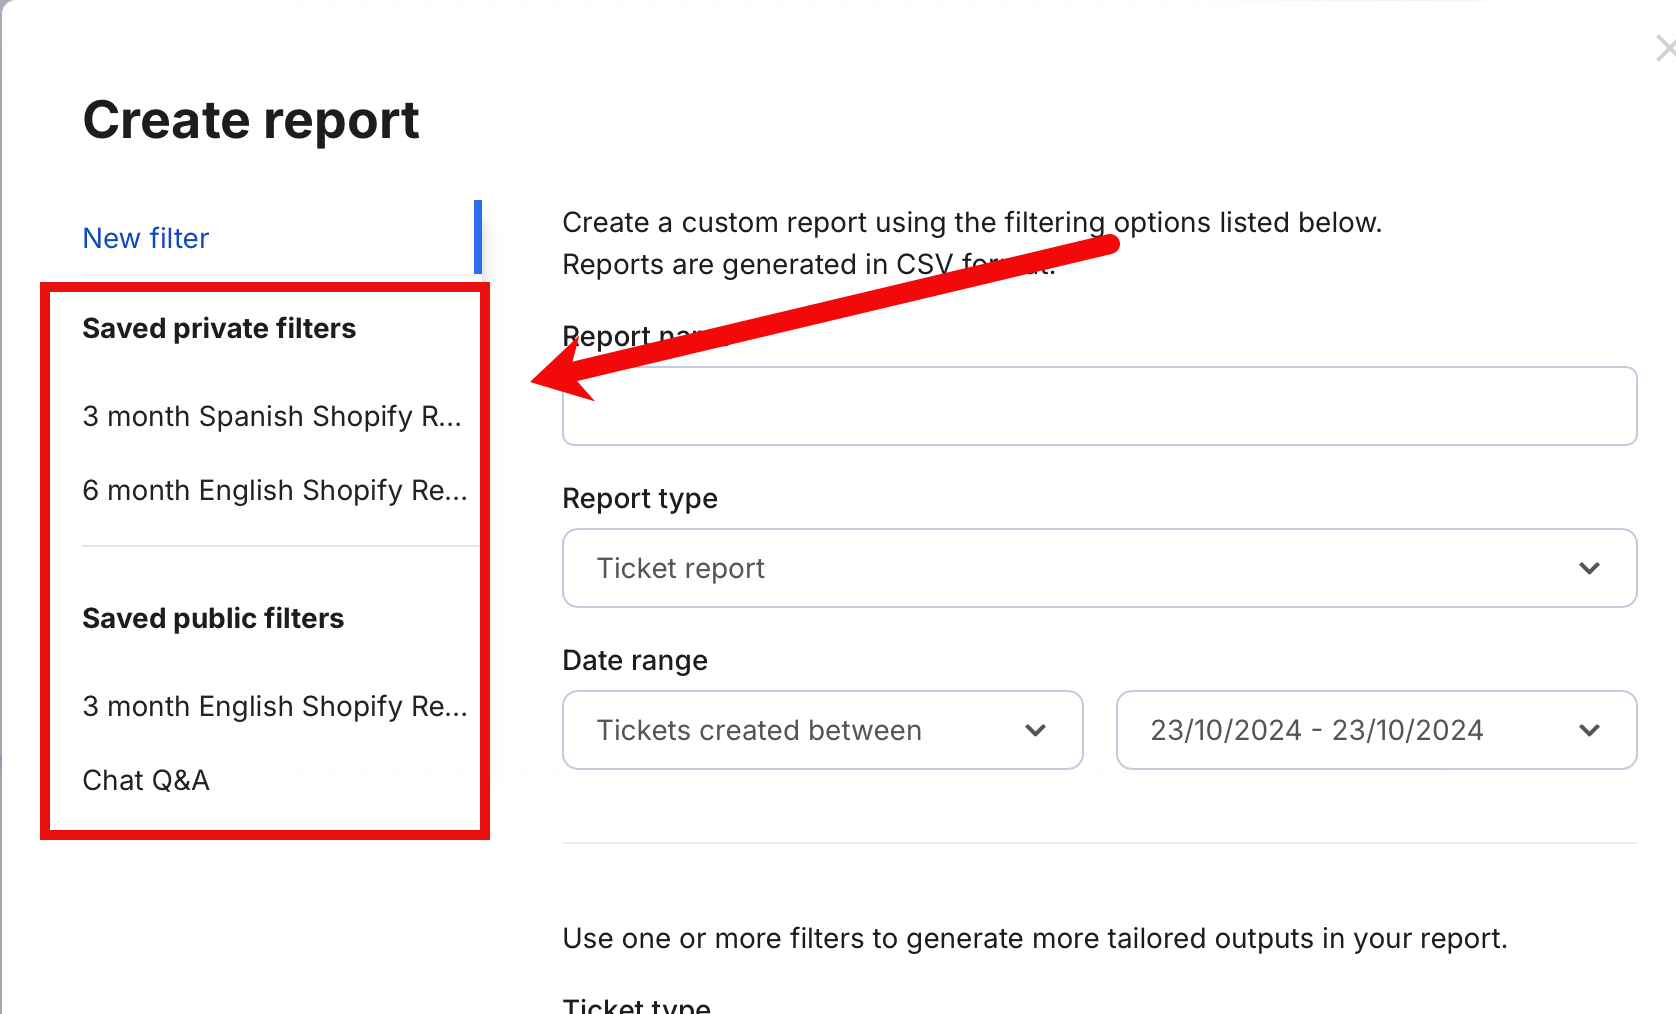
You can also choose a previously saved filter from the list. Saved filters let you quickly reuse settings for future reports (see section 05 below for instructions).
Note: All selected filters apply to the report. For example:
-
A Ticket report with a ticket type and a channel will only include that ticket type from that channel.
-
An Agent report with a channel filter will include all agents, but only with data from that channel.
6. Once the report is ready for download, you will receive a notification under the bell icon at the top of the page and a Download link will be displayed for that report in the Current reports tab. If you’ve selected the email notification option, you’ll also receive an email as soon as the report is ready.
7. Select the Download link to download the file in CSV format.
Note: This link is valid for 30 days and may be accessed by anyone in your company that has permission to view reports. If a report is more than a month old and you want to download the report, you'll need to regenerate the report by following the steps in section 04 of this help file.
If you want to automate a report so that eDesk will generate it regularly on a schedule, e.g. every 7 days, follow the instructions here. These reports are listed in the Automations tab.
04 Regenerating or deleting Report extracts
- Report extracts that were created within the last month are listed in the Current Reports tab.
- Report extracts that were created more than a month ago are listed in the Expired Reports tab.
In the Current Reports tab, you can:
- Delete an individual current report extract
When you delete a current report extract, it is deleted permanently and is removed from your eDesk.
To delete a current report extract:
1. In the Current Reports tab, select More Actions (three dots) in the row for the report extract you want to delete. A menu is displayed.
2. In the menu, select Delete. A confirmation dialog box is displayed.
3. In the confirmation dialog box, select OK to complete the deletion.
In the Expired Reports tab, you can:
- Delete all expired report extracts
To clear the Expired Reports tab and delete all expired report extracts in the list, select the Delete expired reports button (1). The report extracts are deleted permanently and removed from your eDesk.
- Delete an individual expired report extract
To delete a single report, select the Delete button in the row for that report (3). The report extract is deleted permanently and removed from your eDesk.
- Regenerate an expired report extract
To view an expired report extract, you must regenerate it. Select the Regenerate button in the row for that report (labelled 2 in the screenshot below).
Once regenerated, the report will be moved to the Current Reports tab, where you can download it by selecting the Download link.

See here for further information about managing report extracts in the Automations tab.
05 Saving filters for future use
Sometimes you'll create filters that you know you'll want to use again in the future. You can save the filters in a report for future use, and make the filter private (only available for you to use) or public (available to all users in your business that can access the Report Extracts).
To save filters for future use:
1. In the Current Reports tab, select Create report.
The Create report window opens.
2. Select the filters you want to set.
3. Select Save.
A Save filter popup opens:

4. Enter a name for the new filter into the Title field.
5. Select the Public checkbox to make the saved filter available to others in your business, or leave it unticked to make it for your own use only.
6. Select Save Filter to save the new filter, so that it will be displayed in the list of saved filters on the left-hand side of the Create Report window.
06 Important
- You can generate reports from data that goes back as far as July 2023.
- The data in a report is a snapshot taken when the report was generated.
Further reading
For further information on eDesk reporting, see here.
To learn about eDesk CSAT, see here.