Start automating your customer feedback and review requests with eDesk Feedback will help you save hours of work each week, improve your ratings and increase your sales.
Get set up for success and ready to boost your metrics with this simple 3-step eDesk Feedback setup guide.
When you have some time, pull up your eDesk dashboard in one window, and keep this guide open in another to walk step-by-step through the process.
Before you start
- You’ll need an Admin login to eDesk. If you don’t have an Admin login, you can request one from an Admin user within your business.
- You'll need to sign up for eDesk Feedback. To find out more about this, click here.
Note: Don’t forget to bookmark this page, so you can easily come back to it at any time.
01 Get Connected
The beauty of using eDesk Feedback is that it connects with all the marketplaces and webstores you sell and support, so you can quickly get all your customer data to hand, and auto-populate it in messages to reply faster (more of that in the smart snippets section later on).
When you're ready to connect a channel, click on the Settings → Channels → Add Channel. Just click on the channel you want to connect to and follow the instructions.
You can find more detailed instructions in the channel-specific guides below:
- Amazon
- eBay
- Shopify
- Magento API integration
- Magento Extension
- PrestaShop
- WooCommerce
- Trustpilot
02 Create a Feedback Rule
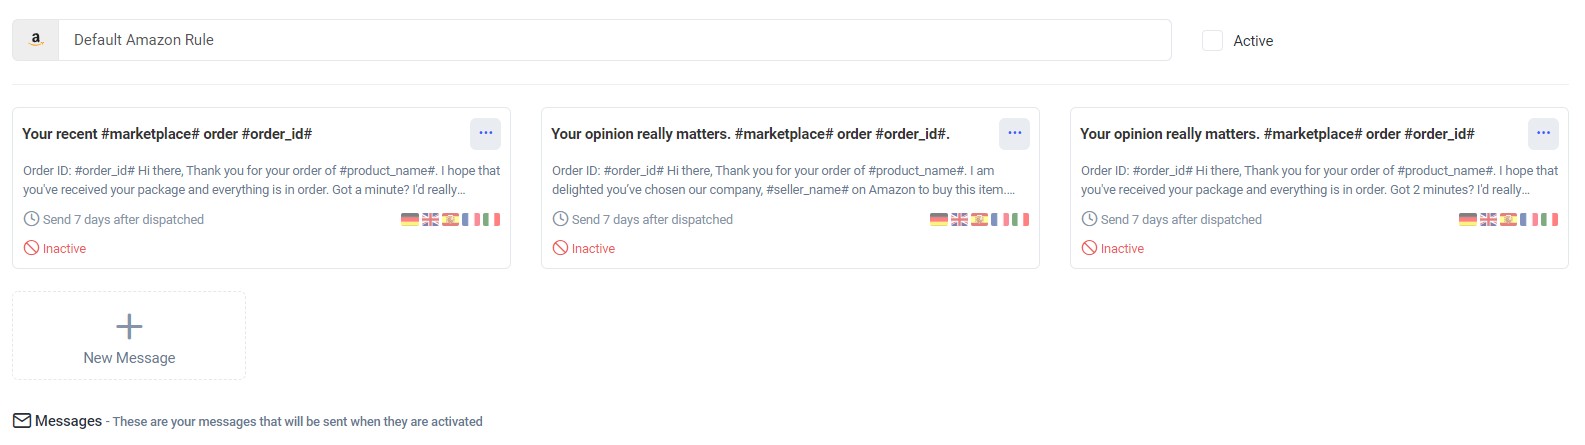
Now that you added your channel, you will be able to create your first Rule. A Feedback Rule will determine the message you want to send to your buyers and also specify conditions to target certain orders or to send requests at certain times.When you're ready to set up your first Rule, click on Feedback → Feedback Rules → + Add Feedback Rule.
You will be prompted to select whether to create a blank Rule (a Rule from scratch) or use the Default Rule, which we’ve created to help you get started quickly. If you’re an Amazon seller and wish to create your own Rule, please ensure that it complies with Amazon’s latest Buyer Seller policy. For help understanding the policy, read our guide here.
 To find out more detailed instructions about creating a Feedback Rule, click here.
03 Send Emails to your Buyers
Now that you connected a channel and set up a Feedback Rule, emails will start sending to your buyers. In order to help you understand exactly how eDesk Feedback works, we have explained the basic logic of requesting feedback from buyers using eDesk. - You create a Feedback Rule, specifying conditions to target certain orders and to send requests at certain times.
- Inside each Rule, you create messages. These are the messages that the Buyer will receive. Each message can also have a set of conditions to target the right buyers and orders.
- Buyer places an order which is received in eDesk and placed in the Feedback queue.
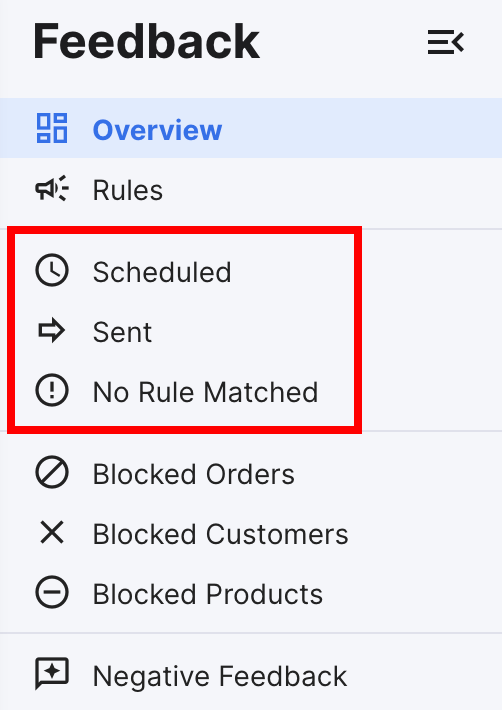
- Each order is run through your Feedback Rules. Once it matches the Rule and message conditions, the messages will be Scheduled to Send.
- At the scheduled time, the order will once more run through the conditions to ensure it still fits the criteria. If not (for example, there may be an open ticket in the eDesk Mailbox or the order has been cancelled), it will move to No Rule Matched and no message will be sent.
- If the order matches the conditions, it will then send to your buyer and will be displayed in the Sent section.
 Note: Each order can only match one rule and the buyer will receive all messages created inside that Rule.
And that's it!
Further Readings
If you would like to find out more about blocking feedback requests for certain products, orders or customers, click here.
If you would be interested in learning more about staying compliant with Amazon, click here.