This help file will guide you through setting up Live Chat for your Shopify store.
Before you start
-
Learn all about how eDesk’s Live Chat works here.
-
eDesk Live Chat is available as an Add-On. To find more information, see here.
-
You’ll need to have access to Smart Tools → Widgets in your Settings. If you don’t have access, request it from an Admin user within your business.
-
To set up Live Chat, you’ll need an Admin login to eDesk. If you don’t have an Admin login, you can request one from an Admin user within your business.
-
You’ll need to have already connected your eDesk to the Shopify store that will offer the Live Chat. For more information on connecting channels, see here.
01 Setting up eDesk Live Chat
To add eDesk's Live Chat to your Shopify store, you must first create and customize a Live Chat Widget in eDesk by completing the following steps:-
Give your support agents permission for Live Chat. This help file describes what to do.
-
Create a new chat Widget by following the instructions here.
Important: This process will ask you to choose a Channel for the widget - make sure you select the Shopify store that will be offering eDesk's Live Chat. Once you've completed the steps to create your Live Chat Widget, you'll have copied a Widget ID from the Installation tab in the Settings > Smart Tools > Widgets > [your new Widget] page onto your clipboard. Keep this page open as we will shortly click a link on the page to jump to your Shopify Store. Later on in this help file, we'll need you to paste the Widget ID into a field in your Shopify store.
The chat Widget provides the buttons, chat box, and a contact form that will be on your store. You can customize it to match the branding on your website. You should also read sections 03 and 04 of this help file, which explains about adding a link to your cookie policy when you're customizing your Live Chat Widget. -
Now move to section 02 of this helpfile.
02 Implementing Live Chat on Shopify
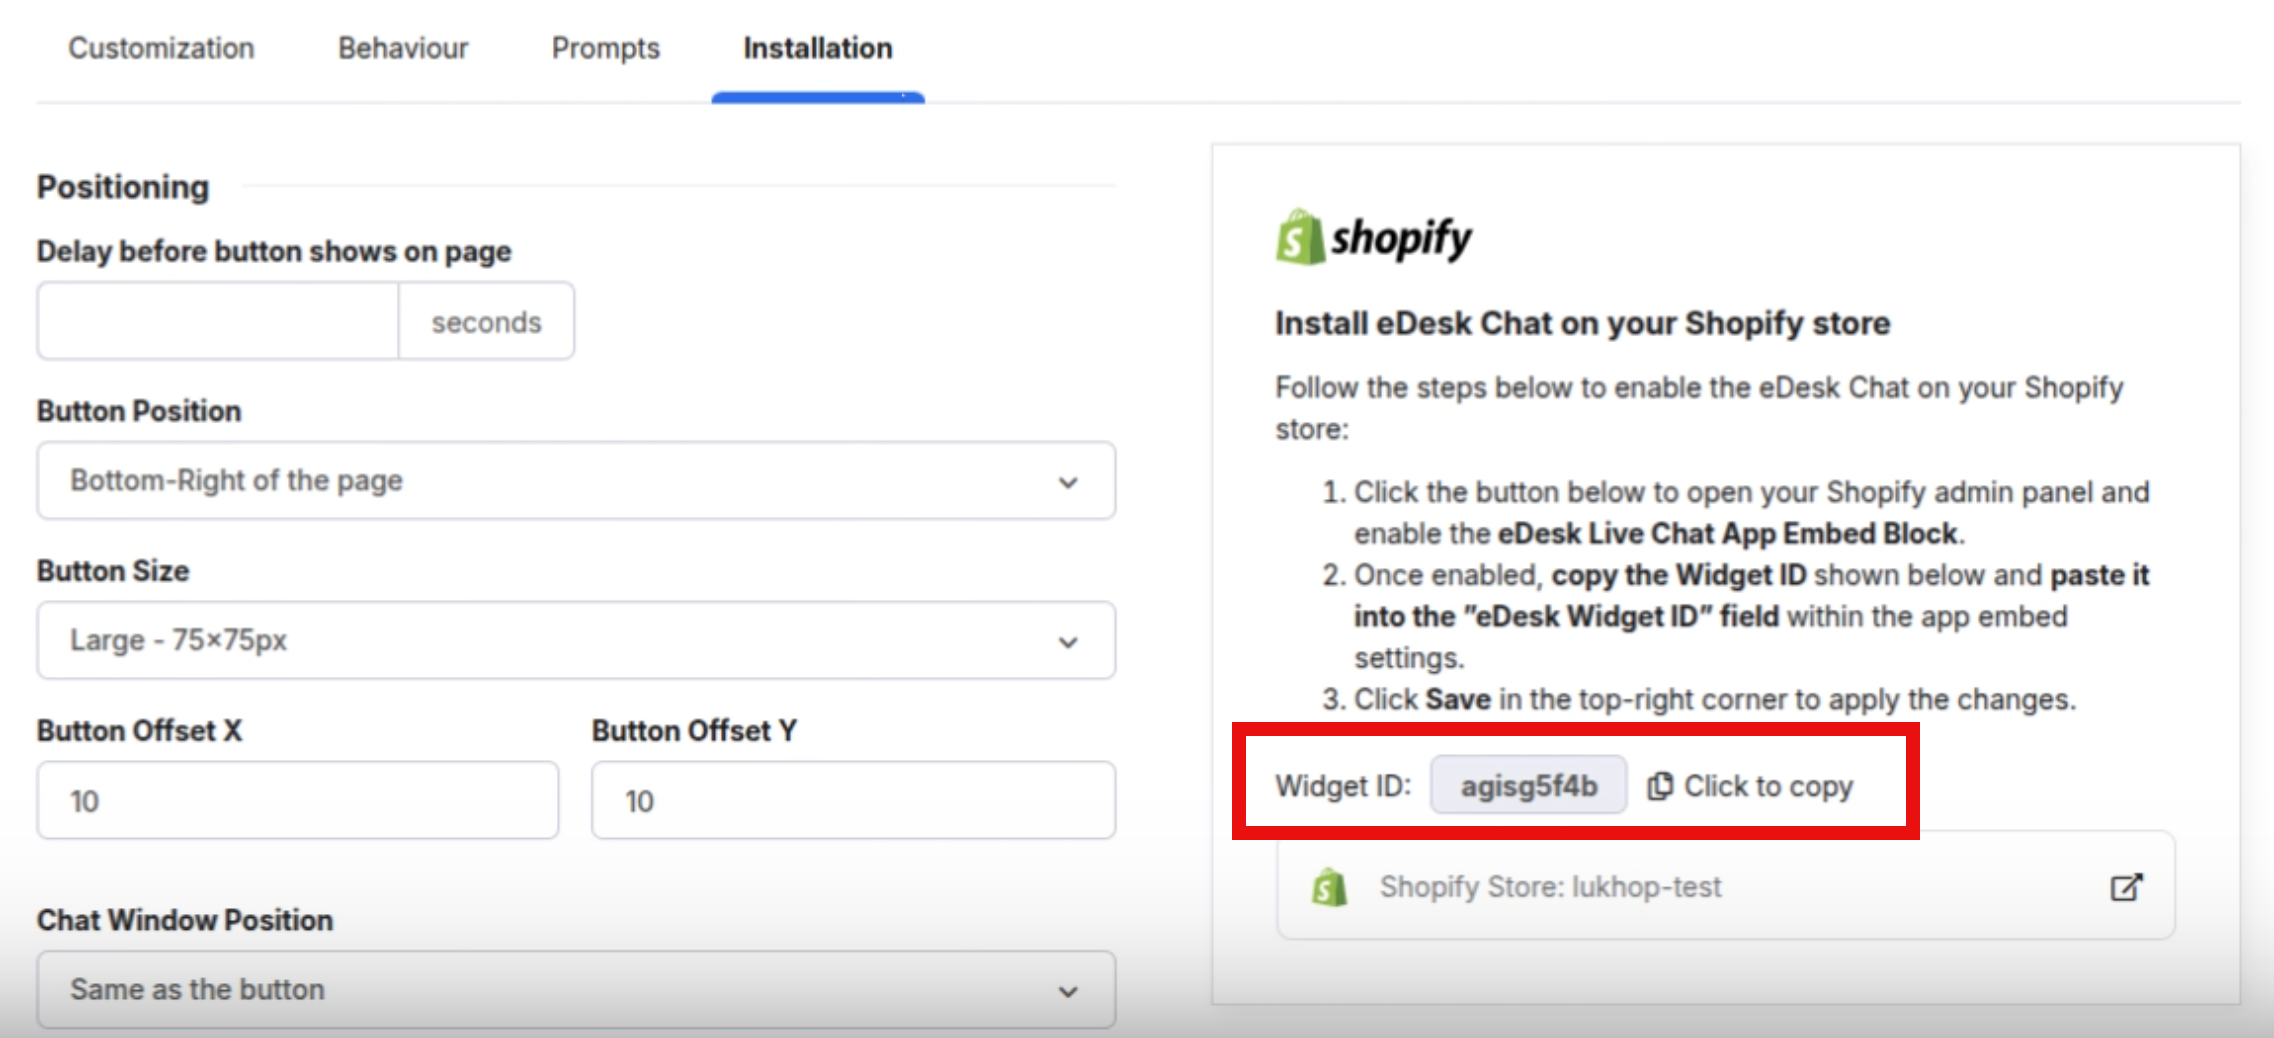
Once you have created your Live Chat Widget and customized it using the instructions above, you're ready to install it on your store.1. In the Installation tab in the Settings > Smart Tools > Widgets > [your new Widget] page, you'll see an Install eDesk Chat on your Shopify store section.
2. If you haven't already copied the Widget ID, select Click to copy.
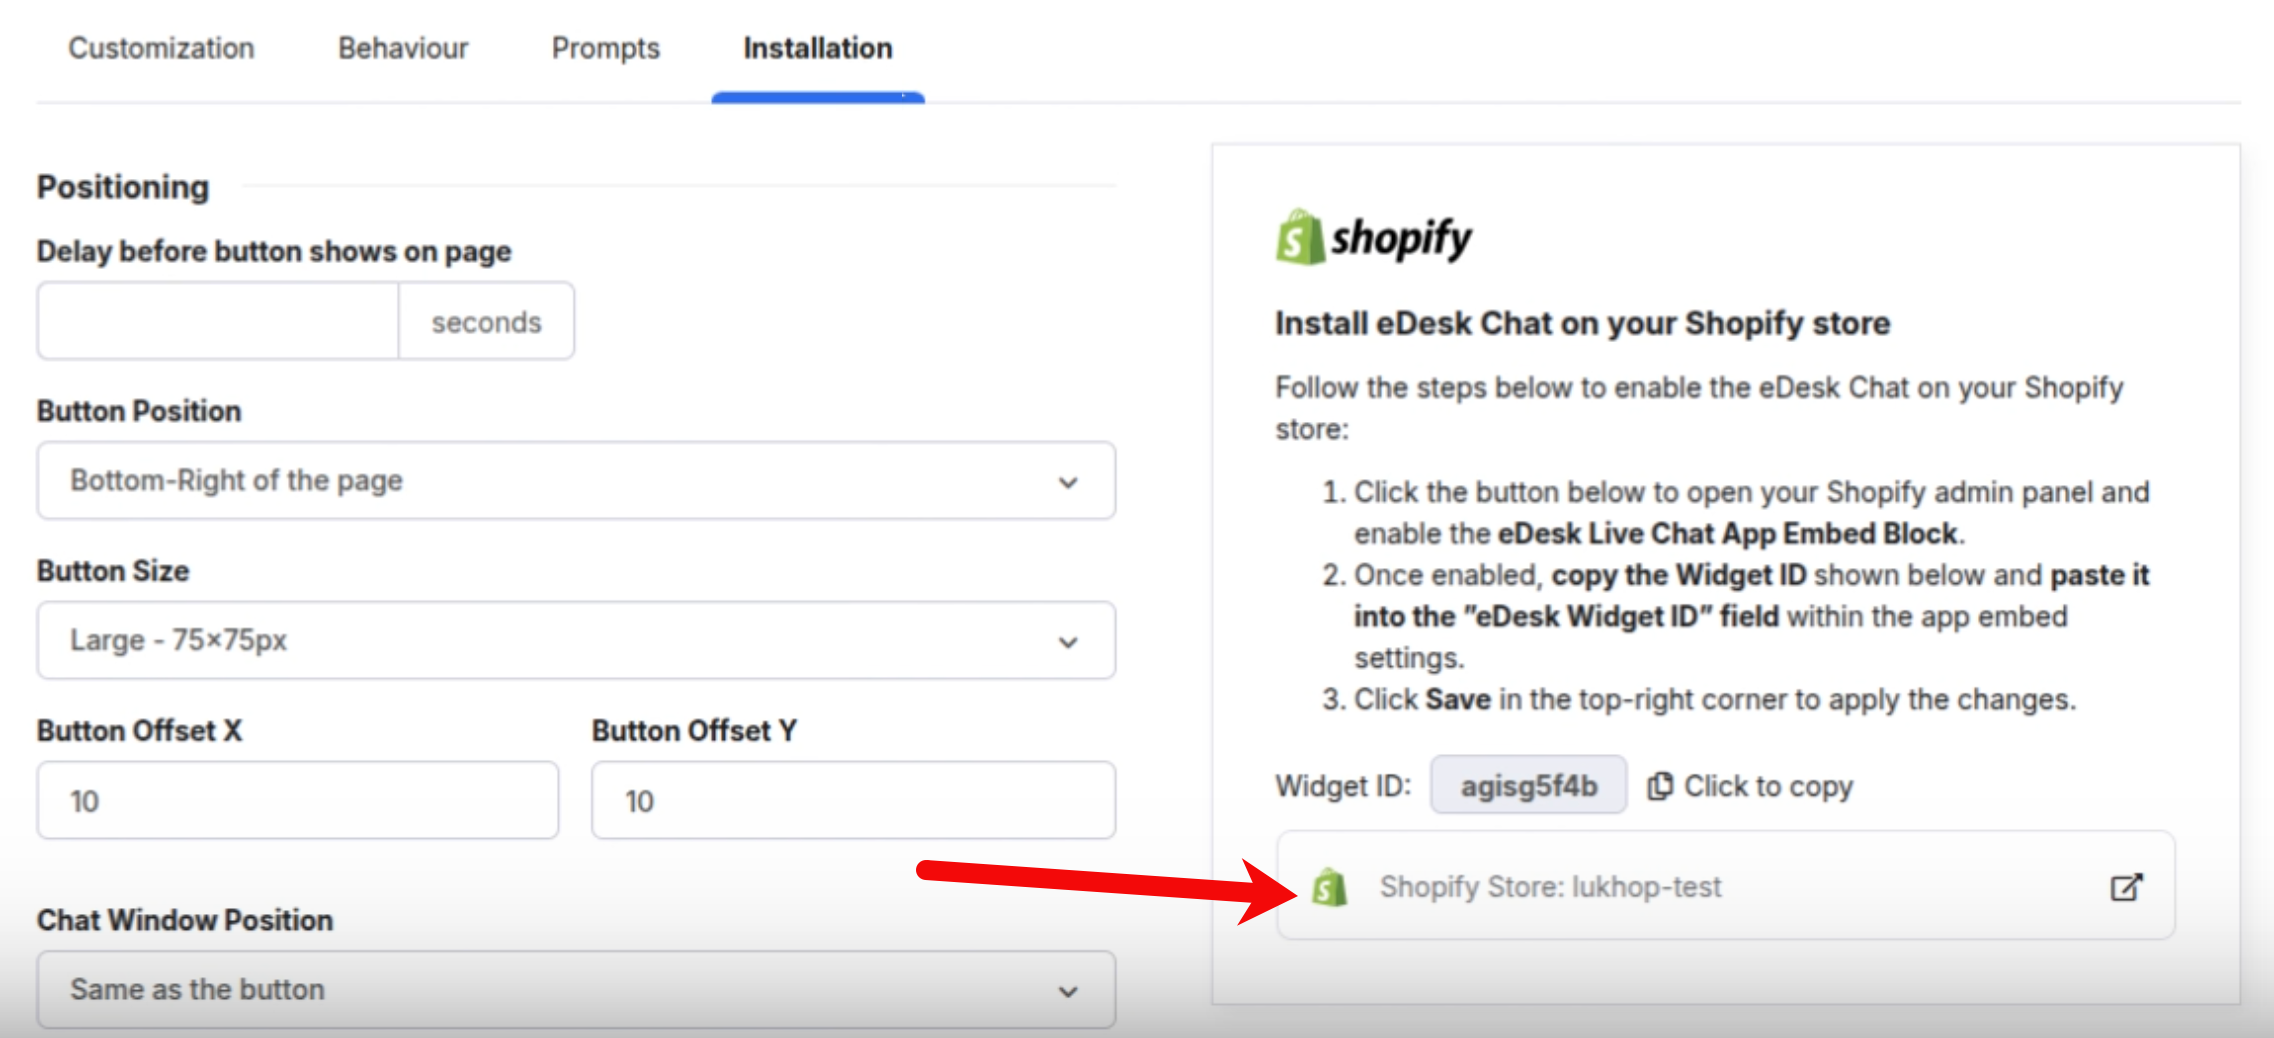
3. Select the Shopify Store link to open your Shopify Store in a new browser tab:
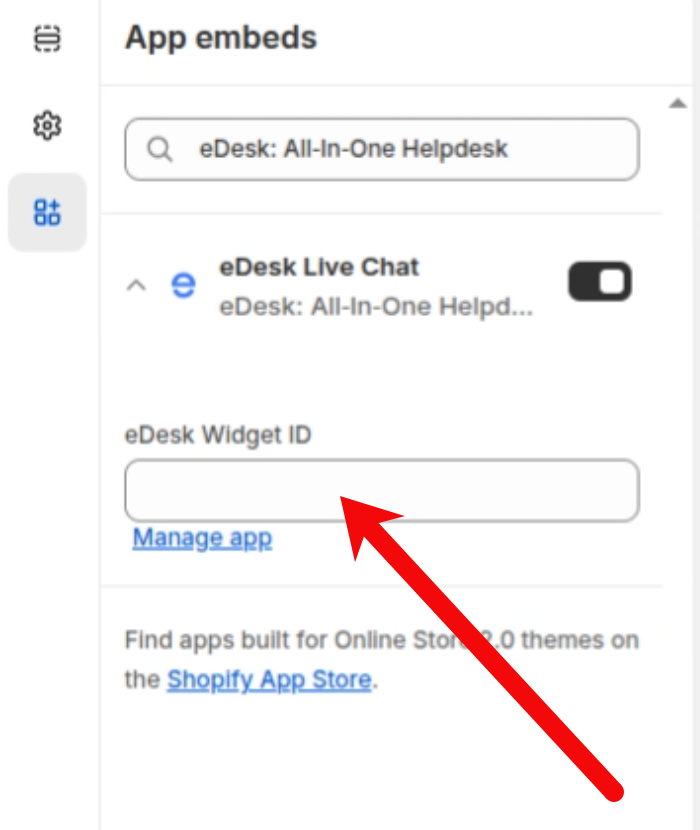
4. The Shopify Store opens in a new browser tab and shows an App embeds section with the following pre-populated information:
eDesk: All-in-One Helpdesk is the selected app.
eDesk Live Chat slider is enabled.
In the eDesk Widget ID field, paste in the Widget ID.
5. Select Save.
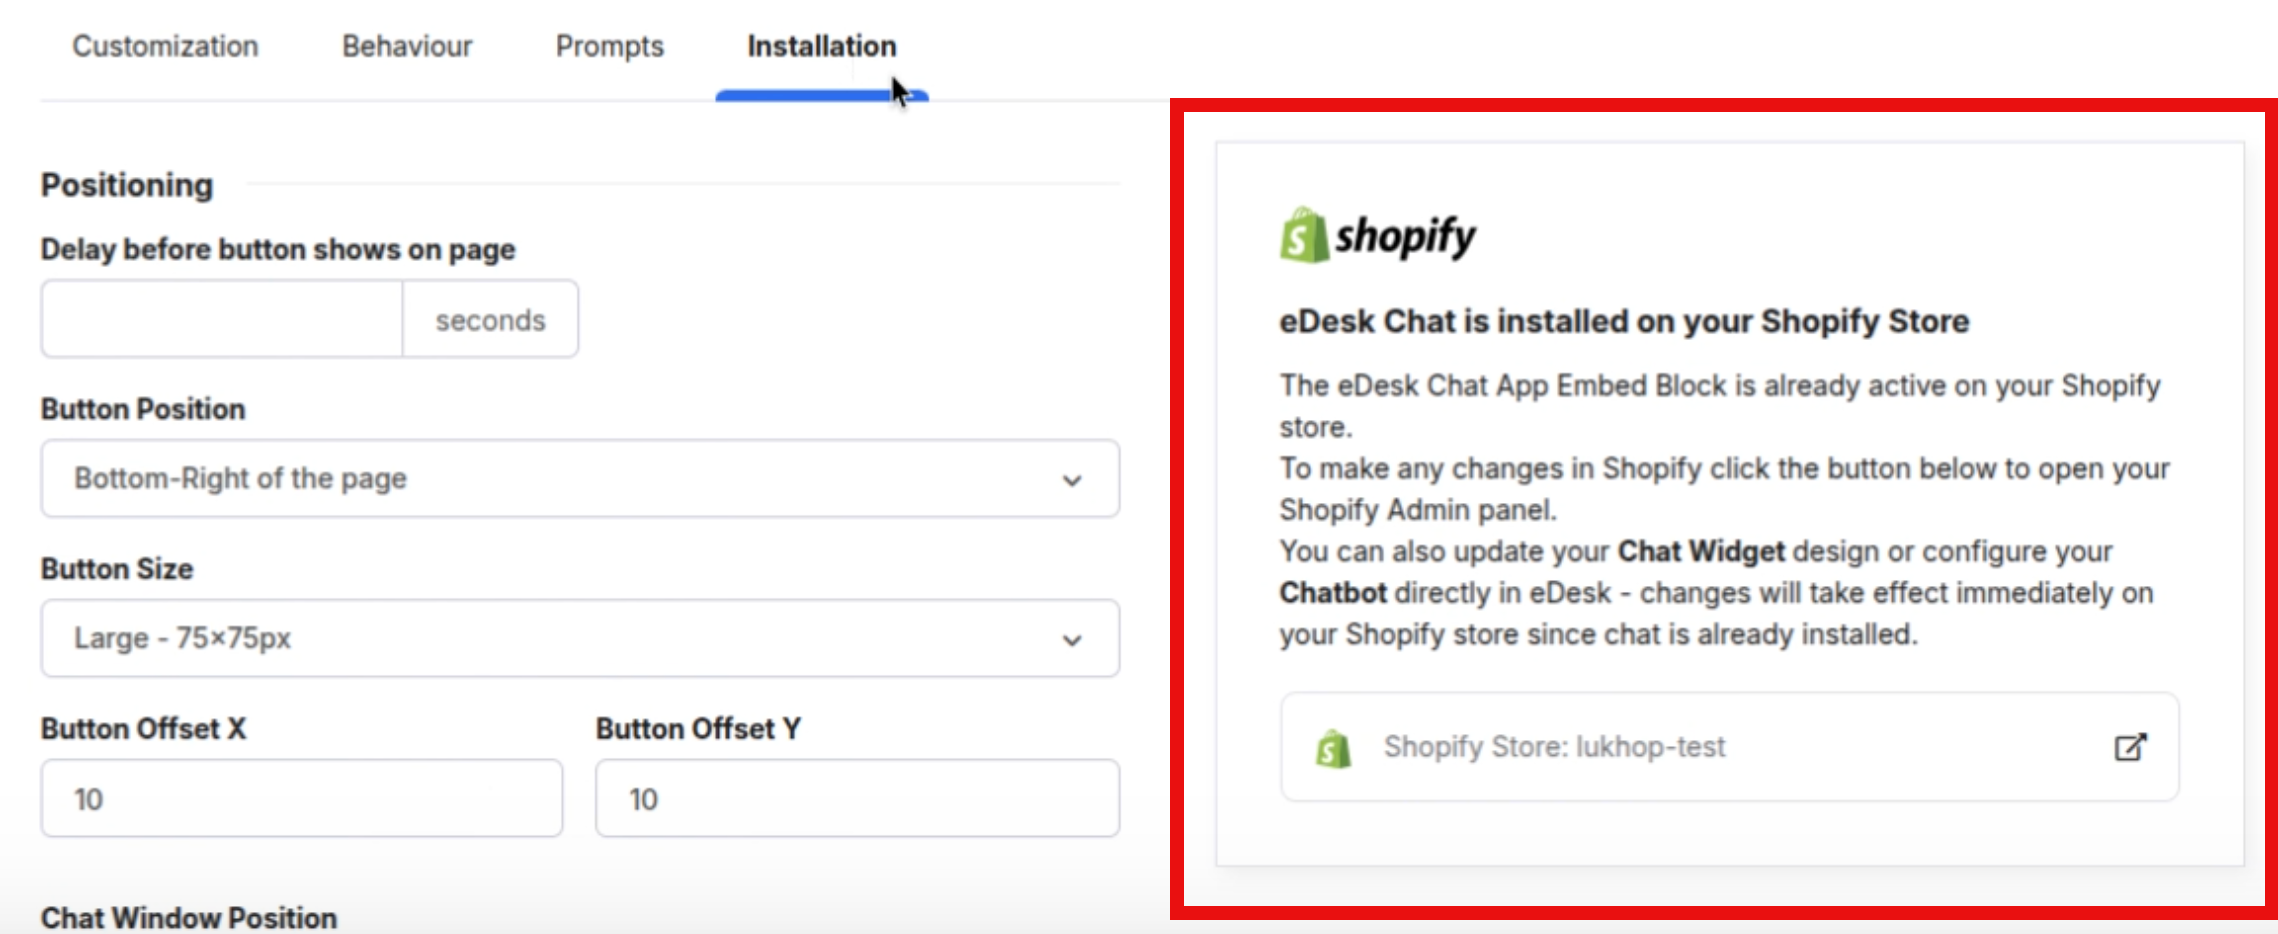
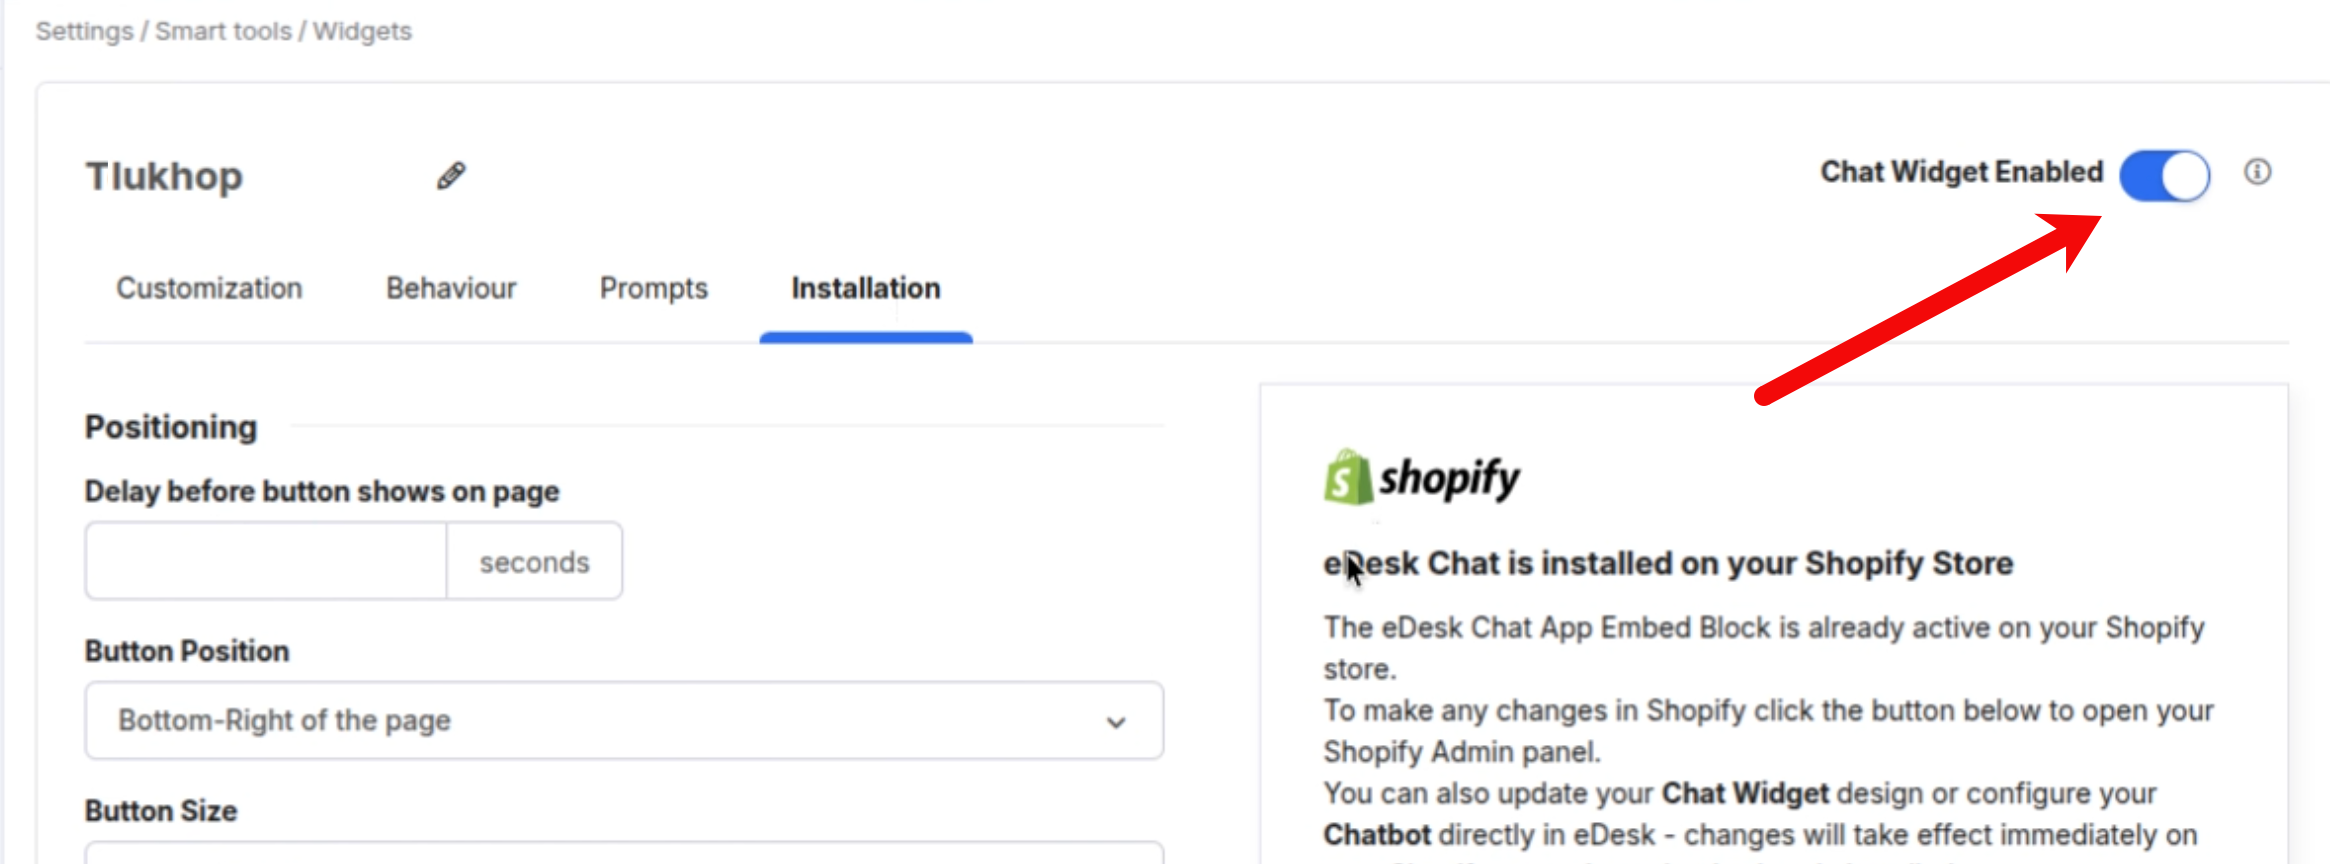
6. Now return to the eDesk page in your previous browser tab, which shows the Installation tab in the Settings > Smart Tools > Widgets > [your new Widget] page. Refresh the page and reopen the Installation tab, which now shows a message confirming that this eDesk Live Chat Widget is installed on your Shopify Store:
7. Ensure the Chat Widget Enabled slider is enabled.
8. Please read section 03 of this help file to learn about website cookie policy that will affect whether a customer can talk to you via Live Chat on your Shopify store.
Note: At least one agent must be online for the Live Chat option to appear on your website. Otherwise, a website contact form will appear instead.
Keep in mind that if you want to edit your widget, you can always deactivate it by selecting the Chat Widget Enabled slider to disable it. Then, once you are happy with your changes you can re-enable the slider.
03 Website Cookie Policy consent box
It's important that you’re aware of the Shopify Privacy API updates - where users must give consent to any 3rd party who is using cookies.
This means that when a customer navigates to your Shopify store and wants to initiate a Chat with you using our Live Chat widget, they will see a checkbox below the name and email field that asks them if they “consent to the website cookie policy”.
.png)
Once the customer ticks the box, eDesk sends this consent to the Shopify API and the customer can begin the Chat as normal. If they do not tick the box, the Chat will not start.
04 Adding a link to your cookie policy
To enable your customer to review your cookie policy before they make their decision, you can add a link to your cookie policy when customizing your widget.
.png)
- Go to the Customization tab in your selected Widget settings.
- Scroll down to Add a link to your cookie policy.
- Paste the URL to your cookie policy in the required field.
- Save by scrolling down and clicking on Save Changes.
When you’ve saved your changes, your cookie policy will be hyperlinked in the consent text above.
If you have any questions or are experiencing some issues setting Live Chat up, please review the troubleshooting guide below or feel free to reach out to us at support@edesk.com.
Further Reading
To find out more about Troubleshooting your Live Chat Widget, see here.
If you're interested in learning more about Proactive chat, see here.