This help file will explain how to manually set up an Chatbot and runs through the different nodes that are available. If you want to start with our pre-made chatbot template, click here.
Before you start
- Chatbots are available as an Add-On and form part of our AI Automation feature. Learn about AI Automation and how it's billed here.
- You’ll need to have access to Smart Tools > AI > Chatbots in your permissions.
- Admin and Team Leader roles will have the Chatbot permission by default.
- If you don’t have access, you can request it from an Admin user within your business.
- To learn more about eDesk chatbots, read the introduction here.
01 Creating the Chatbot
You must already have at least one active chat widget. You'll add your new chatbot to this widget.Let's get started!
1. Go to Settings > AI > Chatbots > Add chatbot > choose 'New' from the pop-up to manually create a chatbot.
2. Complete the fields:
- Chatbot name
Name your chatbot. - Show chatbot name in chat
The name entered above will be displayed as the sender of each message in the chat widget. - Test mode
Test mode allows you to see information about the answers the chatbot is sending. It will show a score for the accuracy of the link that is sent to the customer and will also send a verification code in the conversation window instead of by email when the Ask for identity node is used. This must be switched off after testing is complete. You will not be charged for resolutions while the Chatbot is in test mode. Learn more about Test mode here. - Current avatar
This is the image that currently accompanies the Chatbot name when it sends a message in the chat widget.
This field isn't displayed if you are adding an avatar for the first time to this chatbot. - New avatar
Select Choose file to add an image to accompany the Chatbot name when it sends a message in the chat widget.

3. Select Save your changes. Once saved, the Flows tab will become available. The next section of this help file will walk you through creating flows.
02 Building flows
Your chatbot's behaviour is determined by the flow(s) you build. A flow is a sequence of nodes and a node is simply a ready-made action like "Present options", “Send message to customer” or “Transfer to agent”.Your chatbot is assigned a Default Flow automatically. Every chatbot conversation will start on the Default flow.
You can edit the Default flow to include all the actions you want your chatbot to perform - or you can adopt a modular approach and create separate flows for different tasks, and then link to them from the Default flow. You can create as many dedicated flows as you like.
Pro Tip: We have found that a modular approach is more efficient and easier to maintain. It might mean creating a few additional dedicated flows such as:
- Check my order
- Transfer to an Agent
- AI answers
- First, select the Flows tab to display a list of your existing flows. If you are setting up a new chatbot, the list will show only the Default flow. In the example below, the Default flow is called Default Answer.

- To edit or inspect the Default flow, select it to open a page showing the nodes in the Default flow. The example below shows a Default flow that has not yet been edited , so it currently contains no nodes. The 'Default Answer' button is for naming purposes and is only for your reference - the customer will not see this.

- If you'd like to rename the Default flow, select the 'Default Answer' button and edit its name - this will update the name of the Default flow.
- Now you can start adding nodes to the Default flow. Select the + symbol below the default node and choose the node you want from the list. The available nodes are described below.
Once you add a node to the flow, you'll see an End of Flow node is added automatically to the end of the sequence of nodes. The chatbot conversation will continue until the this node is reached. The End of Flow node ends the conversation so the customer can no longer send any messages. The only way to chat more with the chatbot is to start a new conversation.
Pro Tip: If you are creating multiple flows and linking the Default flow to them, you'll need to create the other flows first and then go back to the Default flow and add Transfer to another flow nodes to link the other flows to the Default flow. More on the Transfer to another flow node in the Nodes section of this help file. - Save your changes to the flow.
- To add another flow, go to the Flows tab and select the Add Flow button.
Nodes
Nodes are the actions that make up your flow. We provide a list of nodes for you to choose from. Different nodes have different customisation options. Each one is explained below:
- Add business hours condition
Based on the business hours option in Company settings.
Set the options based on time, for example: Transfer to agent within hours or Create ticket outside of hours.
This is a Key Node. Learn more about Key Nodes here. - Send message
This sends a message to your customer.
If required, you can include a hyperlink.
You can also set up a sending delay: enter the number of seconds for the Chatbot to wait before sending the message to the customer. - Present options
This displays different options for your customer to choose from.
After each option has been added using this node, you must add a node so there is an action on each option. - Show knowledge base articles
This displays links to the specified articles. - Conversation with chatbot
This is the Conversational AI node, which is another Key Node. Learn more about Key Nodes here.
For this node to work, you need to have Training Content and Instructions set up first. Once the Training Content has been populated with material, the node will connect to your Training Content.
The chatbot will then answer any customer query based on the information in the Training Content. - Ask for identity
Another Key Node. Learn more about Key Nodes here.
Some nodes require the Ask for identity node so it must be added before using any of the following nodes:- Select order
- Transfer to agent
- Create ticket
- Select order
You must have the Ask for identity node added before the Select order node.
This node requests the customers email address.
The chatbot will then fetch any order associated with that email address.
Order nodes are Key Nodes. Learn more about Key Nodes here. - Show order details
After the Select order node, the show order node displays all orders within the chat window.
The customer can select one and then order details will be displayed in the chat window.
Order nodes are Key Nodes. Learn more about Key Nodes here. - Input variable
This node allows you to request additional information.
Because the Chatbot ticket defaults to Resolved, the Create ticket node should be used in conjunction with the Input variable to ensure a To Do ticket is created.
Information entered by the customer will appear as a message inside the ticket. - Transfer to another flow
This node transfers the customer to another flow within the chatbot.
The customer will not know this is happening - the flow will just start. - Create ticket
You must have the Ask for identity node added before the Select order node.
This will create a To Do ticket in your Mailbox - Transfer to agent
You must have the Ask for identity node added before the Transfer to agent node.
If the customer is not satisfied with the response from the chatbot or that chatbot cannot provide an answer, this node starts a live agent conversation. - Condition
The condition node allows you to create more dynamic and responsive chat flows by setting up IF/OTHERWISE statements within your flows. IF your customer triggers your specific chosen conditions, they will be brought down one branch in the flow. OTHERWISE they will be brought down another branch. Learn more about Condition nodes here. - Ask if question resolved
This option asks the customer to confirm whether their question has been answered.
The question and options presented to the customer can be customized.
A node should be added after each option, whether it is a message or an action.
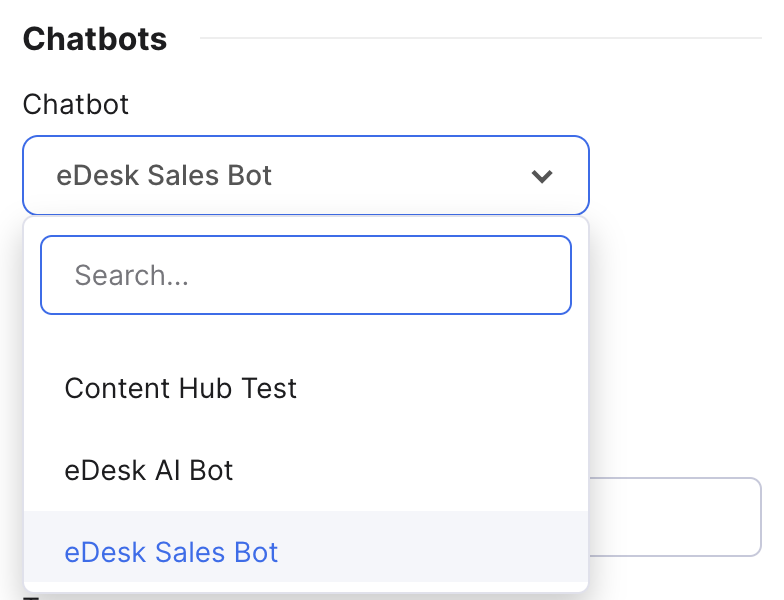
03 Attaching the chatbot to a widget
Once you have the chatbot flows built you must attach the chatbot to a widget through the Behaviour tab of the widget you want to use.Go to: Settings > Smart Tools > Widgets > click on the widget you want to attach the chatbot to > Behaviour tab > Click the dropdown under Chatbots. This list will show all active chatbots > Choose the chatbot you want to add to this widget > Save changes
Find out more about widget settings here.
04 Editing flows
You can edit a flow any time. If you edit a flow in an active chatbot that is being used by customers, the flow will be updated as follows:
- If a customer is in the middle of a conversation with the chatbot and the edited flow is in use when you save the changes to the flow, their experience will not change and the same version of the flow will continue until the chat is finished.
- Customers that begin a conversation with the chatbot after you have saved your changes to the flow will experience the edited version of the flow.
As well as renaming a flow, and adding nodes to it, you can also perform the following:
- Edit a node
Go to Settings > AI > Chatbots and select the chatbot. Then select the Flows tab and select the flow containing the node you want to change. Select the node to open an edit panel, and make your changes. - Delete a node
To permanently delete a node from a flow, go to Settings > AI > Chatbots and select the chatbot. Then select the Flows tab and select the flow containing the node you want to change. Select the node to open an edit panel, and then select Delete. - Disable/enable a flow
To temporarily stop the chatbot from using a flow, you can disable it, and then enable it when you want the chatbot to start using the flow again.
To disable or enable a flow, go to Settings > AI > Chatbots and select the chatbot. Then select the Flows tab and locate the flow you want to disable or enable. Click the value in the Enabled column to toggle it from Disabled to Enabled, or vice versa.

Note: When a flow is disabled, it will not appear in the list of available flows on the Transfer to another flow node. - Delete a flow
To permanently delete a flow that is no longer in use, click on the ellipsis on the right-hand side of that flow and choose 'delete'. If this flow is linked to another flow, a warning will pop up so that you can disconnect the flow from the others before deletion.
Further Readings
For a full overview of the chatbot see here.
Learn more about the Training Content here.
Learn more about Instructions for your AI here.