Wix is a cloud-based website builder that includes web hosting and design services. It makes it easy for users to build their site without having specialist skills themselves or having to hire web developers.
Connecting eDesk will allow your orders, messages, delivery times, returns and refund details to flow directly from your Wix account.
Before you start
- You’ll need an Admin login to eDesk. If you don’t have an Admin login, you can request one from an Admin user within your business.
- You'll need an eDesk account. To find out how to create one, click here.
- Your Wix store needs to be published. We cannot connect to your Wix store if it's unpublished.
01 How do I connect eDesk in Wix?
It's very easy to get started with eDesk on Wix, simply follow the instructions below.- Go to the Wix App Market and select eDesk.

- The App page for eDesk provides an Overview of how the channel works with Wix. Click Add to Site to go ahead and link your eDesk account to Wix.

- Select the Wix site you wish to connect to eDesk. If you want to connect multiple ones, you will simply need to repeat this process.

- Click Add to Site to continue with the installation.

- You will then be redirected to eDesk where you can link your support email address, click on Link Support Email to keep going with the setup. Next we'll set up email forwarding. This will allow eDesk to receive the messages that are sent to the email address you use for Wix customers.

02 Setting up Email Forwarding
Now that your Wix store is connected through the API, you can send outgoing messages from your Wix store through your eDesk account. The next step is to link the Support Email address you use with your Wix account so that eDesk can receive incoming messages.
- Enter the support email address that is attached to your Wix store and select Confirm email.

- After that, you will be asked to confirm which mail provider you currently use to handle Wix Support. Depending on what you select, you will taken to a new screen with in-depth explanations directly on-screen. Click Get Started to continue.

03 Mail Forwarding with Gmail
-
Click on Settings > Forwarding and POP/IMAP on-screen to access your Gmail account and select the Add a forwarding address button in Gmail.

-
In eDesk, copy the unique address showing on-screen and paste it into the presented field in Gmail. Then click Next.

-
In Gmail, you will then see another pop up stating A confirmation code has been sent to xxx@gmail.com to verify permission.
-
Go back to eDesk and click Next Step to retrieve this code.

-
Copy the code displayed on-screen in eDesk and paste it into the presented field in Gmail. Then click Verify.

-
Once this is done, select Forward a copy of incoming mail to and select the eDesk email address from the dropdown.
There is also an option to select what happens to the ticket inside Gmail after it has been forwarded to the address. For example, keep Gmail's copy in the Inbox, which you'd select if you want both Gmail and eDesk to keep a copy of the email.
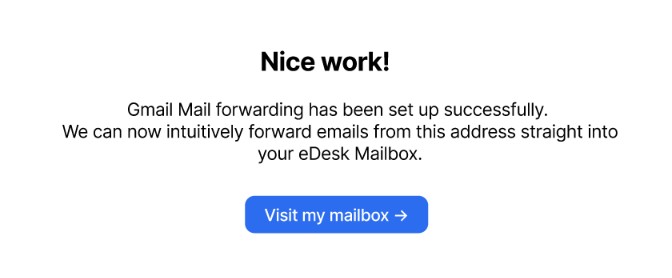
In Gmail, click Save Changes. You'll see a confirmation message at the top of the page if the forwarding has been set up successfully. -
Finally, return to eDesk and click Complete Setup.
To find out all the instructions to setup Gmail forwarding, click here.
04 Mail Forwarding with Yahoo
To find out all the instructions to setup Yahoo forwarding, click here.
05 Mail Forwarding with Outlook
To find out all the instructions to set up Outlook forwarding, click here.
06 Mail Forwarding with another provider
Please find below all the instructions to set up Mail Forwarding with another provider:
- The Enter your IMAP details form is displayed.
 Complete the form. IMAP details are specific to the individual email provider. You can often find them in the Help documents for the email provider.
 - Click Next.
- That's it done!
07 Where do I see data from Wix in eDesk?
Now that you have successfully connected your Wix account, we will import data directly into your eDesk account.
You will be able to see all your buyer messages on the Mailbox screen.
You will see the Wix data related to each ticket on the right-hand side of every single ticket.
And you also will be able to consult all your Wix orders directly on the Orders screen in eDesk:
Further Readings
If you would like to find out more about connecting Amazon with eDesk, click here.
If you would be interested in learning more about connecting Etsy with eDesk, click here.