When navigating through your eDesk account, the search and filters option will enable you to find exactly the tickets you're looking for.
This help file will explain in great detail how you can use these options at the top of the Mailbox screen.
Before you start
- You’ll need an Admin login to eDesk. If you don’t have an Admin login, you can request one from an Admin user within your business.
01 Search
The Search bar is displayed at the very top of the Mailbox in your eDesk account. In there you can type in any keywords related to your search such as:
- Customer details (Name, Email, Phone number).
- Order details (Product name, SKU, ID, Fulfillment type).

02 Filter
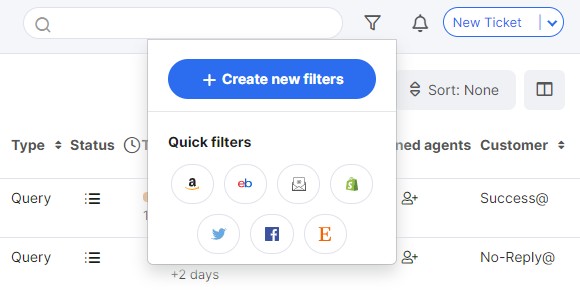
The filter option is also displayed at the very top of the Mailbox in your eDesk account. Hover over the filter icon to access Quick filters and Saved filters.
- Quick filters are preset channel filters, these will be enabled by default.
- Saved filters are ones that have been created by an agent.
03 Custom Filters
When using the + Create new filters option, you will be able to choose from a wide range of search conditions.
These include:
-
Marketplaces
The marketplace is the platform the message is coming from (Amazon, eBay, email, etc.). -
Channels
A specific channel within a marketplace (Amazon Germany for example). -
Ticket Status
This is the status the ticket is currently in (Unresolved, To Do, Waiting, Resolved, Snoozed, Spam). -
Users mentioned
A specific user is/isn't mentioned in the ticket.
-
Ticket Owners
A specific user is/isn't assigned to the ticket. -
Ticket Type
Each ticket that comes into the system will automatically generate a type either from the marketplace or by our system. -
Tag Groups
Select a tag group that has been attached to a ticket. -
Ticket Sentiment
Here you can choose to display messages based on the sentiment (positive, negative, mixed etc.)
Note: You can hit the down arrow below Ticket Sentiment to access other options: - Tags Select a tag that has been attached to a ticket.
- AI Classification Select an AI Classification to see specific tickets in that AI classification
-
Ticket Created at
This identifies the date range the ticket was made and brought into eDesk. -
Existing Customer
If this customer has purchased from your previously. -
Sales Order
Here you can choose if the ticket has an order attached to it or not. - Last Message Item Type
Here you can choose what the last message on the ticket was (Internal note, Incoming message or Outcoming message).
 Note: You can also filter based on the custom fields you have created. To find out more about this, click here.
04 Saving a Filter
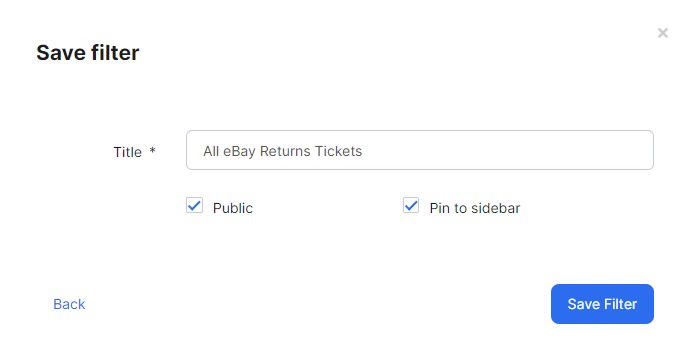
Once the filter has been created, you can select Show results, which will display tickets that meet the criteria or you can choose to Save the filter to use it again later.
To save the filter, enter a name and choose if you would like to make it public and if you would like to pin it to the sidebar.
- Public filters are available in all user accounts. If not selected, the filter is only available to the agent who created it.
- Saved filters will appear in the list when you hover over the filter button.
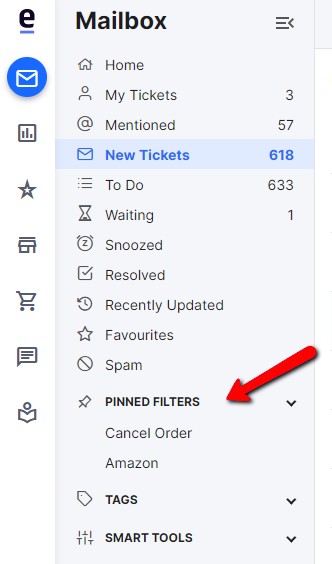
05 Pinned Filters
If you wanted to create folders to help you categorize your tickets in the Mailbox, you will be able to pin custom filters to the sidebar. They will then be displayed in the Pinned Filters section.
This feature is really useful and allows you to easily access the tickets you need to see.
06 Delete or Unpin a Filter
To consult all of your existing filters in eDesk, you can click on the filter icon at the top then Create a New Filter.
They will then be displayed on the left-hand side of the screen and you can then hover over the filter(s) you would like to edit, delete or unpin.

Further Readings
To learn how to download a set of filtered tickets, click here.
To find out more about tags to organize your eDesk Mailbox, click here.