All of your eDesk teammates have a user role associated with their account, giving them access to different tools in eDesk.
It’s easy to adjust these roles within eDesk, and we offer both standard roles, which you can use out-of-the-box, and custom roles, which you can fit your team’s needs.
This help file will guide you through creating, managing, and assigning roles to help give your team access to the tools they need and to keep your workspace secure.
Before you start
- You’ll need an Admin login to eDesk. If you don’t have an Admin login, you can request one from an Admin user within your business.
- You’ll need to be on the eDesk Professional or Enterprise plan to access custom roles. To find out more information, click here.
01 Using Standard roles
Standard roles have preset permissions that can be assigned to team members. You can view the standard roles in the Settings → Company Settings → Roles.

Note: By default, the account creator is given an admin role (defined below). When you invite teammates to your account, you’ll be able to choose what roles to give them.
Below we list the Standard roles, with a summary of the permissions for each role.
-
Basic: this role gives the user access to their own Mailbox only. They can view and respond to customer messages.
-
Agent: a role designed for Support Agents. It gives the user limited access to the Dashboard in eDesk, which includes a number of Mailbox views. Teammates can see tickets that are assigned to them and to others in their team. They can view Sales orders and use Chat to talk to customers. They also have access to the Knowledge Base.
-
Team Leader: a role designed for the Customer Support Managers that manage a team of Support Agents. It allows the Managers to configure the Smart Tools that they need to update frequently, for example, Message rules, Message templates, Tags, AI Settings, and Company Snippets. It gives access to all Mailbox views for themselves and their team, as well as Chat and the Knowledge Base. It does not give access to the Orders dashboard or to the Smart Tools for Feedback rules, Custom fields, Widgets, and Invoice templates.
-
Admin: an administrator role that can see every screen and perform every task in eDesk. This role enables teammates to fully configure eDesk to best serve their business, for example, set up VAT, Time Zone, Country, Company signature, Business hours, etc. They can also manage the roles assigned to teammates within the business.
-
Read Only: this role gives the user access to eDesk but they cannot make any changes to account or respond to tickets.
02 Creating Custom roles
It’s easy to create custom roles to give your teammates customized access to the tools they need.
Click here to learn how to set up Custom roles or continue reading to learn how to view your team’s permissions, and assign and unassign roles to users.
03 Viewing your team’s roles and permissions
To view your team’s roles, go to Settings → Company Settings → Roles. This will show you Standard roles. To view the Custom roles, click the Custom Roles tab
To view the permissions for a role, click the role you’d like to view.  The Role Information page is displayed, with the Role Details tab shown by default. The checkboxes indicate which permissions are enabled for the role. If you’re viewing a Custom Role this will be editable, while for Standard roles this is a read-only page. Click here to learn about what each permission enables for a user.
Pro Tip: If you’re on the Professional or Enterprise pack you can clone any of the above roles and then edit it to make your own custom role. To find out more about custom roles, click here.
04 Adding, updating, or removing a teammate’s user role
Removing a role from a user reverts them to the Basic role. Any changes to a user’s role will come into effect immediately.
There are two ways to add or remove a user’s role account. You can either:
- Lookup a user and add/remove their role.
- Lookup a role and associate/disassociate one or more users from the role.
Pro Tip: If you’re want to change many roles at the same time, use the second approach.
05 Looking up a user to add or remove a role
First, go to Settings → Company Settings → Users. This will show you a list of your active users.
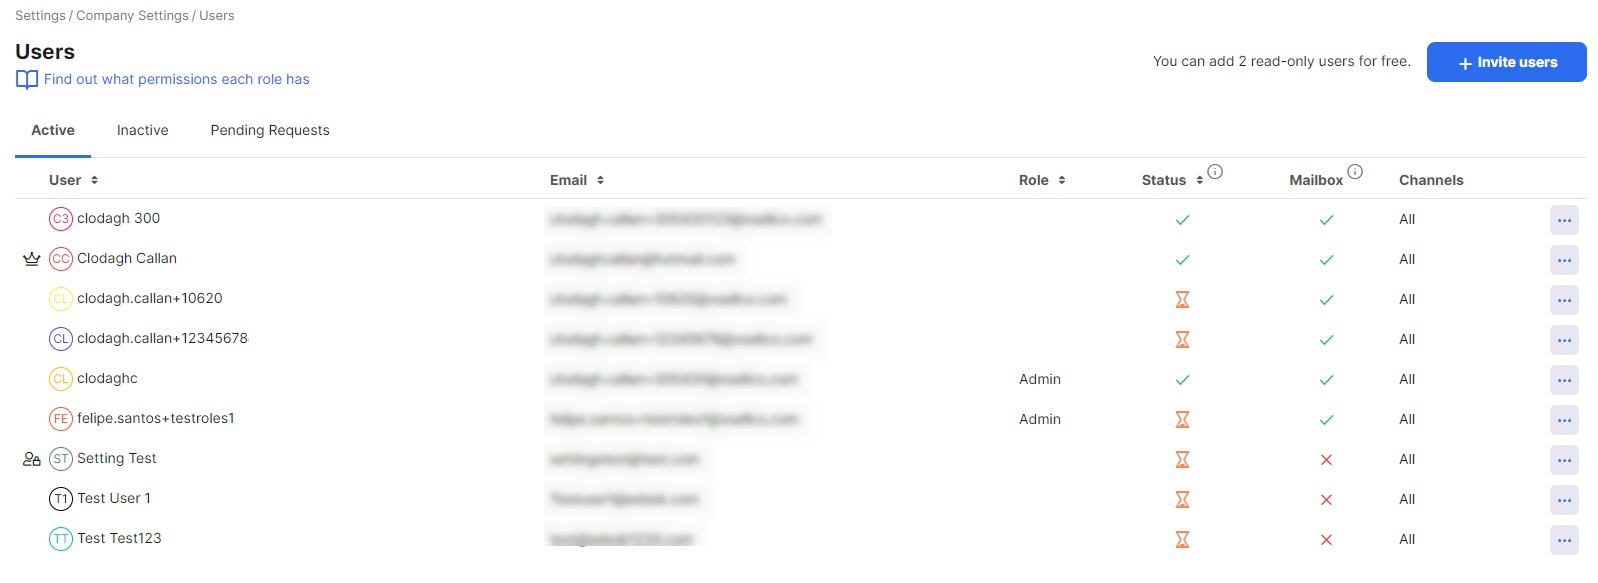
- Click on the user that you want to view.
The User page is displayed, with the General tab shown by default. - Click Permissions.
This will show you the current permissions the user has. - Click the Role field.
A menu listing all the available roles is displayed.
To remove the role from the teammate’s account, select No role from the menu. This will give the teammate the same permissions as the Basic role. - To add or update the role, select another role from the menu.
- Click Save changes.
06 Looking up a role to associate/disassociate teammates from the role
You can add or remove a role for a teammate in the Users tab on the Role Information page. Here’s how to do it.
To view your team’s roles, go to Settings → Company Settings → Roles. Then click on the role you want to associate/disassociate with a teammate to access the Role details page.

Step 1: View the list of users that have this role
- Click the Users tab.
The tab shows the list of users with this role.
Step 2: Add/remove the user from the role
- To remove a user, click X Disassociate role in the row for that teammate.

The teammate is added to the list in the User tab.
Once this change is saved, the teammate’s role will be the Basic role. - To add a teammate, click + Associate role with User.
A menu showing a list of users is displayed. These are all your teammates, including teammates that already have user roles assigned. - Click on a User on the menu.
The teammate is removed from the list. - Repeat the add/remove steps until you have added or removed all the teammates from this role.
- Click Save Changes to save the changes to the User list (or Cancel to return to the previous page without saving).
Further Readings
Interested in learning more about custom roles? Click here.
If you want to find out more about adding Read-Only users to your eDesk account, click here.