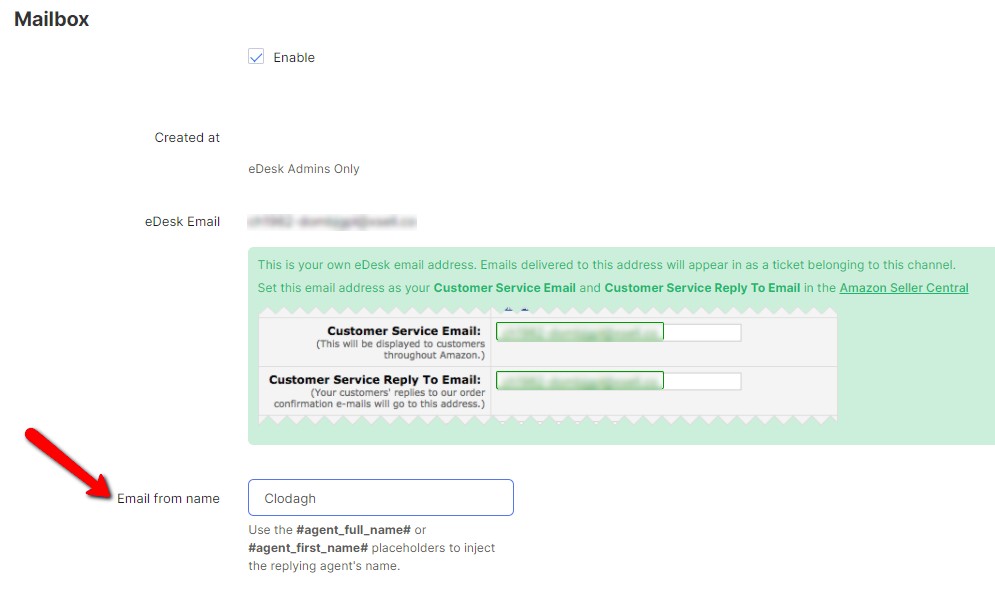
This guide will walk you through the process of changing the sender's name in your eDesk account.
Before you start
- You’ll need an account with eDesk. If you want to find out how to create one, click here.
- You’ll need an Admin login to eDesk. If you don’t have an Admin login, you can request one from an Admin user within your business.
01 How to change my sender's name?
- Go to Settings → Mailbox Settings → Channels.
- Then click on the Support Email channel of your choice.
- Select the Mailbox tab and scroll down to the Email from name section.
 Pro Tip: if you wanted your sender's name to be the name of the agent that sent the email, feel free to simply add #agent_full_name# or #agent_first_name# in the field and it'll automatically update it when sending.
To find out more about Mailbox Settings, click here.
02 Where do I see my sender's name?
Your sender's name will be displayed on any email you sent, whatever you added in your eDesk account will then show in the From section in the email.
03 Can I change my sender's name for external emails?
External email addresses have a specific From address that cannot be changed.This ensures that all external messages remain in the thread but do not get sent to the address on the right-hand side of the ticket.
More importantly, it ensures that the response comes into the ticket but again does not get sent to the right-hand side address.
Further Readings
If you would like to find out more about Mail Forwarding with eDesk, click here.
If you would be interested in learning more about approving senders with eDesk, click here.