If you use Outlook to receive emails from multiple channels, and the emails go into an Outlook folder for each channel, here's some good news. In eDesk, you can now map individual Outlook folders to individual channels when connecting to Outlook via API, and you won't get duplicate emails cluttering your Mailbox.
This help file will explain how to connect your channels in eDesk with the different folders in your Outlook.
Before you start
- You’ll need an Admin login to eDesk. If you don’t have an Admin login, you can request one from an Admin user within your business.
- You'll need to have Outlook set up to access your email.
- You'll need to have a dedicated folder in Outlook for the emails you receive for each channel, and some rules configured that move emails for a channel into its Outlook folder as soon as it arrives in Outlook. For example, if you sell through Magento and Walmart, you'd have an Outlook folder for each of these, and have rules moving all emails that arrive from Walmart to the Walmart folder, and all emails that arrive from Magento to the Magento folder. This article explains how to create a folder in Outlook, and this article shows you how to create rules.
01 Choosing an Outlook folder to eDesk for the first time
1. Follow the instructions in this help file to connect Outlook to eDesk.
Now you just need to select which Outlook folder to use for the first channel.
2. Go to Settings > Mailbox Settings > Channels.
You'll see a list of the channels you have connected.
3. Click the channel that has your Outlook email address connected to it.
The Channels page will open.
4. Select the Mailbox tab and scroll down to the Source folder field.
5. Click the Source folder field to display a list of folders in your Outlook. Select the folder you want to use for this channel. In the example below, the Outlook folder Etsy has been selected.

6. Select Save changes.
02 Adding Outlook folders for further channels
1. From the App Store, install another Outlook app. Once you authorize eDesk's access to your Outlook, you'll see a page that says "[your email address] has been connected to an eDesk channel already. Please select a folder to connect to the channel [your email address]".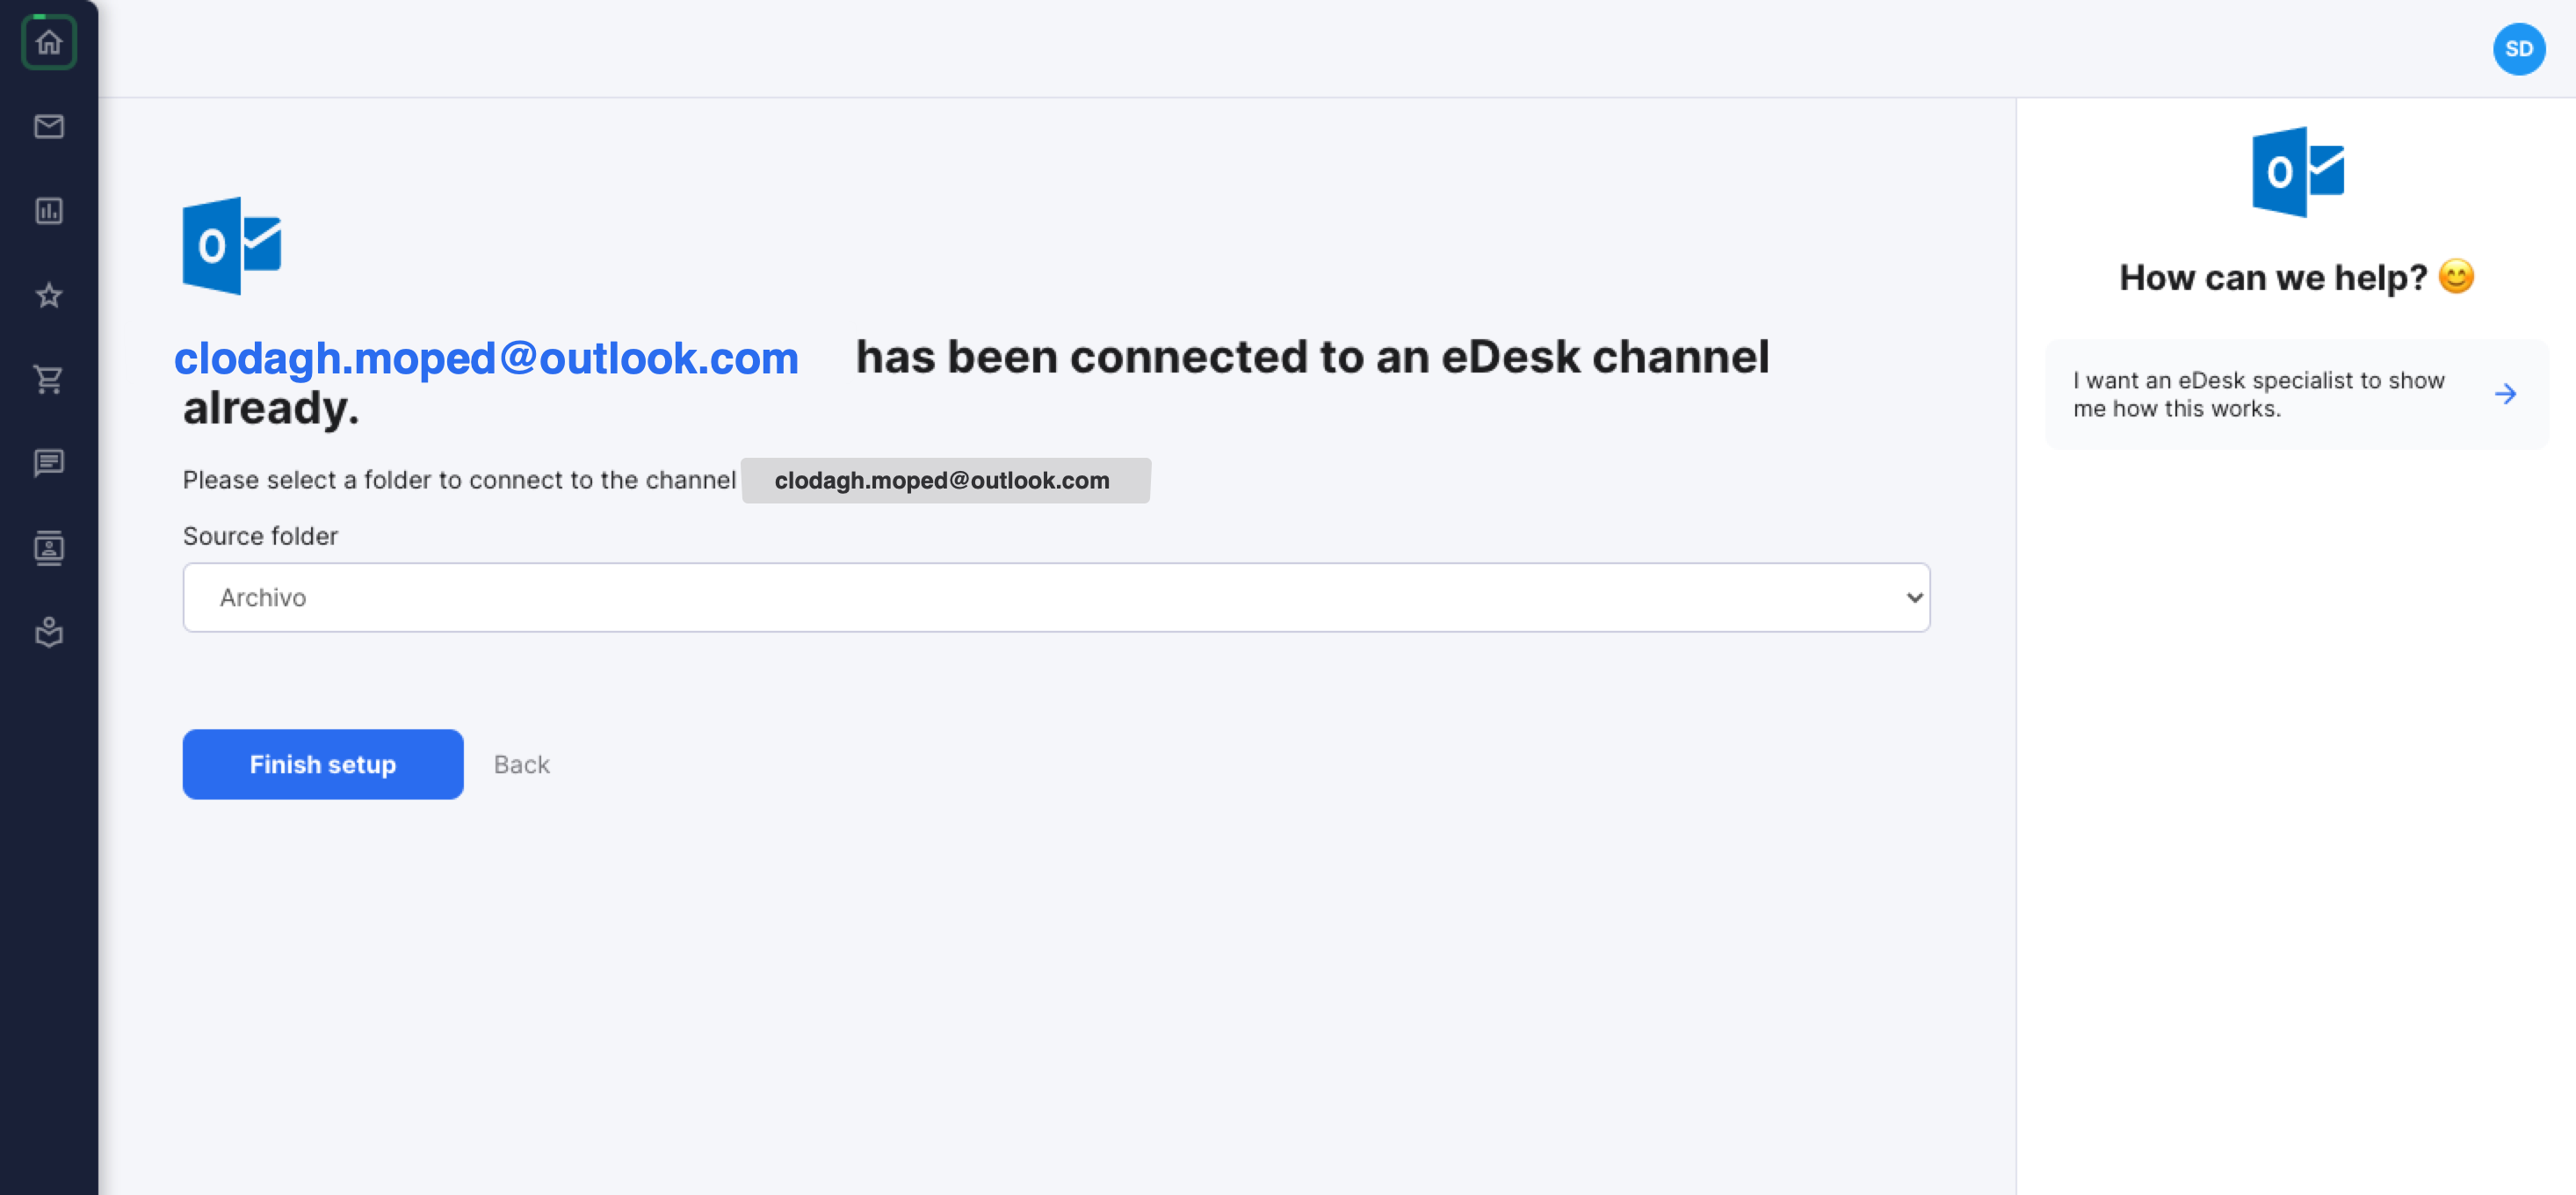
2. Select the Source folder field and choose the appropriate Outlook folder for the channel you want to connect, e.g. Shopify. Any folders that you have already connected will be grayed out.
Pro Tip: If you haven't already created the folder in Outlook, you can do it now and then refresh this page to see the new folder in the list.
3. Select Finish setup.
03 What if I have already connected Outlook and now want to connect my Outlook folders?
You must have connected to Outlook via the API method before you can connect Outlook folders. You can check whether you have already connected via API by doing the following:
1. Go to Settings > Mailbox Settings > Channels.
2. Click the channel that has your Outlook email address in the Title column.
3. Select the Mailbox tab and scroll down to the Receiving mode field.
If the Receiving mode field is set to Pull emails via Microsoft Outlook API, then you have set eDesk up to connect to Outlook via API, and can go ahead and connect your folders by following steps 2-6 in the first section of this document.

If you have Outlook connected via a different method and you would like to start using folders, then do the following:
1. Go to Settings > Mailbox Settings > Channels.
2. Click the channel you want to change to use the API method.
3. In the Mailbox tab, change the Receiving mode to Pull emails via Microsoft Outlook API.
Note: When you set the Receiving mode to API, the Sending mode field will disappear, because the API method handles both the sending and receiving of emails, so you don't need to configure another method for sending.
4. In the Source folder field, select the Outlook folder you want to use.
5. Click Renew Outlook access to eDesk.

6. You'll see a Reauthorize page. Select Authorize eDesk.
7. Follow the steps on screen to complete authorization in Microsoft Outlook.
8. Select the source folder.
Further Reading
To learn how to connect Outlook with eDesk, click here.
To learn how to connect Gmail with eDesk, click here.