This help file walks you through end-to-end Chatbot set up.
Before you start
- eDesk's AI chatbots are powered by Ava and are available as an Add-On, as part of our AI Automation feature. Learn about AI Automation and how it's billed here.
- Admin and Team Leader roles will have the Chatbot permission as default.
- You’ll need to have access to Settings > AI > Chatbots in your permissions.
- If you don’t have access, you can request it from an Admin user within your business.
- For an overview of the Content hub including an introduction to building custom content, see here.
01 I'm starting from scratch!
If you haven't added eDesk Chat to your website but want to do so now and include a handy Chatbot, follow the steps below.- First you need to create a new Chat Widget by following the steps in sections 03 and 04 of this help file.
Don't worry about completing the Chatbots fields in Step 3: Tell eDesk how you want Live Chat to behave - we'll return to this later after we have created our Chatbot.
However, you must make sure that the Chat Widget is enabled by selecting the Chat Widget Enabled slider:

- Your Chatbot will take its information from a pool of information called a Content hub. Follow the instructions in this help file to create a library and populate it with content in the Content hub for your Chatbot to use.
- Now, create your Chatbot by following the instructions this help file for our Chatbot template. Using our template is the easiest way to get your Chatbot up and running. (Ensure to point the AI Flow in the template to your newly created Content hub library).
- Create Instructions for your Chatbot to follow. These include Tone of voice, Directions and Backstory. Read more about Instructions in this help file. (Ensure your Instructions are set to include 'AI Chatbot' under Usage and that your newly created Content hub is selected under the 'Content hub libraries' dropdown in the Instructions).
- Now we'll return to the Chatbot section of the Chat Widget set up page, where we'll link the Chat Widget to the new Chatbot.
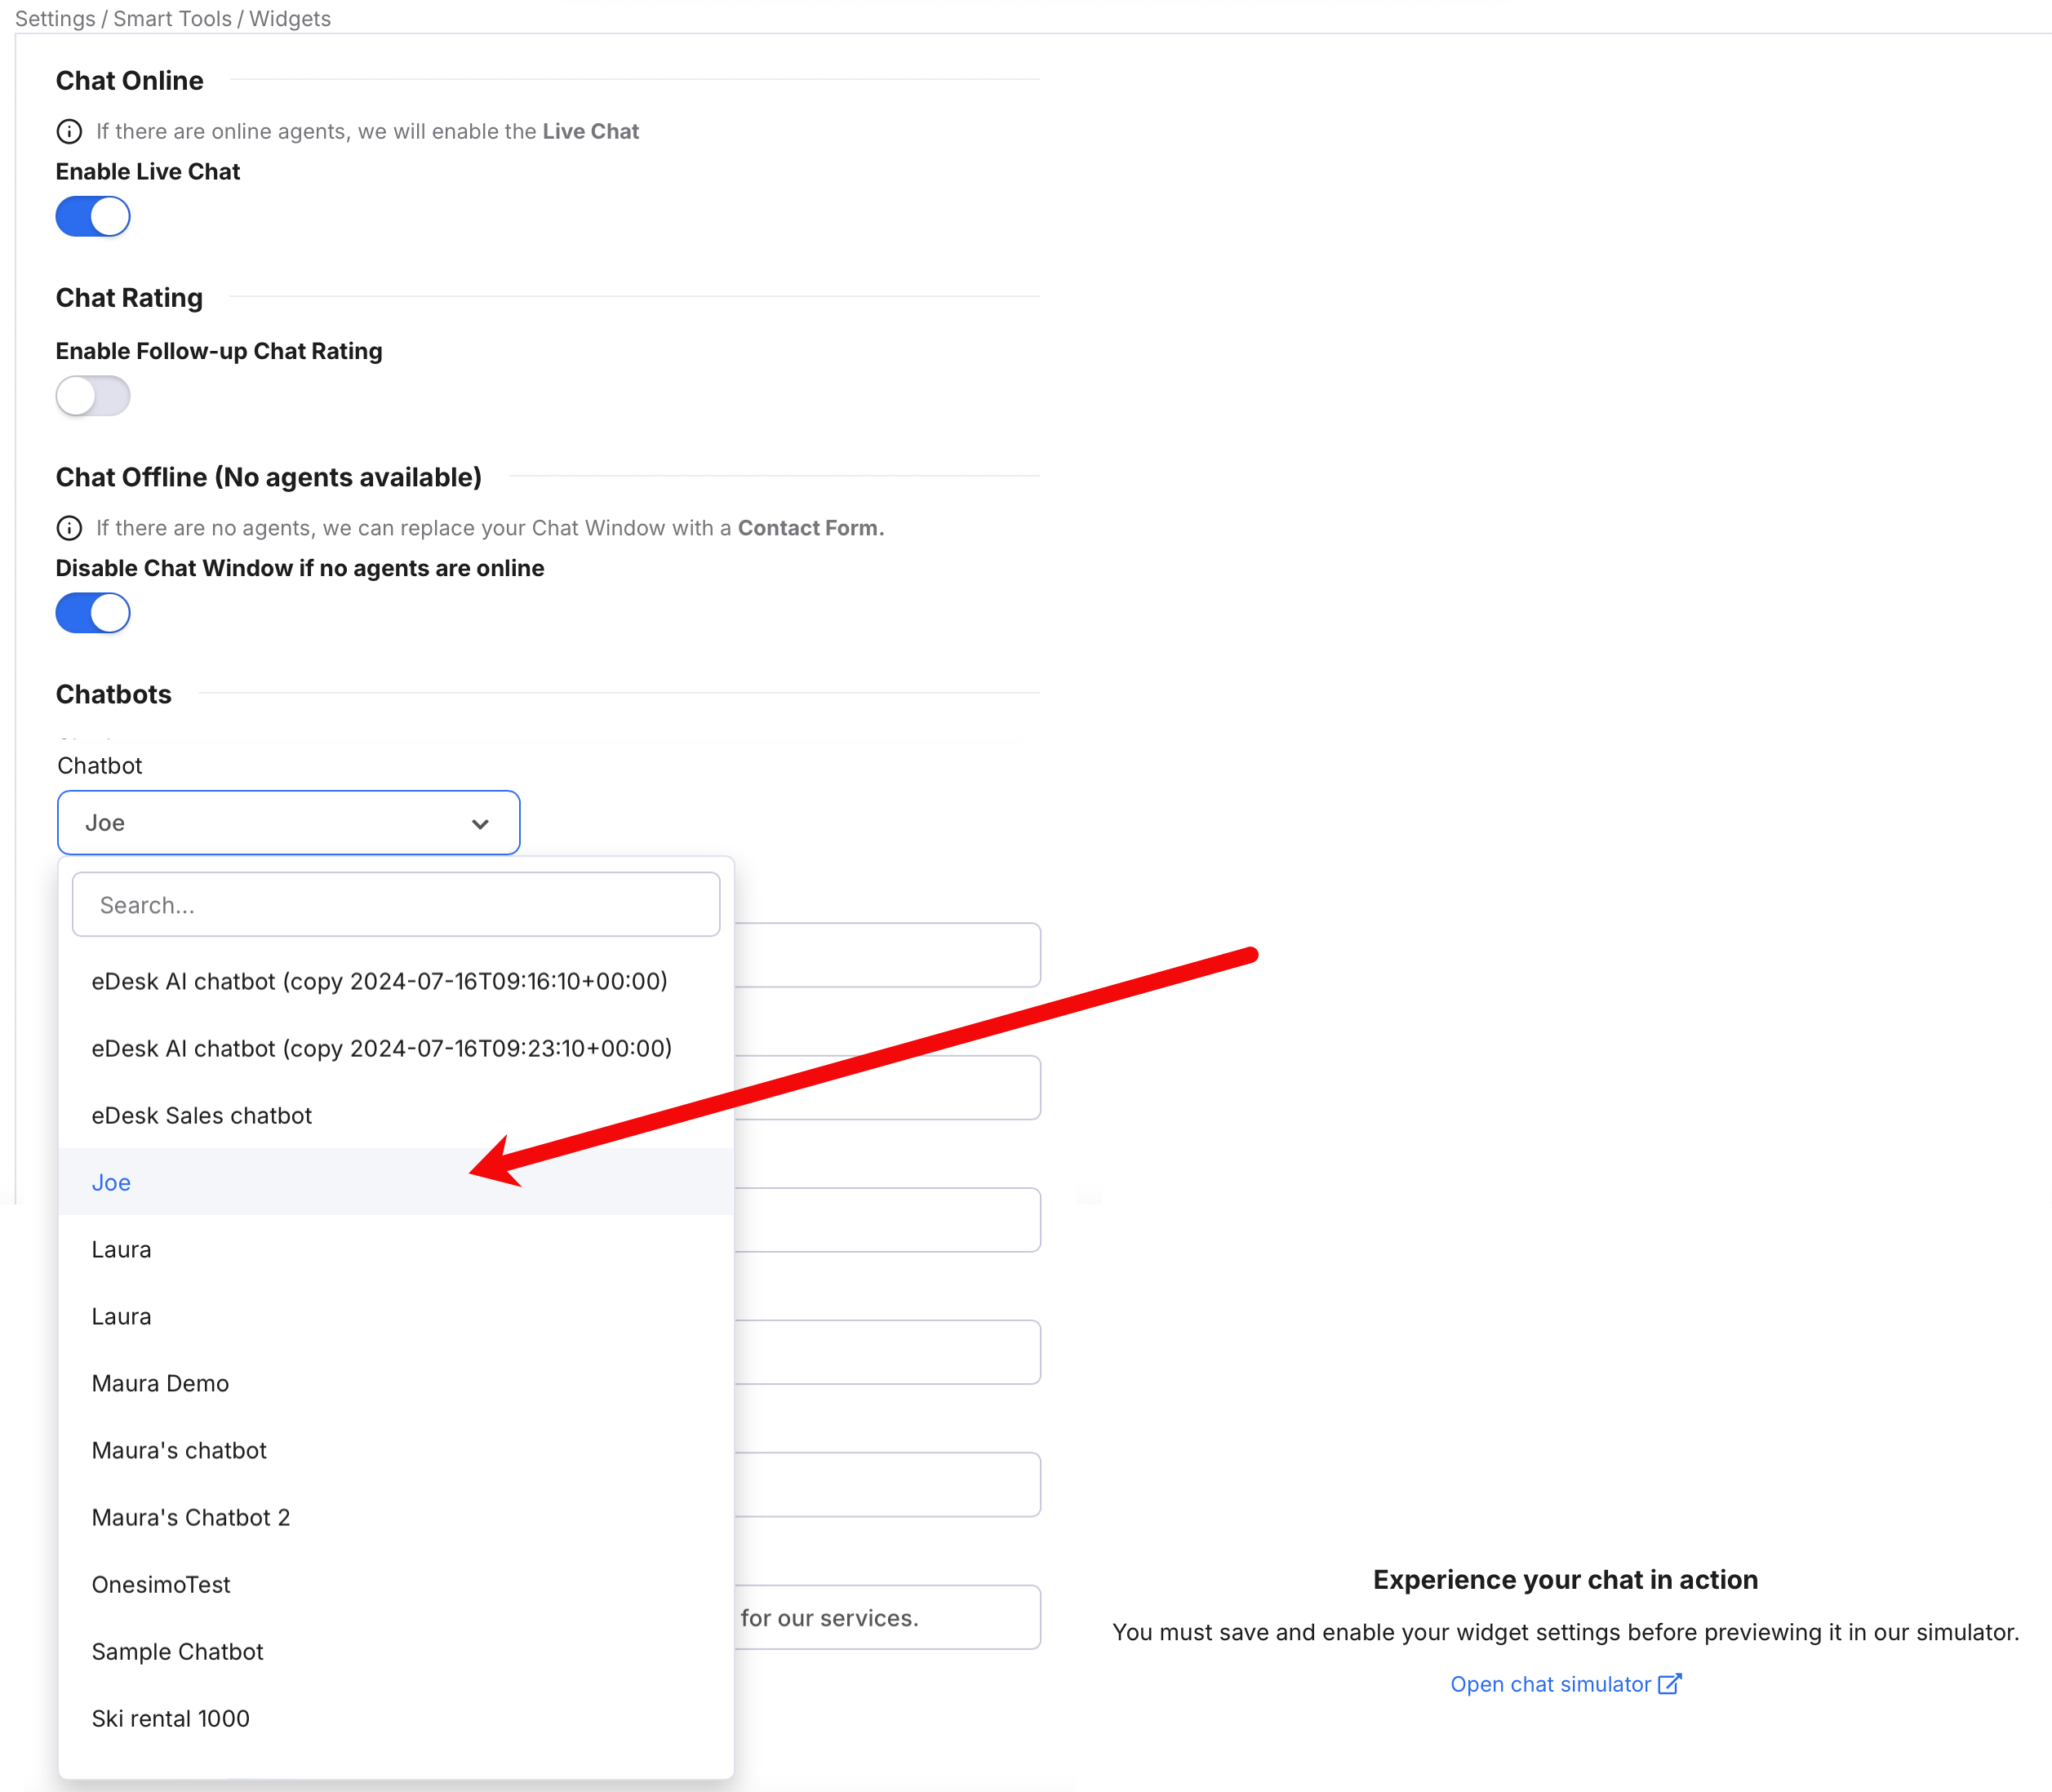
Go to Settings > Smart Tools > Widgets and click the Chat widget you want to add the Chatbot to.
Select the Behaviour tab and scroll down to the Chatbots section.
Select the Chatbot field to display a menu that lists all the Chatbots that have been created, and select your new Chatbot. Save your changes.
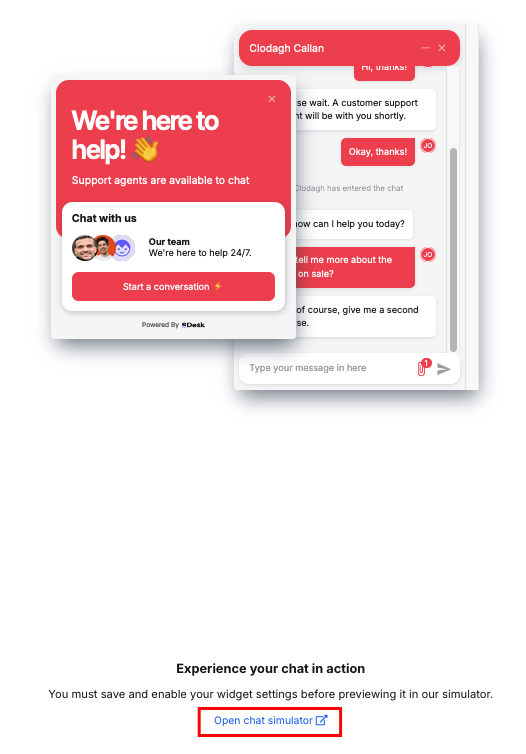
Once saved, you can test the Chat widget and Chatbot using the simulator.
You will see a preview of the widget with a link to "Open chat simulator". This allows you to test the widget exactly as your customer sees it - and as your agents will see it if it gets transferred to an agent.
You will see a preview of the widget with a link to "Open chat simulator". This allows you to test the widget exactly as your customer sees it - and as your agents will see it if it gets transferred to an agent.
Once you are happy, the widget can be added to your website, ready for your customers to use.
To read more about Test Mode and using the Chatbot simulator, click here.
02 I already have a Chat widget and want to add a Chatbot to it
If you already use eDesk Chat on your website and already have a Chat widget that your customers use to chat with Agents - and you now want to add a Chatbot to take care of the everyday queries, then follow the steps below.- Make sure that the existing Chat Widget is enabled:
- Follow steps 2 - 5 inclusive in section 01 of this help file to create a library in the Content Hub, create your Chatbot, create Instructions and link the Chat Widget to the Chatbot.
Your chatbot is now ready for your customers to use when they start a chat in the Chat Widget.
Further readings
For a full overview of the Chatbot, see here.For the guide on setting up a Live Chat Widget, click here.
To learn how to build a Content hub, click here.
Learn more about Instructions here.
Learn about connecting, creating, and editing chatbots here.