Create tickets in eDesk to deliver proactive support to your customers, and keep all your correspondence together by sending external emails from a ticket.
This help file will show you how to create new tickets and create an external email in a ticket.
Before you start
- You'll need to have a Basic or higher role to access to create and manage tickets. If you are a read-only user and don't have access, you can request it from an admin user within your organization.
01 Creating new tickets
If you already use eDesk's Mailbox, you'll know that eDesk automatically creates a ticket when it receives a new message from a customer and that you are able to open the ticket to view the message details and respond to the customer as necessary. But did you know that you can also offer proactive customer care by creating tickets yourself in eDesk?Example: You receive an order and you realize that the item in question is back-ordered. Create a ticket to let the customer know that it might take a bit longer for the item to get delivered as it's not in stock right now.
There are two ways to create a new ticket:
- From your Mailbox, which allows you to choose whether or not to include any order details in the ticket. This option is not available if you are creating tickets for Amazon or eBay, which require you to contact the customer through their order.
- From an Order, which automatically includes the order details in the ticket. This is ideal for Amazon and eBay tickets.
Creating a new ticket from your Mailbox
1. In your Mailbox, click New Ticket.
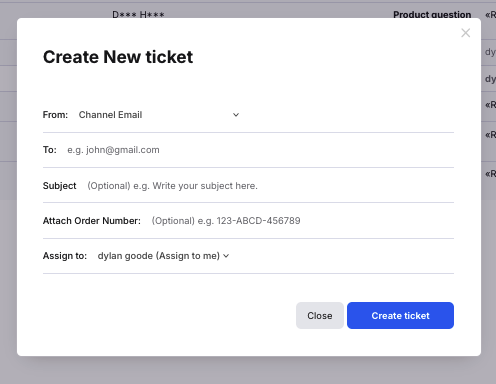
2. In the popup window:
- select the channel for which the ticket will be created.
- enter the email address of the customer that will receive the message sent from the new ticket.
- enter the subject line of the ticket (optional).
- enter an order number to attach an order to the ticket. (Optional. You can also do this after the ticket has been created either).
- Assign thee ticket to an agent if required.
- Click Create ticket. The ticket will be created for editing but won't be sent to the customer just yet.
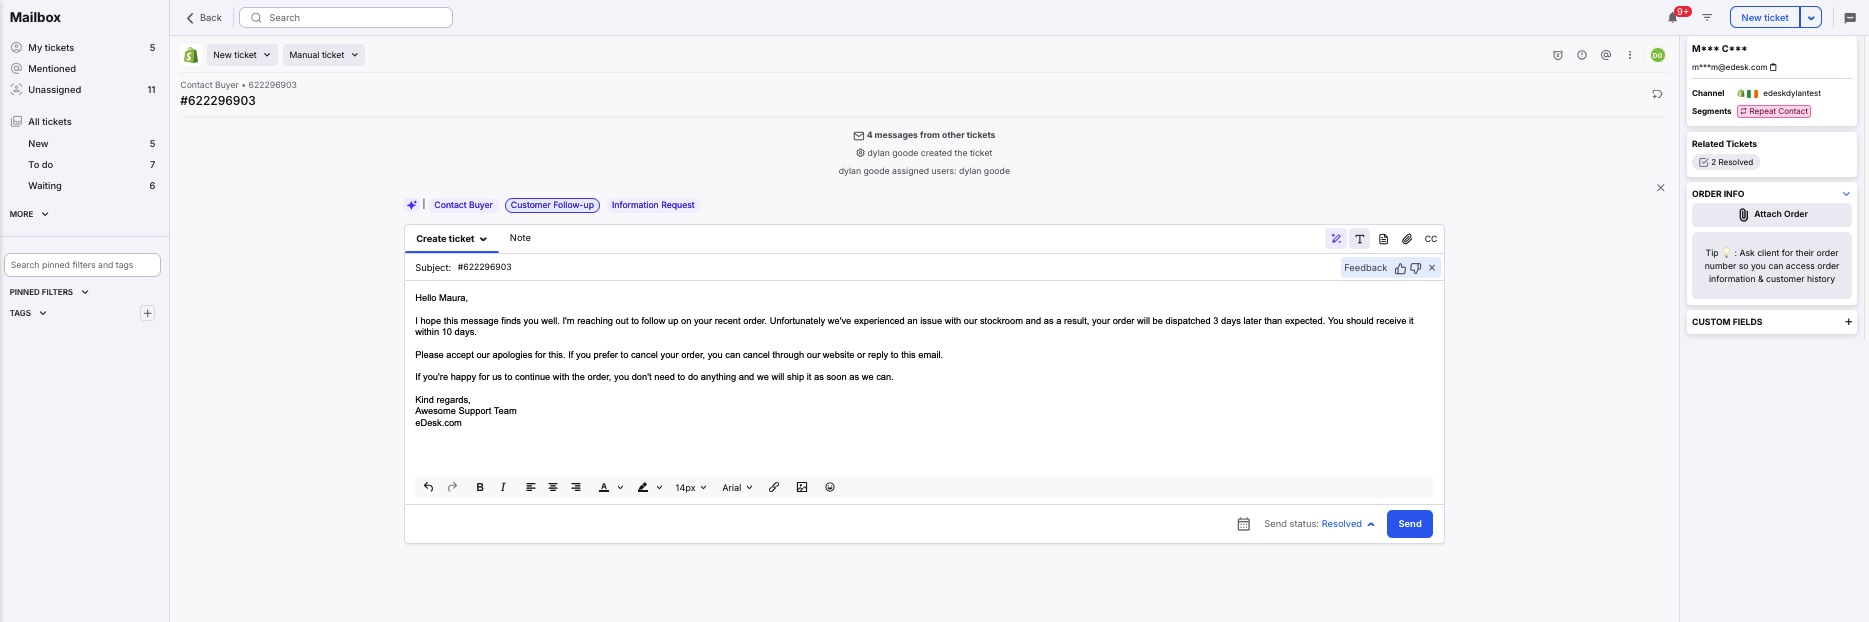
3. Once the ticket has been created:
- enter the message that you want to send the customer. You can click the Template icon to include a template if required. For instructions on using templates, click here.
- edit the Subject if required. By default, this is pre-populated with the ticket number.
- click Attach Order in the sidebar if you want to attach the order details to the message.
- click the Note tab to add an internal note.
- click the External tab under the Create ticket dropdown to send a separate email to an external email address. See below for further information.
- change the Send status if you don't want to mark the ticket as Resolved when the message is sent.
- click Send to send to the customer.
Note: If you close the ticket without sending the message, the ticket will be discarded.
Creating a new ticket from an Order
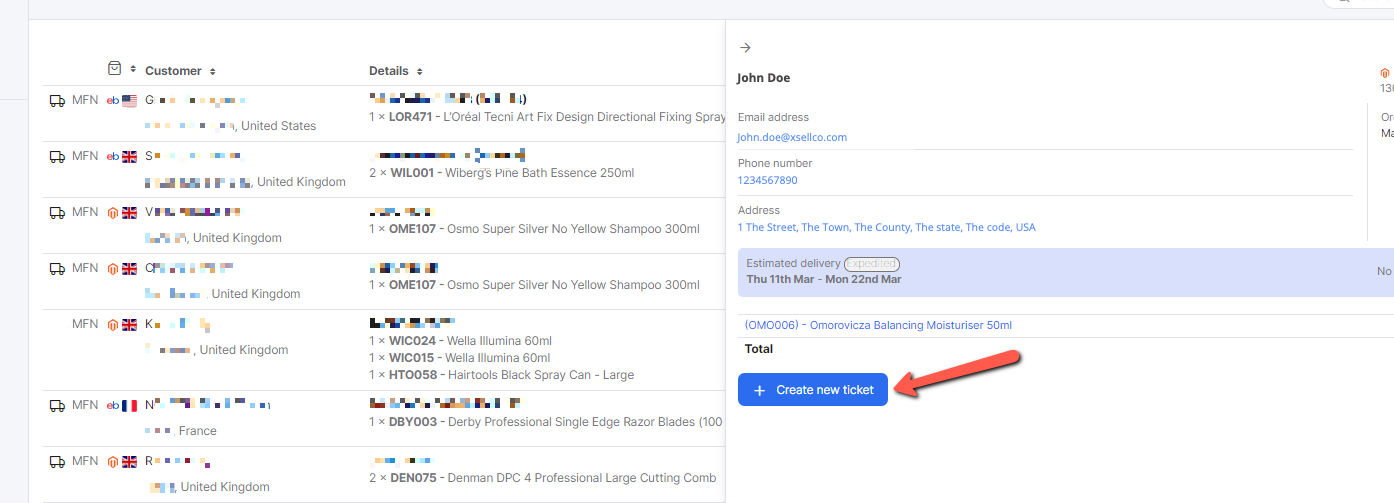
This is the perfect option for eBay and Amazon tickets, as those marketplaces require you to make contact via an order. However, it can be used for any customer who has placed an order.1. Open the Orders category in the main menu, and click on the order for which you want to create the ticket.
2. Click Create new ticket in the order window.
3. Your Mailbox is opened showing the new ticket, which is populated with the order details. You can now:
- enter the message that you want to send the customer.
- edit the Subject if required. By default, this is pre-populated with the order number.
- click the Note tab to add an internal note.
- click External under the Create ticket dropdown to send a separate email to an external email address. See below for further information.
- change the Send status if you don't want to mark the ticket as Resolved when the message is sent.
- click Send to send to the customer.
Note: If you close the ticket without sending the message, the ticket will be discarded.
02 Creating external emails in a ticket
Another useful eDesk feature is that you can send an external email from a ticket. You can use this to keep together all the correspondence for an order, including emails to suppliers or to the marketplace.Example: A customer loves the blue chair they ordered from you, and they want to know if they can get the same chair but in pink. You send an external email inside the same ticket thread to your supplier and ask if they have any pink chairs. As a result, all your messages to the customer and supplier that relate to this query are together in the same thread.
You can create an external email in any ticket, including New and Resolved tickets. Here's how:
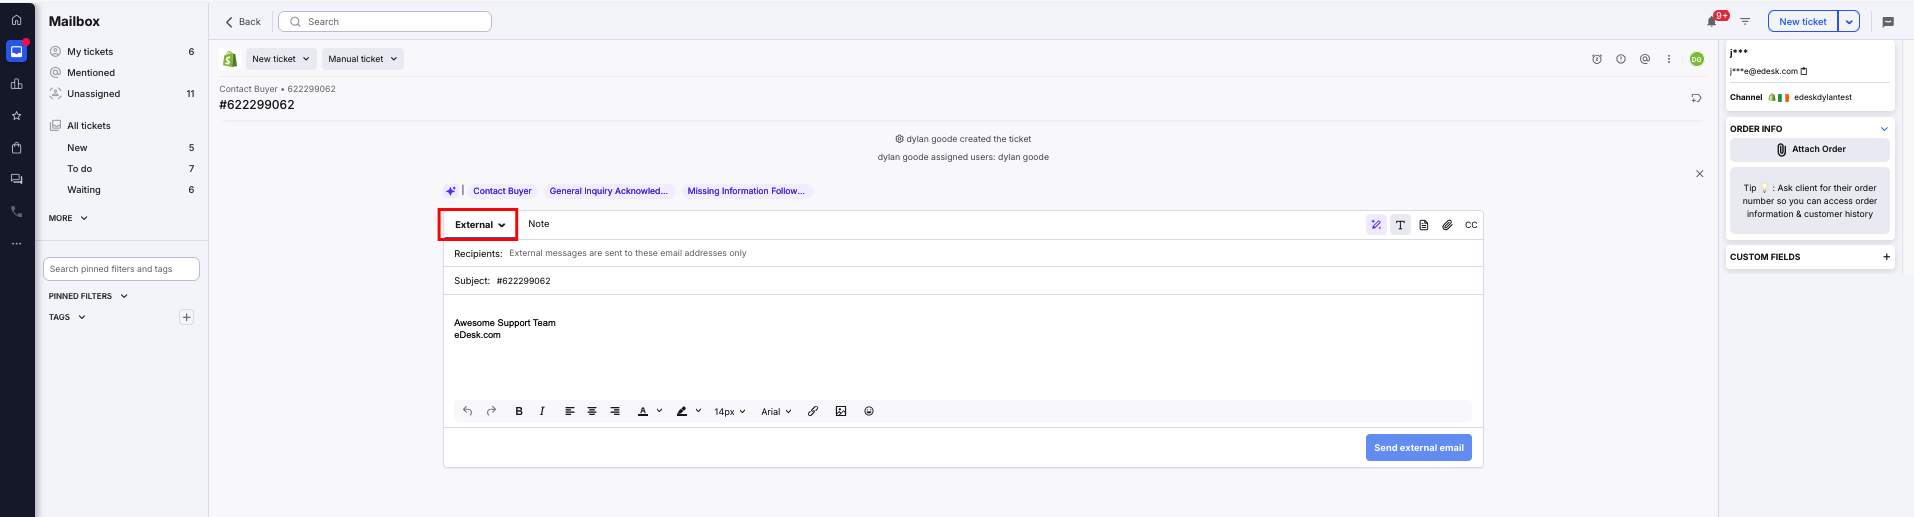
1. Open the ticket and click External from the dropdown under the Reply box.
2. Now you can:
- click Recipients field, and overwrite the text "External messages are sent to these email addresses only" with the email address of the recipient.
- enter a subject into the Subject field.
- enter the message that you want to send the customer. You can click the Template icon to include a template if required or use the shortcut underscore _ key.
- click the Note tab to add an internal note.
- click Send external email to send the email.
Further Reading
To learn about the various ways in which you can respond to customer messages, click here.
To learn about ticket sharing with third parties, click here.