If you started your eDesk trial via Repricer, your eDesk trial account is already connected to your Amazon channel - this means that all your Amazon order information will be visible within eDesk. So, all that you need to do is set up your Mailbox to access your customer queries along with their order information.
This help file will guide you through setting up your mailbox so you'll be able to send and receive messages in eDesk. Your customer messages will continue to be delivered to your Amazon message center also, and it will also update when you send messages from eDesk.
Before you start
-
You’ll need an Admin login to eDesk. If you don’t have an Admin login, you can request one from an Admin user within your business.
- You’ll need a Seller Central account on Amazon. If you want to find out more about creating, click here.
01 Find your eDesk Channel Address
- Go to Settings → Mailbox Settings
- Then select Channel → Mailbox tab → eDesk Email.
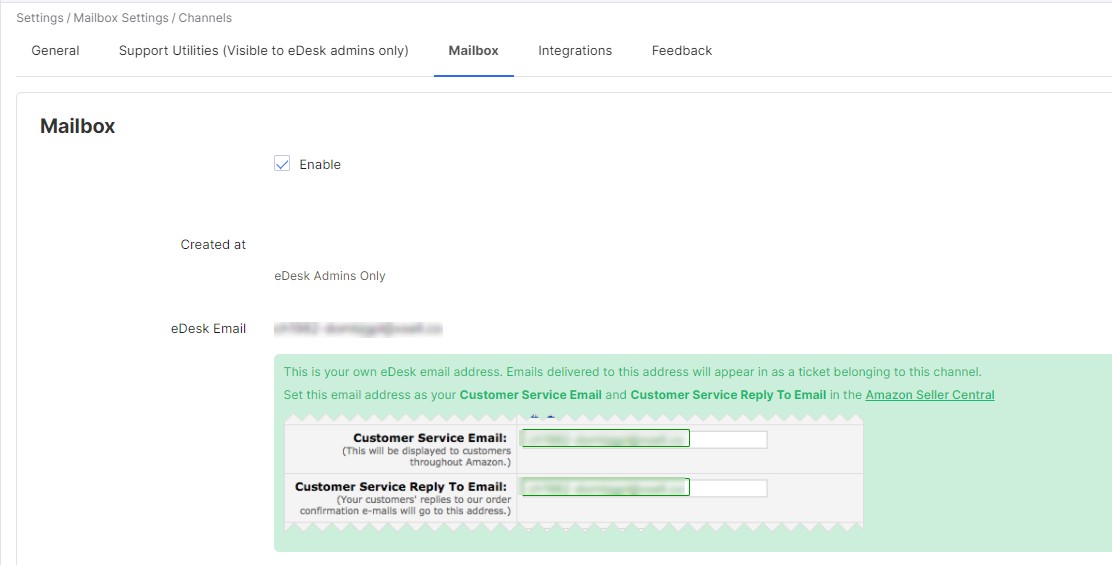 Copy this email as you will need it in the subsequent steps
02 Update Customer Service details in Amazon (Email Forwarding)
Setting up mail forwarding will allow messages to flow into eDesk.- In a new tab, log in to Amazon Seller Central.
- Go to Seller Information.
- Go to the marketplace that you’ve connected and click Edit beside Customer service detail.
- Paste the eDesk channel address you copied above into the fields Customer Service Email and Customer Service Reply to Email.
- Press Submit to update Amazon.

03 Add Alternative Address to Amazon (Add eDesk as a sender)
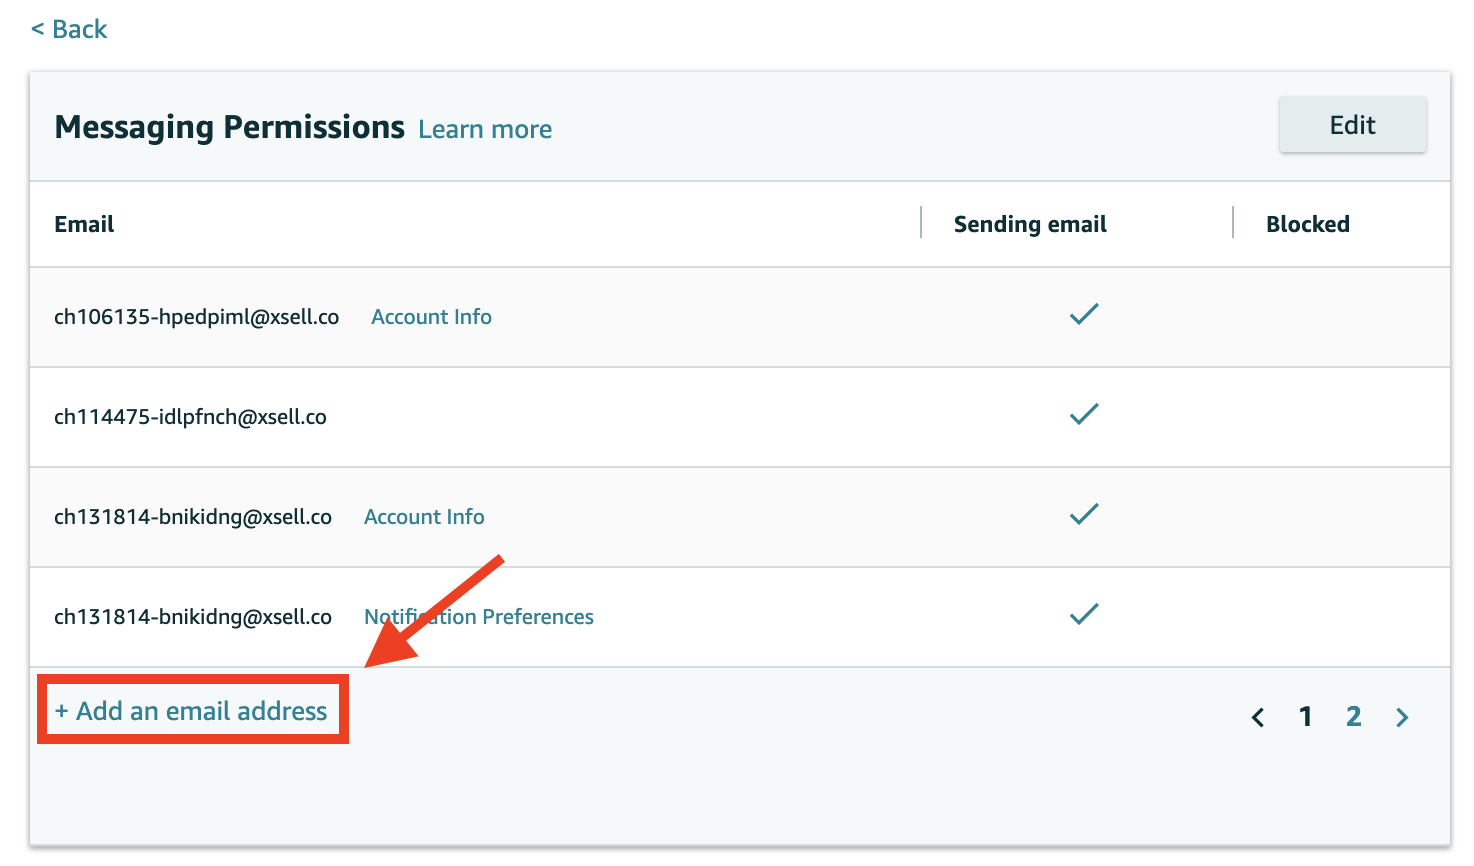
To ensure messages can be sent from your eDesk mailbox, you'll need to add your eDesk address as an approved sender in Amazon.- Navigate to Messaging Permissions.
- Click +Add an email address and add your eDesk channel address.
- Press Save to update Amazon.
04 Notifications
This step will ensure you get all relevant Amazon notifications in eDesk. It's vital to complete this step for your messaging to work.Go to Notification options:
- Update Returns and Claim Notifications
- Go to Return and Claim Notifications and click on Edit.
- Click the Add another under Pending Returns email address, and paste your eDesk channel address.
- Repeat the same process for Claims Notifications and Refund Notifications.
- Update Amazon Messaging Preferences
- Go to Messaging and click on Edit.
- Click Add another under Buyer Messages email address, and paste your new eDesk channel address.
- Repeat the same process for Confirmation Notifications, Delivery Failures, and Buyer Opt-out.
- Press Save to update Amazon.
Further Readings
If you would like to find out more about connecting eBay with eDesk, click here.
If you would be interested in learning more about connecting Walmart with eDesk, click here.