For peace of mind, eDesk enables you to check how your Feedback requests appear to your customers.
This help file will guide you through previewing and testing the Feedback requests that are sent out to your customers.
Before you start
- The eDesk Feedback is available as an Add-On. To find more information, click here.
- You’ll need to have access to Feedback in your Settings. If you don’t have access, you can request it from an Admin user within your business.
01 Checking how your Feedback requests will appear to a customer
eDesk's Feedback Add-on allows you to set up rules that instruct eDesk to gather feedback automatically from your customers. Each rule has one or more pre-written messages that eDesk uses to form the email that is then sent to a customer when their order meets the conditions in the rule. To read an overview of Feedback rules and messages, click here.Sending automated emails out to your customers can be a bit unnerving at first, but don't worry, eDesk lets you preview these messages so that you can see how they will look when your customer reads them. You can also send a test Feedback Request email to yourself.
Note: An important note for messages that have been sent requesting feedback for Amazon orders. Viewing these messages in Amazon Seller Central does not provide a true preview of how the message appears to customers because Amazon removes the formatting from the sent messages in the listing. If you would like to see the Amazon feedback requests as they have appeared to your customer, follow the steps in this article.
02 Previewing your Feedback requests
You can preview both the messages that have been sent already and those that are scheduled to be sent.
To preview Feedback messages that have yet to be sent to the customer:
1. Go to Feedback → Scheduled to Send.2. Click the ellipsis ... at the end of the row for the message you would like to preview. Select Preview message from the menu.
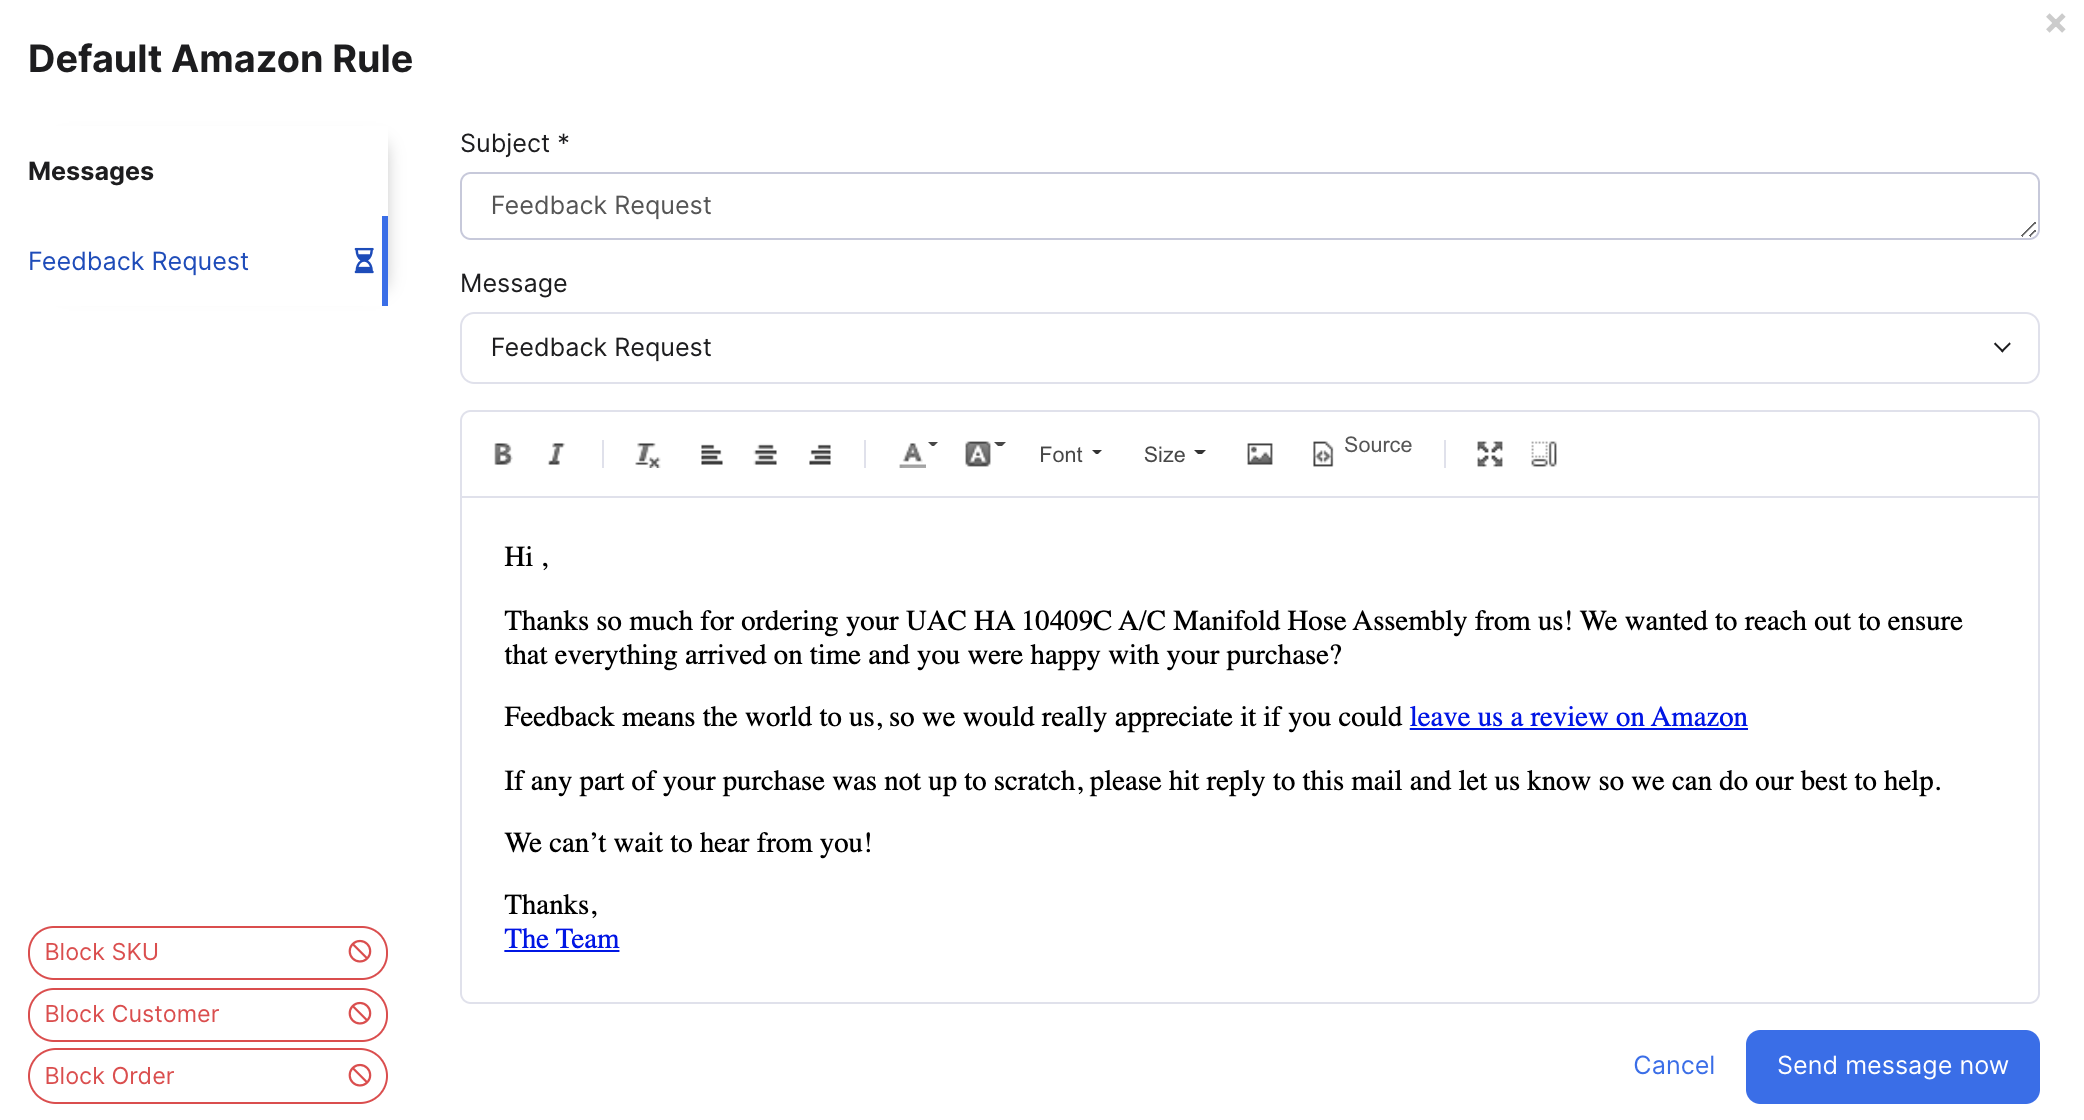
 3. The message is displayed in a new window and looks as it will when the customer reads it.
-
The Subject field is the subject of the email that the customer receives.
-
The main field is the body of the email that the customer receives.
The other fields on this screen are not in the customer email. Instead, they provide information about the message, allow you to edit the message that will be sent to this customer, and also block this Feedback request and future Feedback requests.
-
The Rule used to create this message is displayed in the top left of the window.
In the example, the message is derived from a Custom Feedback Rule that used a Default Amazon Rule template. -
Click the Message field to display a menu showing all the message templates in the Rule. Select a template to change the message and subject in the email.
-
Click the body of the email to edit the message manually.
-
Click Block SKU to block any future Feedback requests being sent to this customer for this SKU, including this one.
-
Click Block Customer to block Feedback requests being sent to this customer for this order and any future orders.
-
Click Block Order to block Feedback requests being sent to this customer for this order.
-
Click Send message now to send the message immediately.
-
Click Cancel or X in the top-right corner to close the window without saving any changes. The message will be sent when it is scheduled to go out.
To view Feedback messages that have already been sent to the customer:
1. Go to Feedback → Sent.
2. Click the ellipsis ... at the end of the row for the message you would like to preview. Select View message from the menu.
 The message is displayed in a new window and looks as it did when the customer read it.
03 Sending a test Feedback email to yourself
A great way of checking the formatting, images, hyperlinks, and message in a Feedback request is to send yourself a test email. This email is generated from a template in any of the Feedback rules you have already created. The rule and template can be inactive or active.
1. Go to Settings → Feedback Rules.
2. Click the rule containing the message you want to test.
3. Click the ellipsis ... in the top right-hand corner of the message template, and select Send test email from the menu.
 4. In the popup window, enter the email address that will receive the test email, and select the language you want to use. The list of available languages is determined by the translations you have provided for this template.

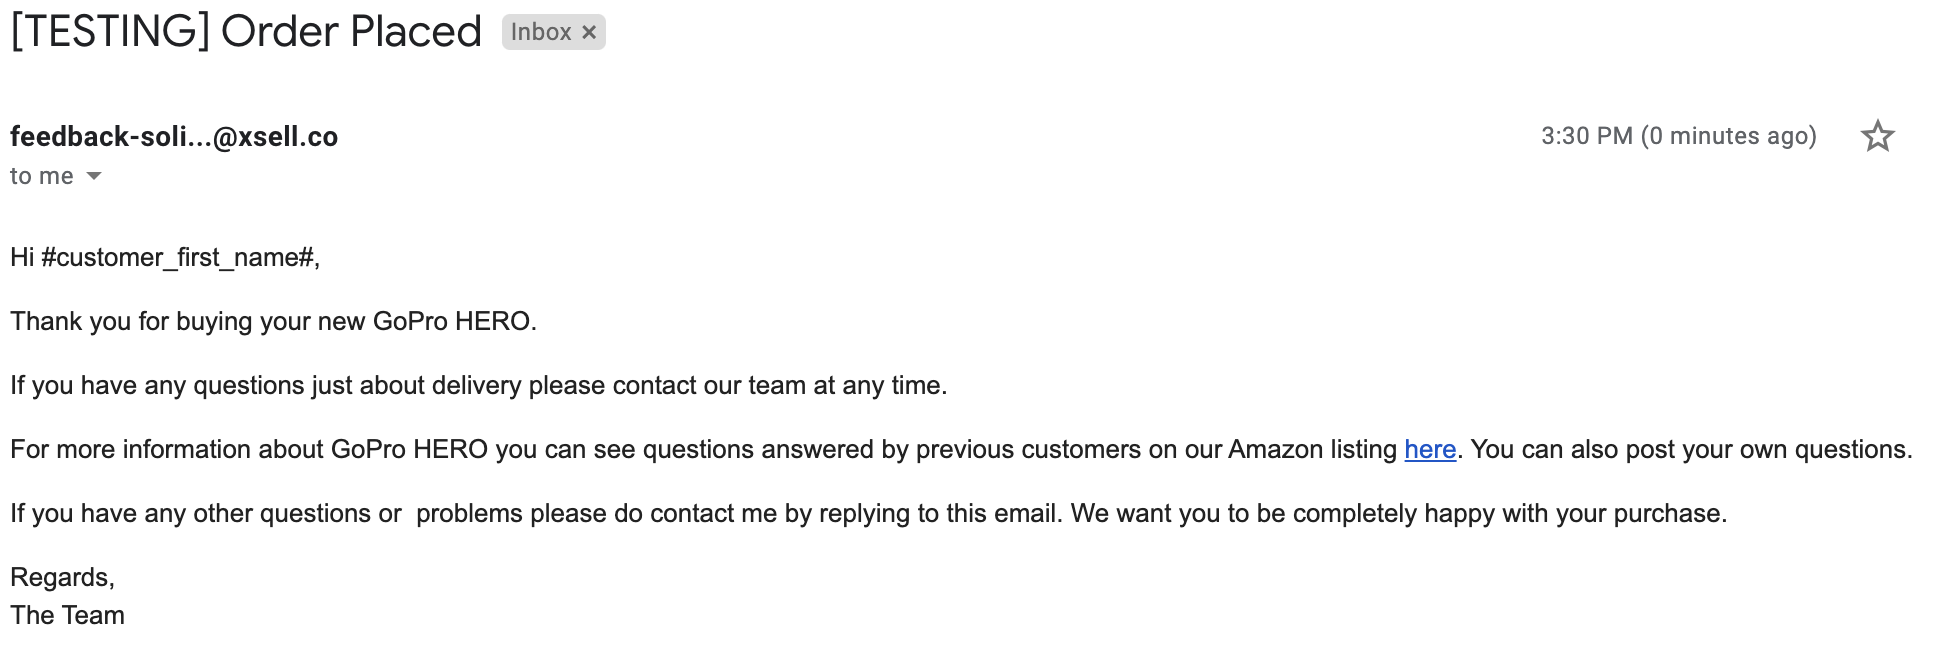
5. Click Send email. When the email arrives, you can see what it will look like to a customer.

-
The Subject field is prefixed by [TESTING] to indicate it is a test email. The rest of the subject is derived from the subject in the template.
-
The From email address is feedback-solicitation@xsell.co
Further Readings
To learn about the Feedback Dashboard, click here.
To learn how the Feedback Rule Checker can help you ensure your Feedback requests are set up correctly, click here.