Creating ready-to-go templates to help your teams deliver expert customer support in record time!
This help file will review the possible reasons why a Template won't show in a ticket and how to fix it.
Before you start
- You’ll need an Admin or Team Leader login to eDesk to view, edit and create Templates.
- You'll need to have Templates created in your eDesk account. To find out more about this, click here.
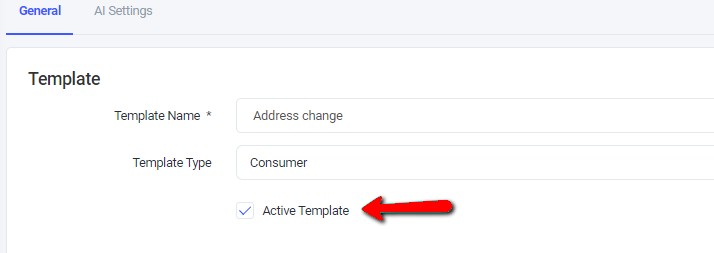
01 Make sure the Template is active
The first thing to check would be to make sure that the new Template you created is Active, if not it's normal that it won't show.- Go to Settings > Smart Tools > Templates.
- Click on the new Template to edit it.
- Ensure that the option Active Template has been ticked.
- Scroll down and Save changes.
02 Review the Usage Conditions
The most common reason why a Template won't show in a ticket would because the Usage Conditions selected do not match the ticket in question.
For example, in Usage conditions, if you have order statuses selected then the ticket will need to have an order attached for the template to be available as an option.
 Pro Tip: It's highly recommended to double-check your Usage Conditions for the Template to ensure that the ticket you're trying to use it for is matching them.
03 Easy Fix
Here's a trick to ensure your Template will always show on a ticket:
- For orders-related tickets, you can choose to tick all the Order Status conditions, meaning that the Template can be used for all orders-related tickets.
- For the other tickets, you can choose to untick all the Order Status conditions, meaning that the Template can be used for any ticket at all.

Further Readings
If you'd like to find out more about Templates in eDesk, click here.
Interested in learning more about using templates to send prewritten messages to your customers, click here.