Reduce customer queries by up to 30% by publishing help articles to your website that enable customers to self-serve. Then attach your Knowledge base to your Training content to enhance your AI responses.
This help file will guide you through setting up a Knowledge base on your website.
Before you start
- You’ll need to have access to Knowledge base in your permissions. If you don’t have access, you can request it from an Admin user within your business.
01 What's a Knowledge base in eDesk?
The Knowledge base feature enables you to create a library of reliable help articles and add it to your website. This library - or Knowledge Base - empowers your customers to self-serve and quickly find answers to their questions. Agents can consult the Knowledge base to enable them to better support the customer or point customers to it. If your business uses eDesk's Chatbots or Smart Reply in AI Assist, you can add your Knowledge base as Training content to help them deliver disciplined and informed answers.
Once set up, agents can look in the Knowledge base when they're answering customer queries and embed or link any article in it into a reply with a single keystroke, using the shortcut $. With agents working from a single source of truth, your customers will receive a consistent, high-quality service.
02 Setting up the Knowledge base
To set up the Knowledge base, select the More icon (...) in the primary nav to display a sub-menu and then select Knowledge base.
Step 1: Create a layout
First, you need to create a layout that will determine the appearance of your Knowledge Base.
- Select Layout and Design in the secondary nav, to display the Layouts page.
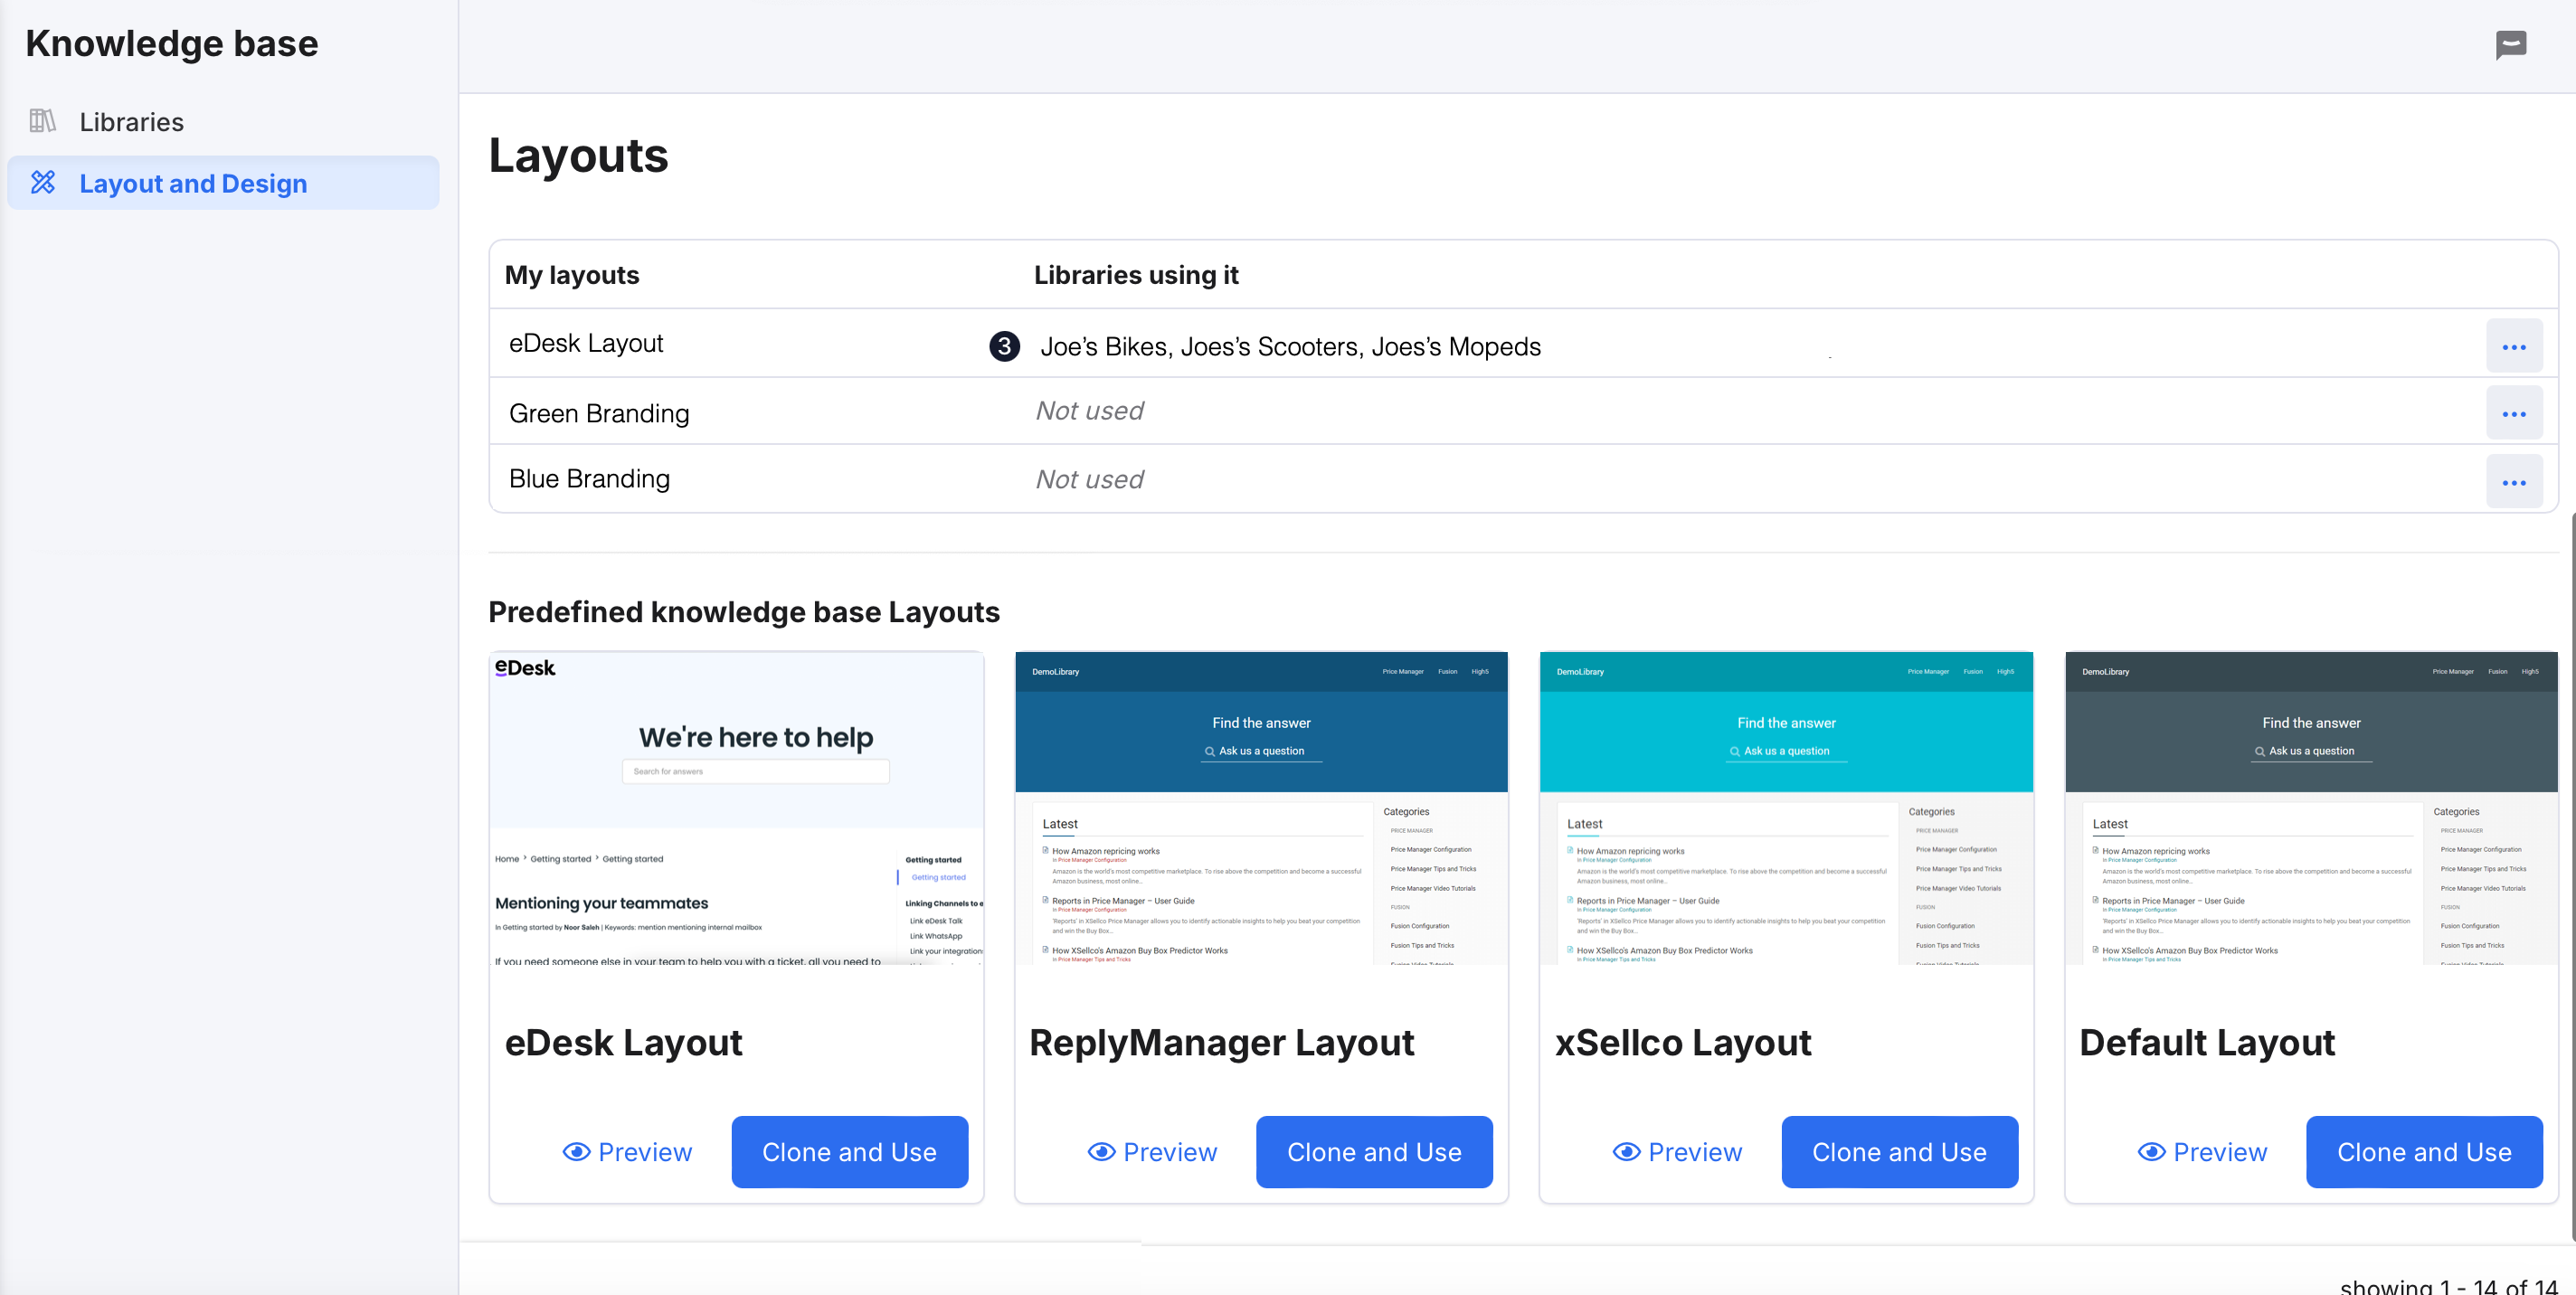 In the Predefined knowledge base Layouts section, a range of predefined layouts are displayed. You'll select one, which you can then restyle via CSS later on.
 - Select Preview for a layout to see what it will look like.
Pro Tip: The eDesk Layout includes an option for your customers to contact you. The customer selects Submit a ticket at the bottom of the page in the Knowledge base, which opens a form. Once they complete the form and submit it, a ticket will be created in the Mailbox that's linked to the channel for that library. - When you have decided which predefined layout to use, select Clone and Use to create a new layout that's based on the one you've selected. This opens a new Clone Layout modal window:
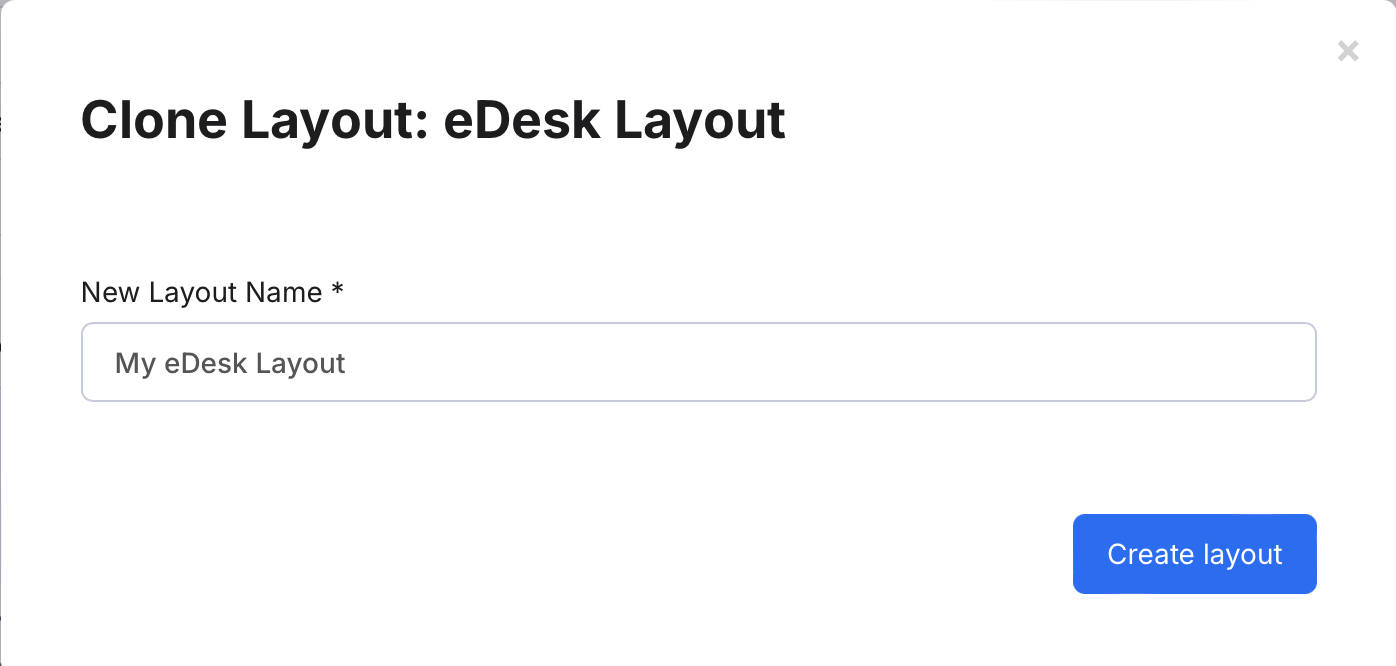
- The New Layout Name field is pre-populated with the name "My [Layout name]", where [Layout Name] is the name of the predefined Layout you cloned. You can replace this default by typing in your own name for the layout if you wish.
- Then select Create layout.
The modal window closes, and the new layout is added to the list on the Layouts page.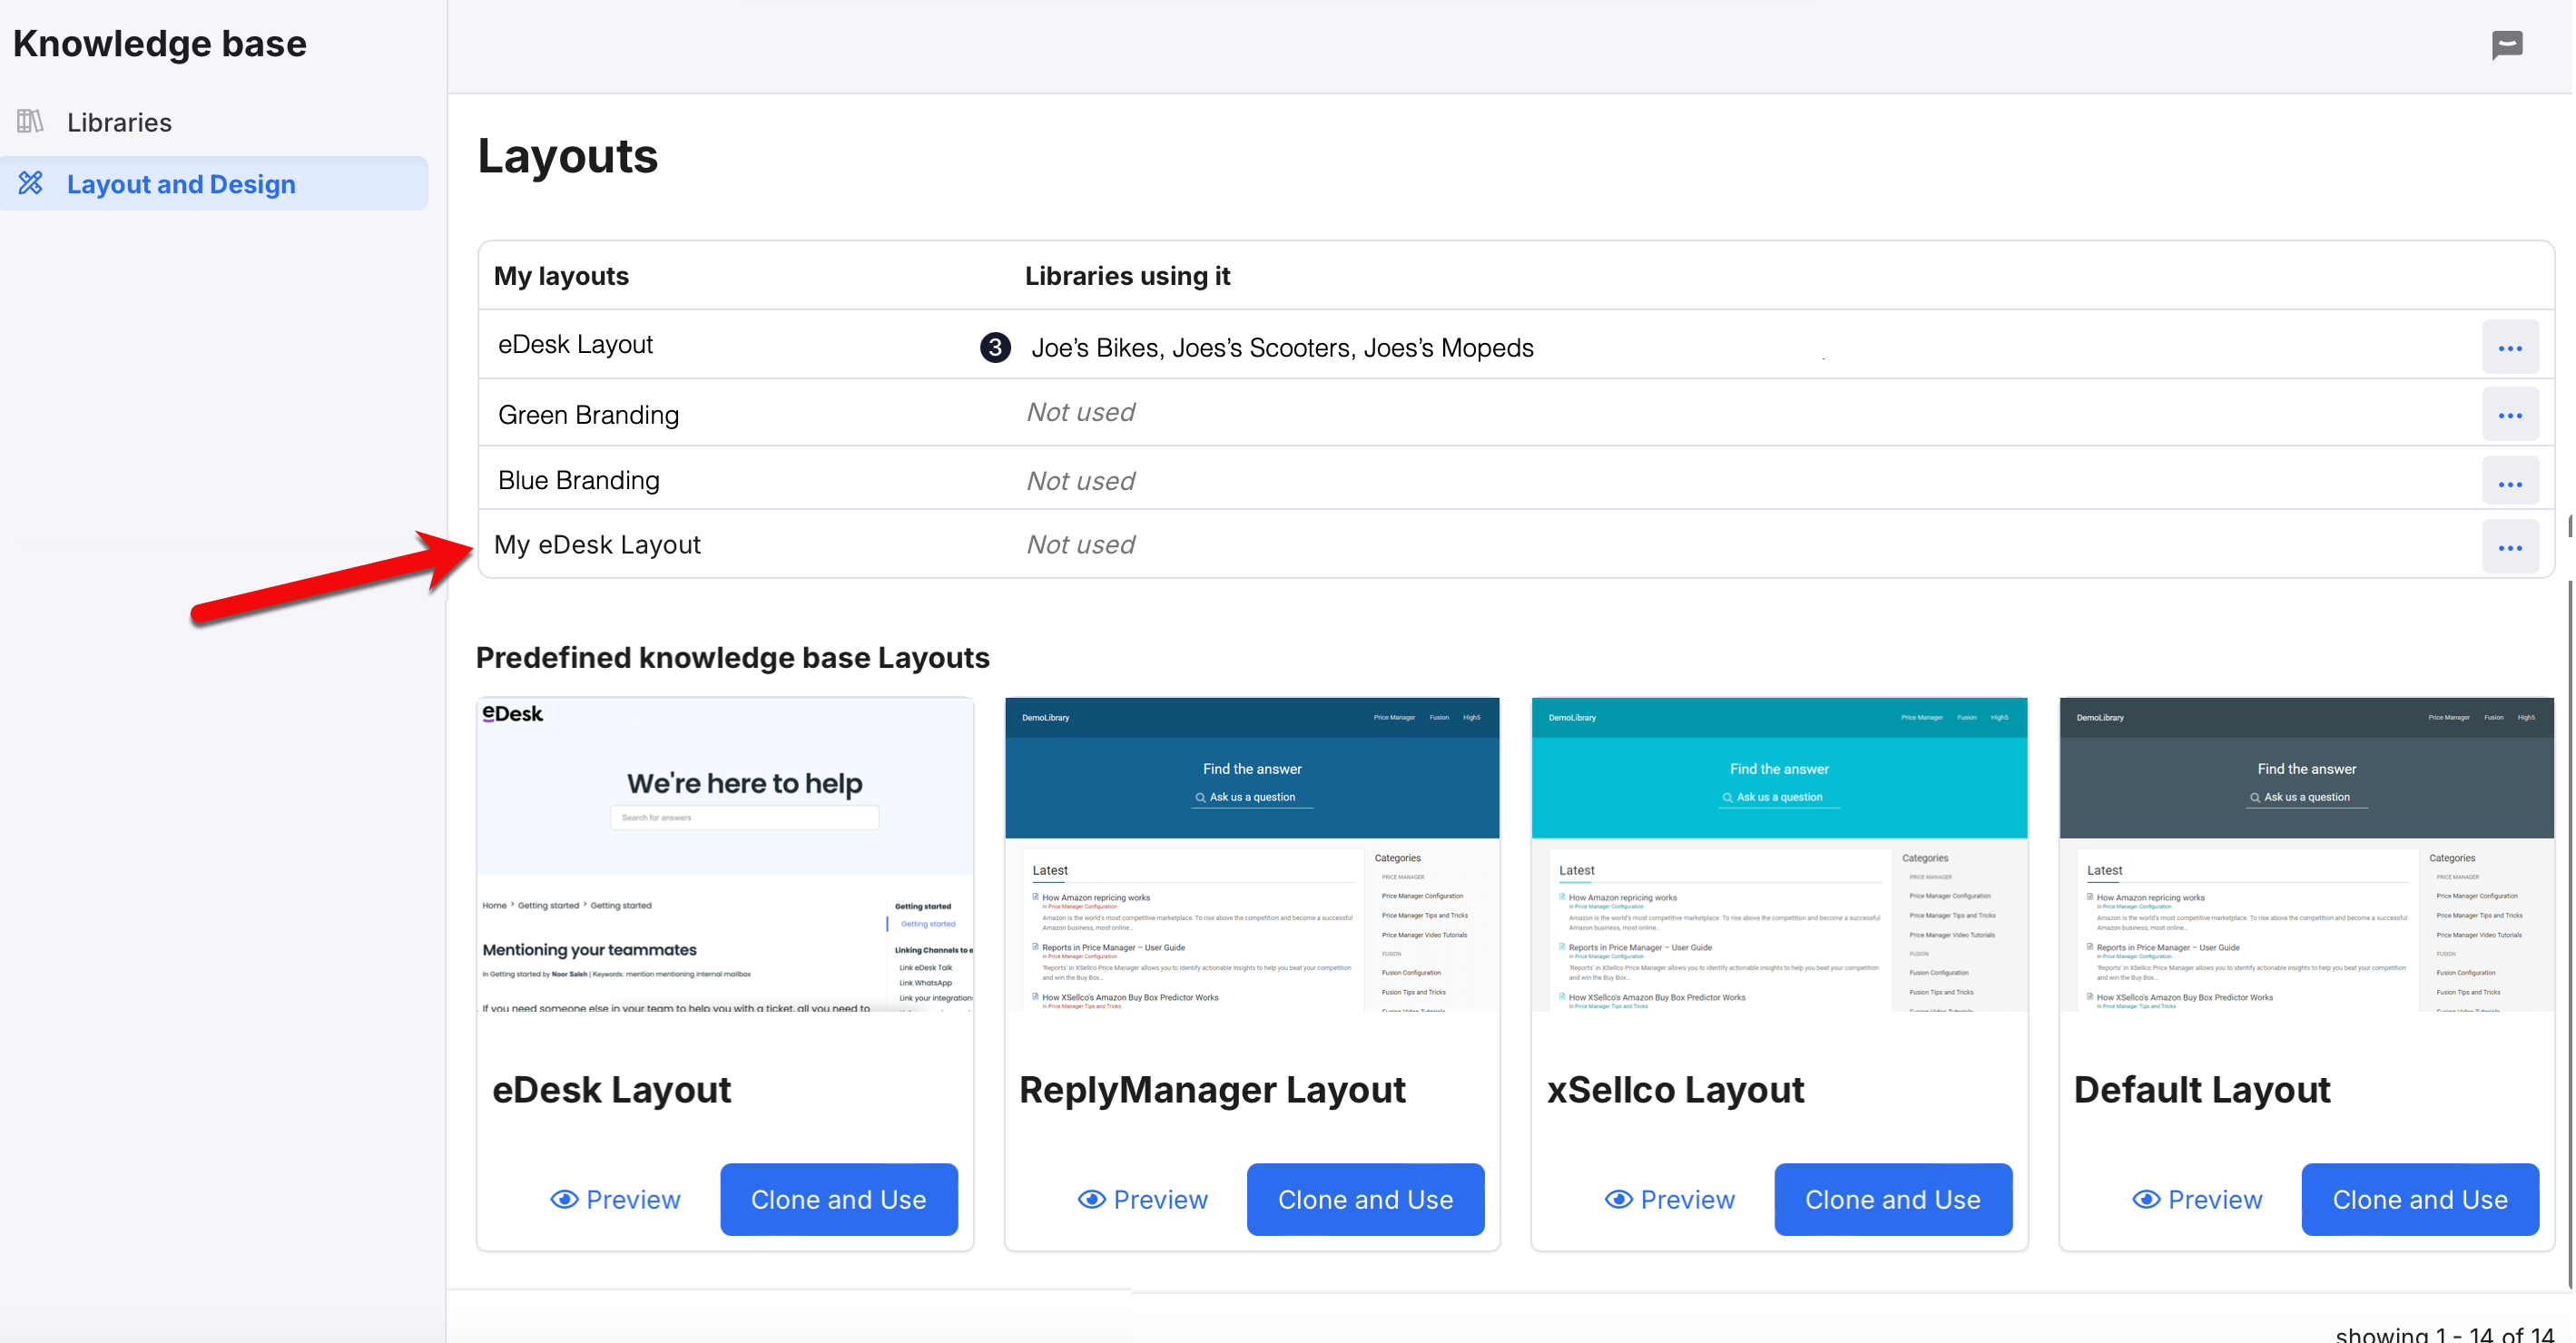
- Select the new layout in the list to open the Edit Layout page, where you can:
-
Logo: Upload your logo, which will be displayed in the Knowledge Base. (The image must be 300x300 pixels in JPEG or PNG format and cannot be larger than 1MB)
-
Style: Update the CSS (style sheets) to match your website branding. You will need someone with web development/CSS skills to do this.
-
HTML: Update the HTML Elements to modify the layout and branding as you require. Again, this should be done by someone with web development skills..
-
Hit Save at the bottom of the page to save your changes. The Preview pane will update to show the changes you've made.

Step 2: Create a library
- Select Libraries in the Knowledge Base menu on the left-hand side of the page to open the Libraries page.
- Select + New Library to display a set of fields that you must complete.

The fields are:
-
Library title: The title of the library within eDesk. Not visible to the public.
-
Library address: The name that will appear in the URL of the Knowledge Base. So if you put 'mylibrary' in as the Library address, the URL for the library will be https://edesk-support.com/mylibrary/
-
Library Cname: (Optional). If you want a custom domain instead of using
edesk-supportin the URL, you can enter your own unique domain name here. Additional setup is needed within your domain settings and technical expertise is required. In your DNS Configuration, you must point your domain to: support.edesk.com - Our team may need to verify the records on our end, so feel free to reach out if you need assistance. - Language: The language in which the articles will be created. Please note, there is currently no translate tool within the Knowledge Base.
- Layout: Select the layout you have just created (or choose one you created previously). This determines the appearance of your Knowledge Base.
-
Linked channels: Select a channel to allow the library articles to be used when responding to tickets via the $ shortcut. Note: If you have cloned the eDesk Layout and have retained the Submit a ticket option at the bottom of the page in the Knowledge Base, you must select a channel here, which will then be linked to the ticket that will be created in the eDesk Mailbox when a customer uses this option to get help from your team.
- Default click action on snippet: When selecting an article in the Reply box, either insert a link to the article or insert the body of the article into your reply.
- Password protection: If you add a password to your library, this will be required by any agent or customer in order to view the Knowledge base. You can disable password protection at any time by ticking Disable and selecting Save changes.
Note: Creating a library will generate a URL. This URL can be used as a stand-alone link or can be added to your own website. The URL for your library will look like this:
https://edesk-support.com/library_name/article_name
Once the library has been created, you can access it by selecting its title in the Libraries list and then create and view articles. You can add your first article at this point, or you can edit the library further to add some categories to it.
To edit the library, select the More options (three dots) icon in the row for the library.
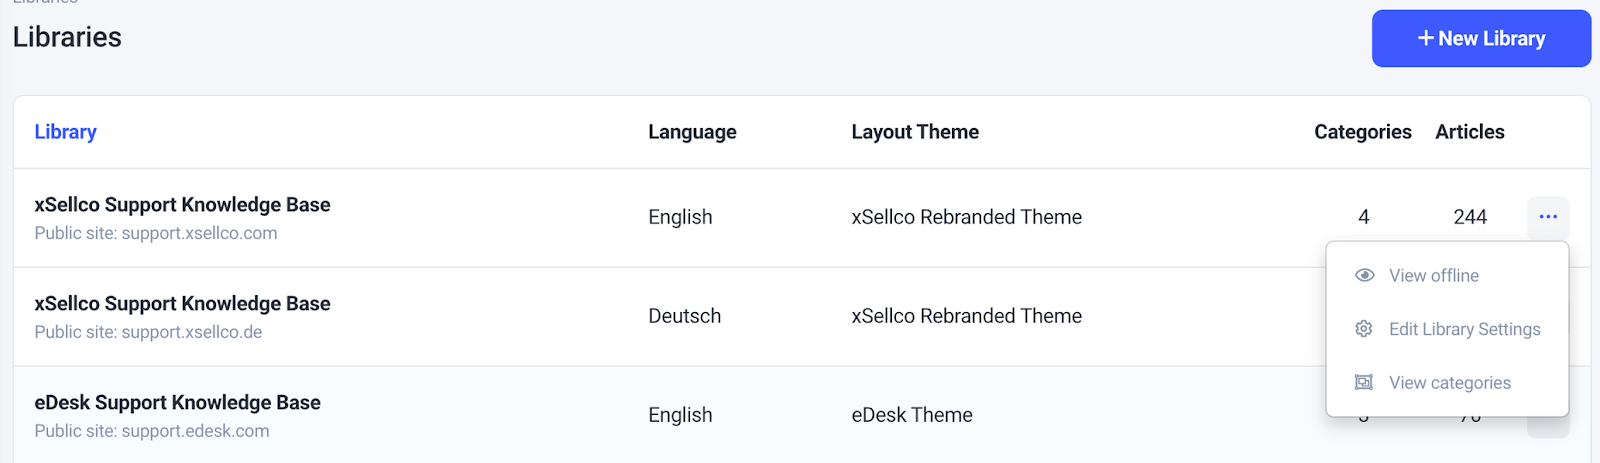
- View offline shows a preview of the unpublished libraries.
- Edit Library Settings allows you to update the settings after the library has been created.
- View categories allows you to create new categories and view the existing list of categories in your library.
- Clone library allows you to clone the library for use on another site.
Step 3: Create a Category
- Once the library has been created, select More options (three dots) > View categories to display the categories, including the default category that is added by eDesk.

- To add a new category, select + New Category.

- Complete the fields:
- Title: Category name.
- Description: Description of the category you have just created.
- URI: Used to customize the text that appears in the URL.
- Order: Used to customize the order in which categories appear in the menu.
- Library: The library to which the category belongs.
- Parent Category: Make this the parent category or select another previously created one.
Step 4: Create a Sub-category
- Once the category has been created, select select More options (three dots) > View categories.
- Select + New Category and select the previously created category in the Parent Category section.
This will then create a new sub-category and you will be able to add articles to it.
Step 5: Create an Article
- Select the library and select + New Article.
- Complete the fields:
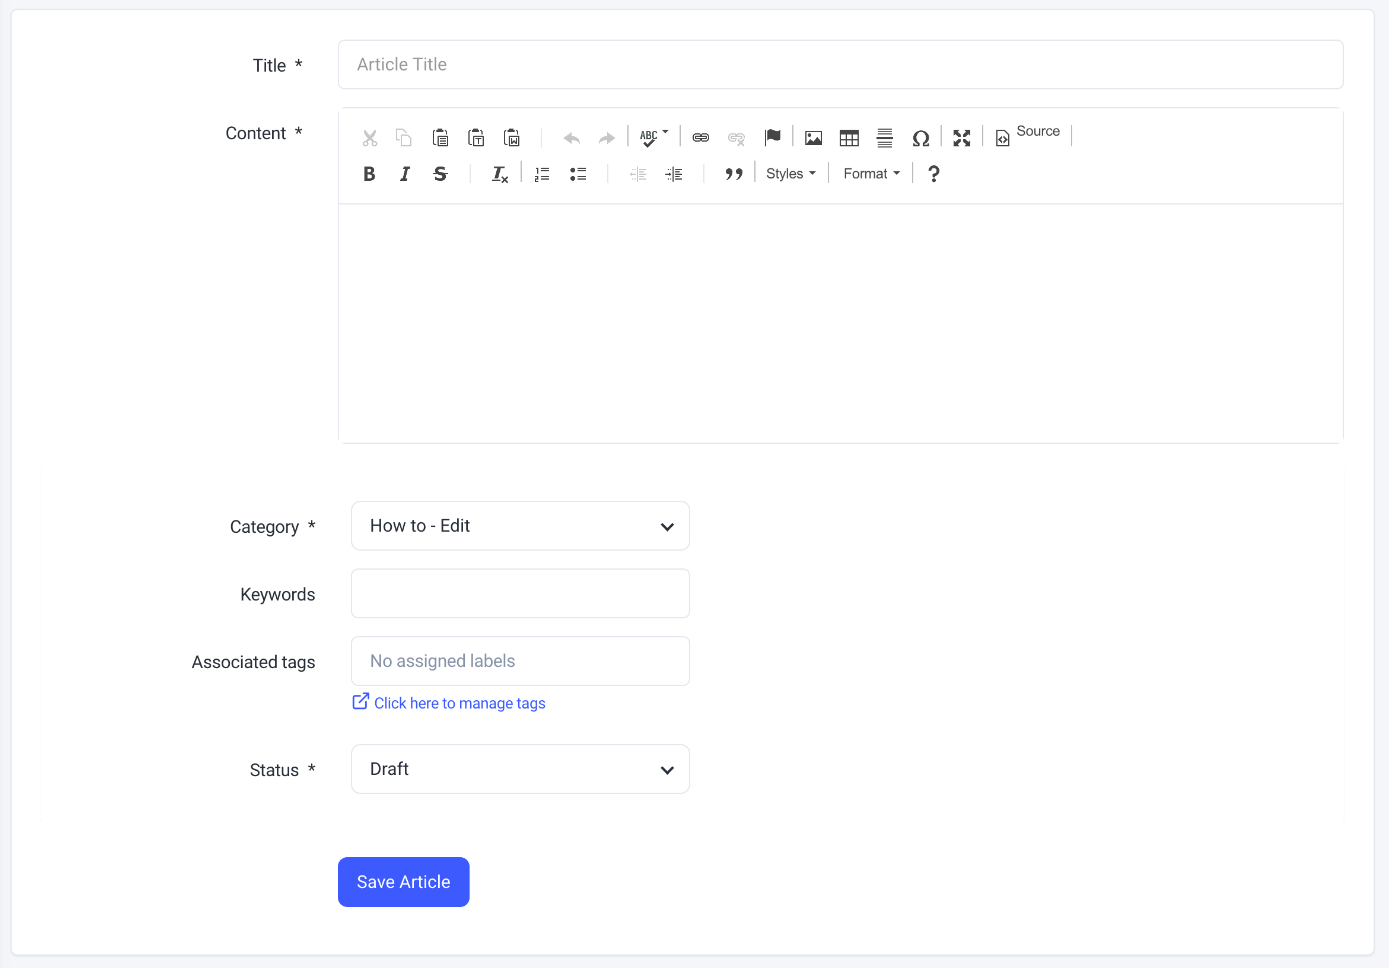
- Title: The name of the article.
- Content: Body of the article.
- Category: Choose from the categories you have created.
- Keywords: Used for searching the Knowledge base. Note: AI is used for the Knowledge base search terms, so even if your customer doesn't use the exact keywords you write here, all content will be scanned for relevance.
- Associated Tags: Tags are searchable in the mailbox, and allow agents to embed articles in tickets when replying to customers (see Section 4 below).
- Status: Draft/Published.
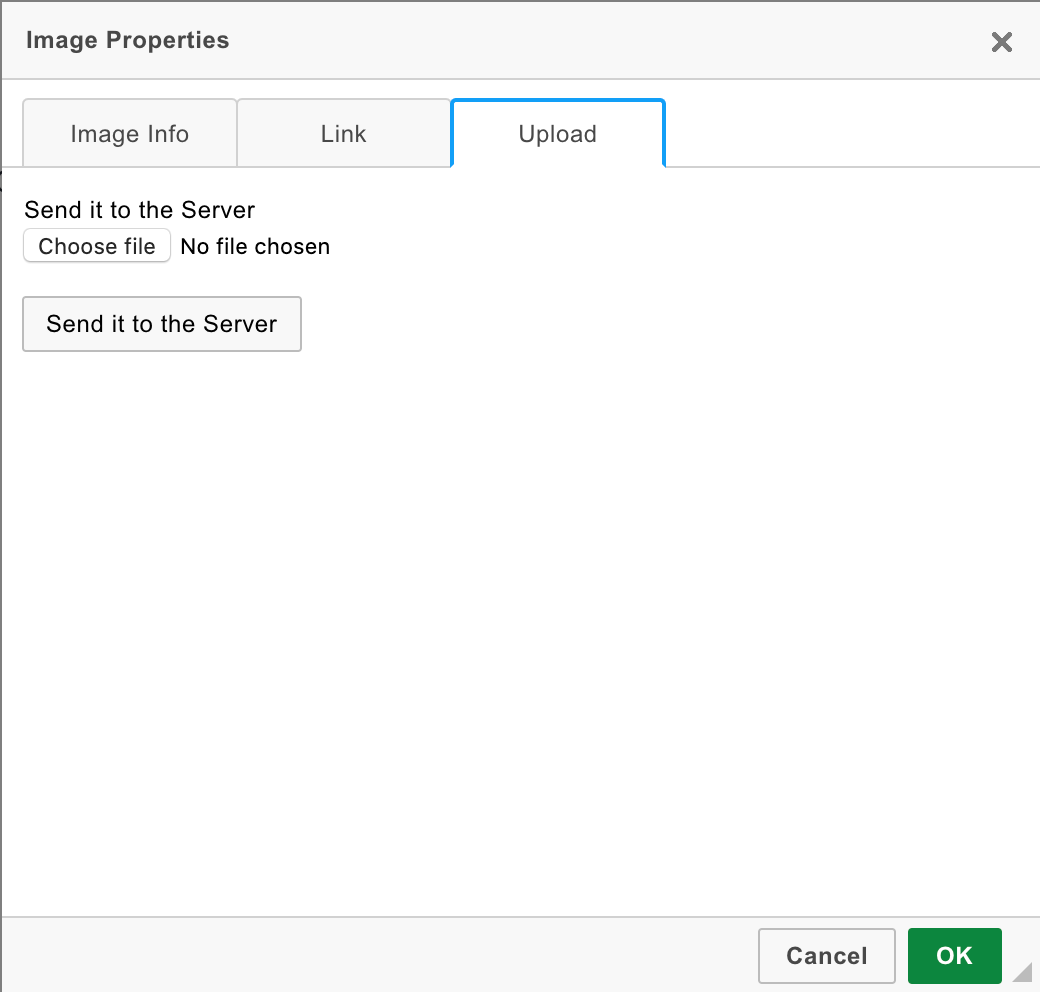
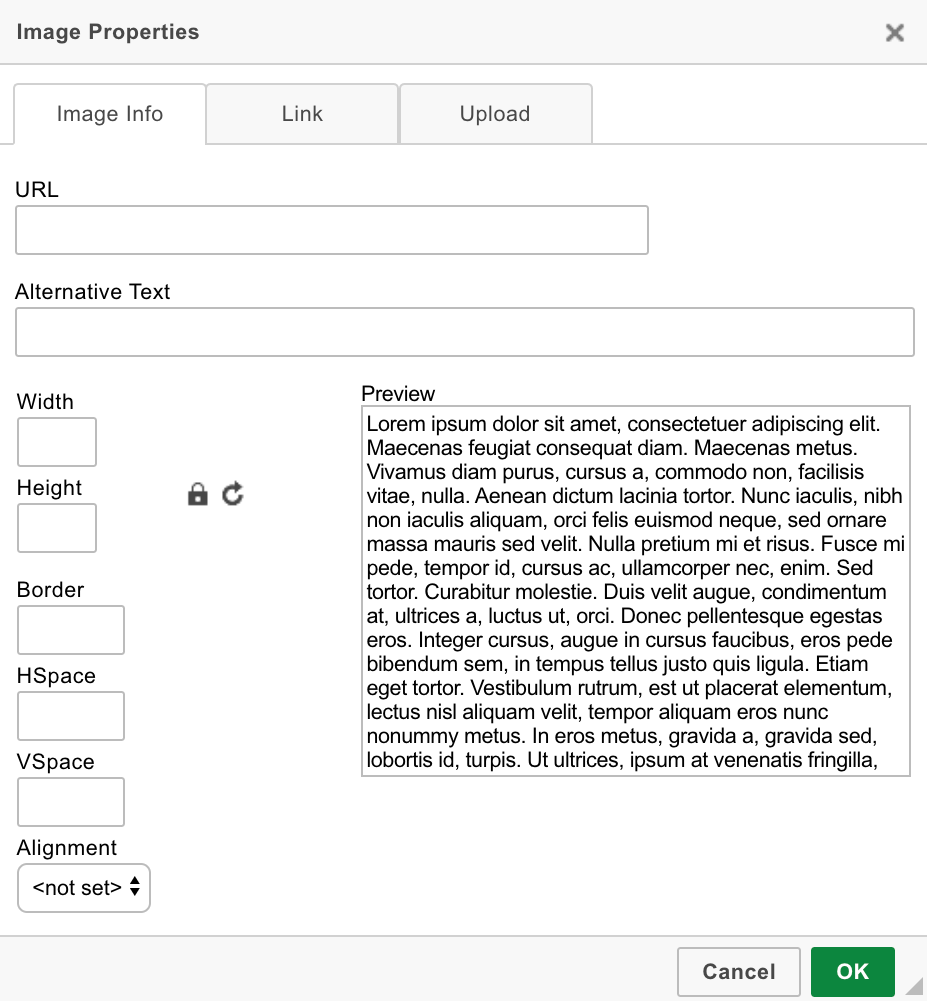
Uploading Media
Select the image icon and add a publicly hosted URL or upload an image to generate a publicly hosted URL. Please note, the media that is uploaded has a size restriction of 10MB.
To upload an image, click the Upload tab and choose a file from your computer.
For publicly hosted images, add the URL in the Image info tab. You can change the size, position and alignment of any upload in the Image Info tab.
03 Including articles in your replies to your customers
When creating an article, there is an option to associate a tag with it. This tag relates to your mailbox tags.
If a tag is associated with an article, it means that the article is available to use in your outgoing messages on any ticket in your mailbox.
To use the article, type $ to display a list of associated articles.

Selecting the article will either add a link to the article or insert the article content into the reply box. This action is based on your library settings under Default click action on snippet.
Further Reading
To find out more about connecting your Knowledge base to your Training Content, click here.
Interested in learning more about our Chatbot? Click here.