eDesk's API enables you to connect eDesk to the third party applications that you use to sell, track, and manage your shop, so that they can send or request information from eDesk. But before they can use our API, you'll need to provide them with an API token from eDesk.
This help file explains how to get an API token from eDesk.
Before you start
- You’ll need an Admin login to eDesk. If you don’t have an Admin login, you can request one from an Admin user within your business.
- You’ll need to be on the Professional plan or higher to access this feature. To see our pricing page, click here.
01 What's an API token?
An API token is sometimes called an API key, and with good reason. Like any key, it unlocks access. In the case of an eDesk API token, it unlocks access to eDesk for a third party application so that the application can request data from your eDesk account, and send data to your eDesk account.
An example is where you use a shipping management application that tracks sent items, and you'd like to include the tracking information in any order-related tickets in eDesk so that it's visible to your agents when a customer asks where their order is. To accomplish this, you can instruct the shipping application to connect with eDesk and use the eDesk API to pass the tracking information to eDesk, which will then add it to the ticket.
If the third party application attempts to send, retrieve or update information to eDesk and you haven't provided it with an appropriate eDesk API token, eDesk won't accept the request. However, it's easy to generate an API token from eDesk as long as you have a valid eDesk login.
02 eDesk's API tokens
For each third party application that needs to connect to eDesk, eDesk generates a single, unique token.
eDesk offers different types of API tokens that have varying degrees of access. These are:
-
Read-only
Only allows third parties to get data from eDesk. They can't send any information to eDesk or update any information already in eDesk. -
Full Access
Allows third parties to get data from eDesk and also create new data, delete data, and update data already in eDesk. -
Custom
Allows you to decide how much access to give the third party.
When you ask eDesk to generate a token, you'll select the type of token you'd like to provide to the application you want to connect.
03 How do I get an API token?
1. Login to eDesk in your web browser as usual.2. Go to Settings and select API Tokens.
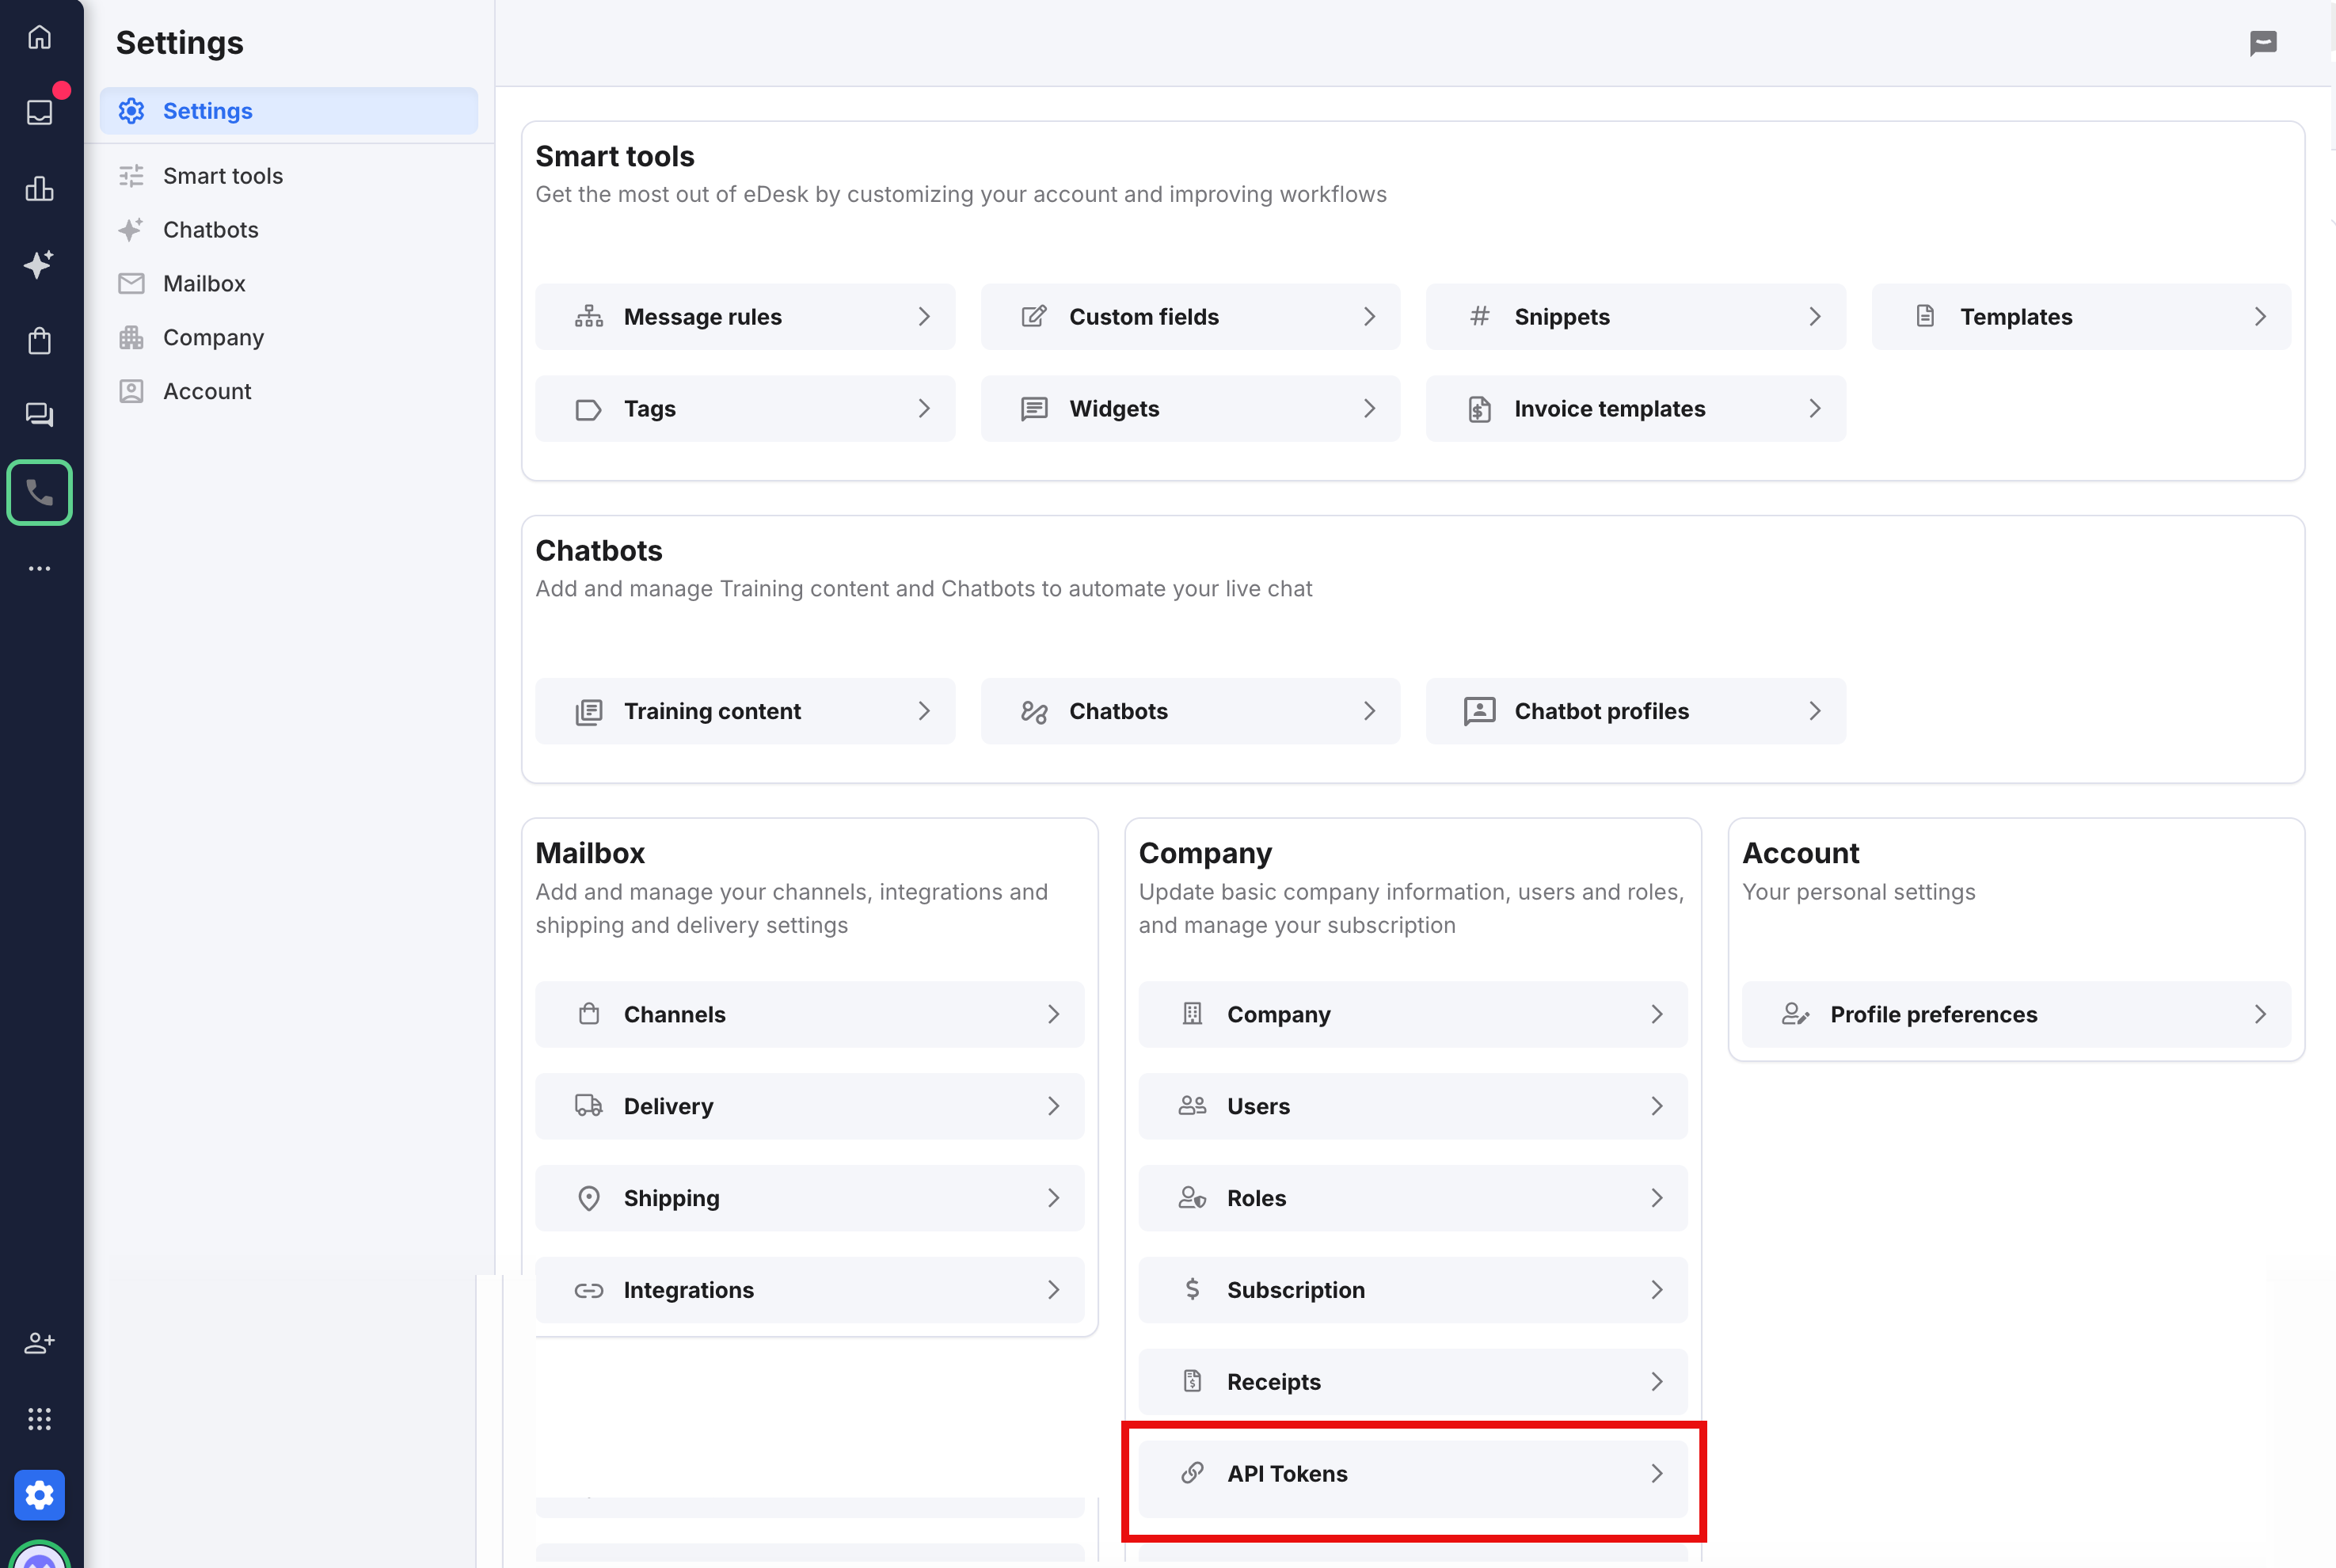
3. The API Tokens page opens. Any API tokens that you've already generated will be listed here.
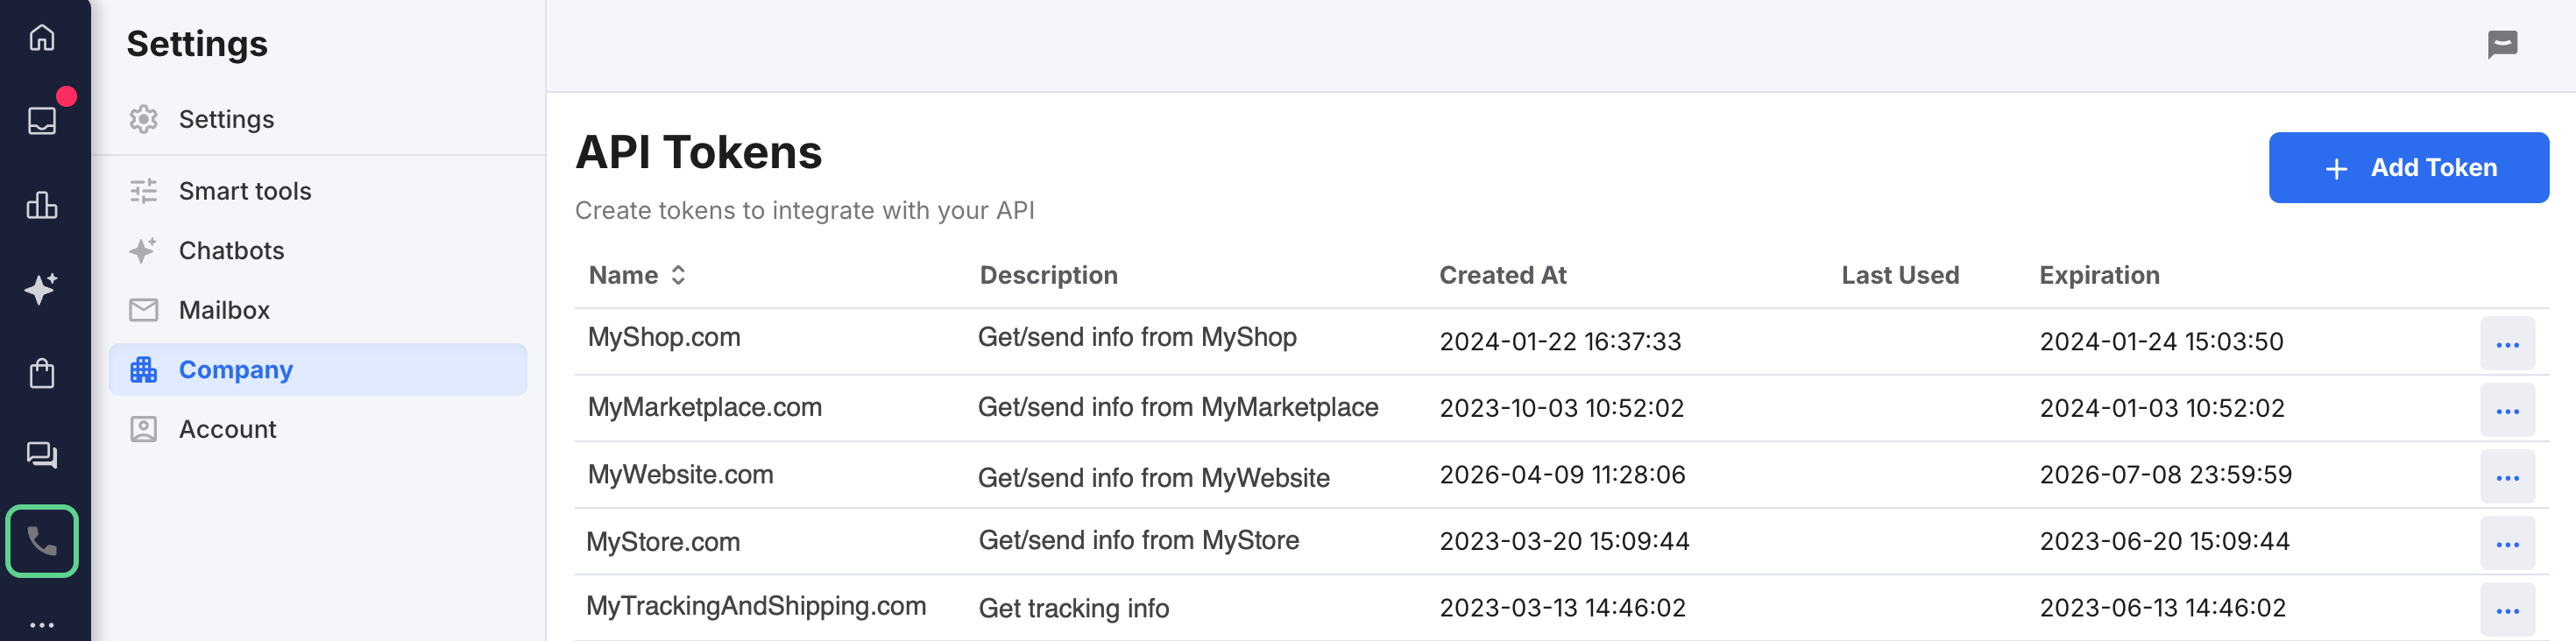
Select Add Token.
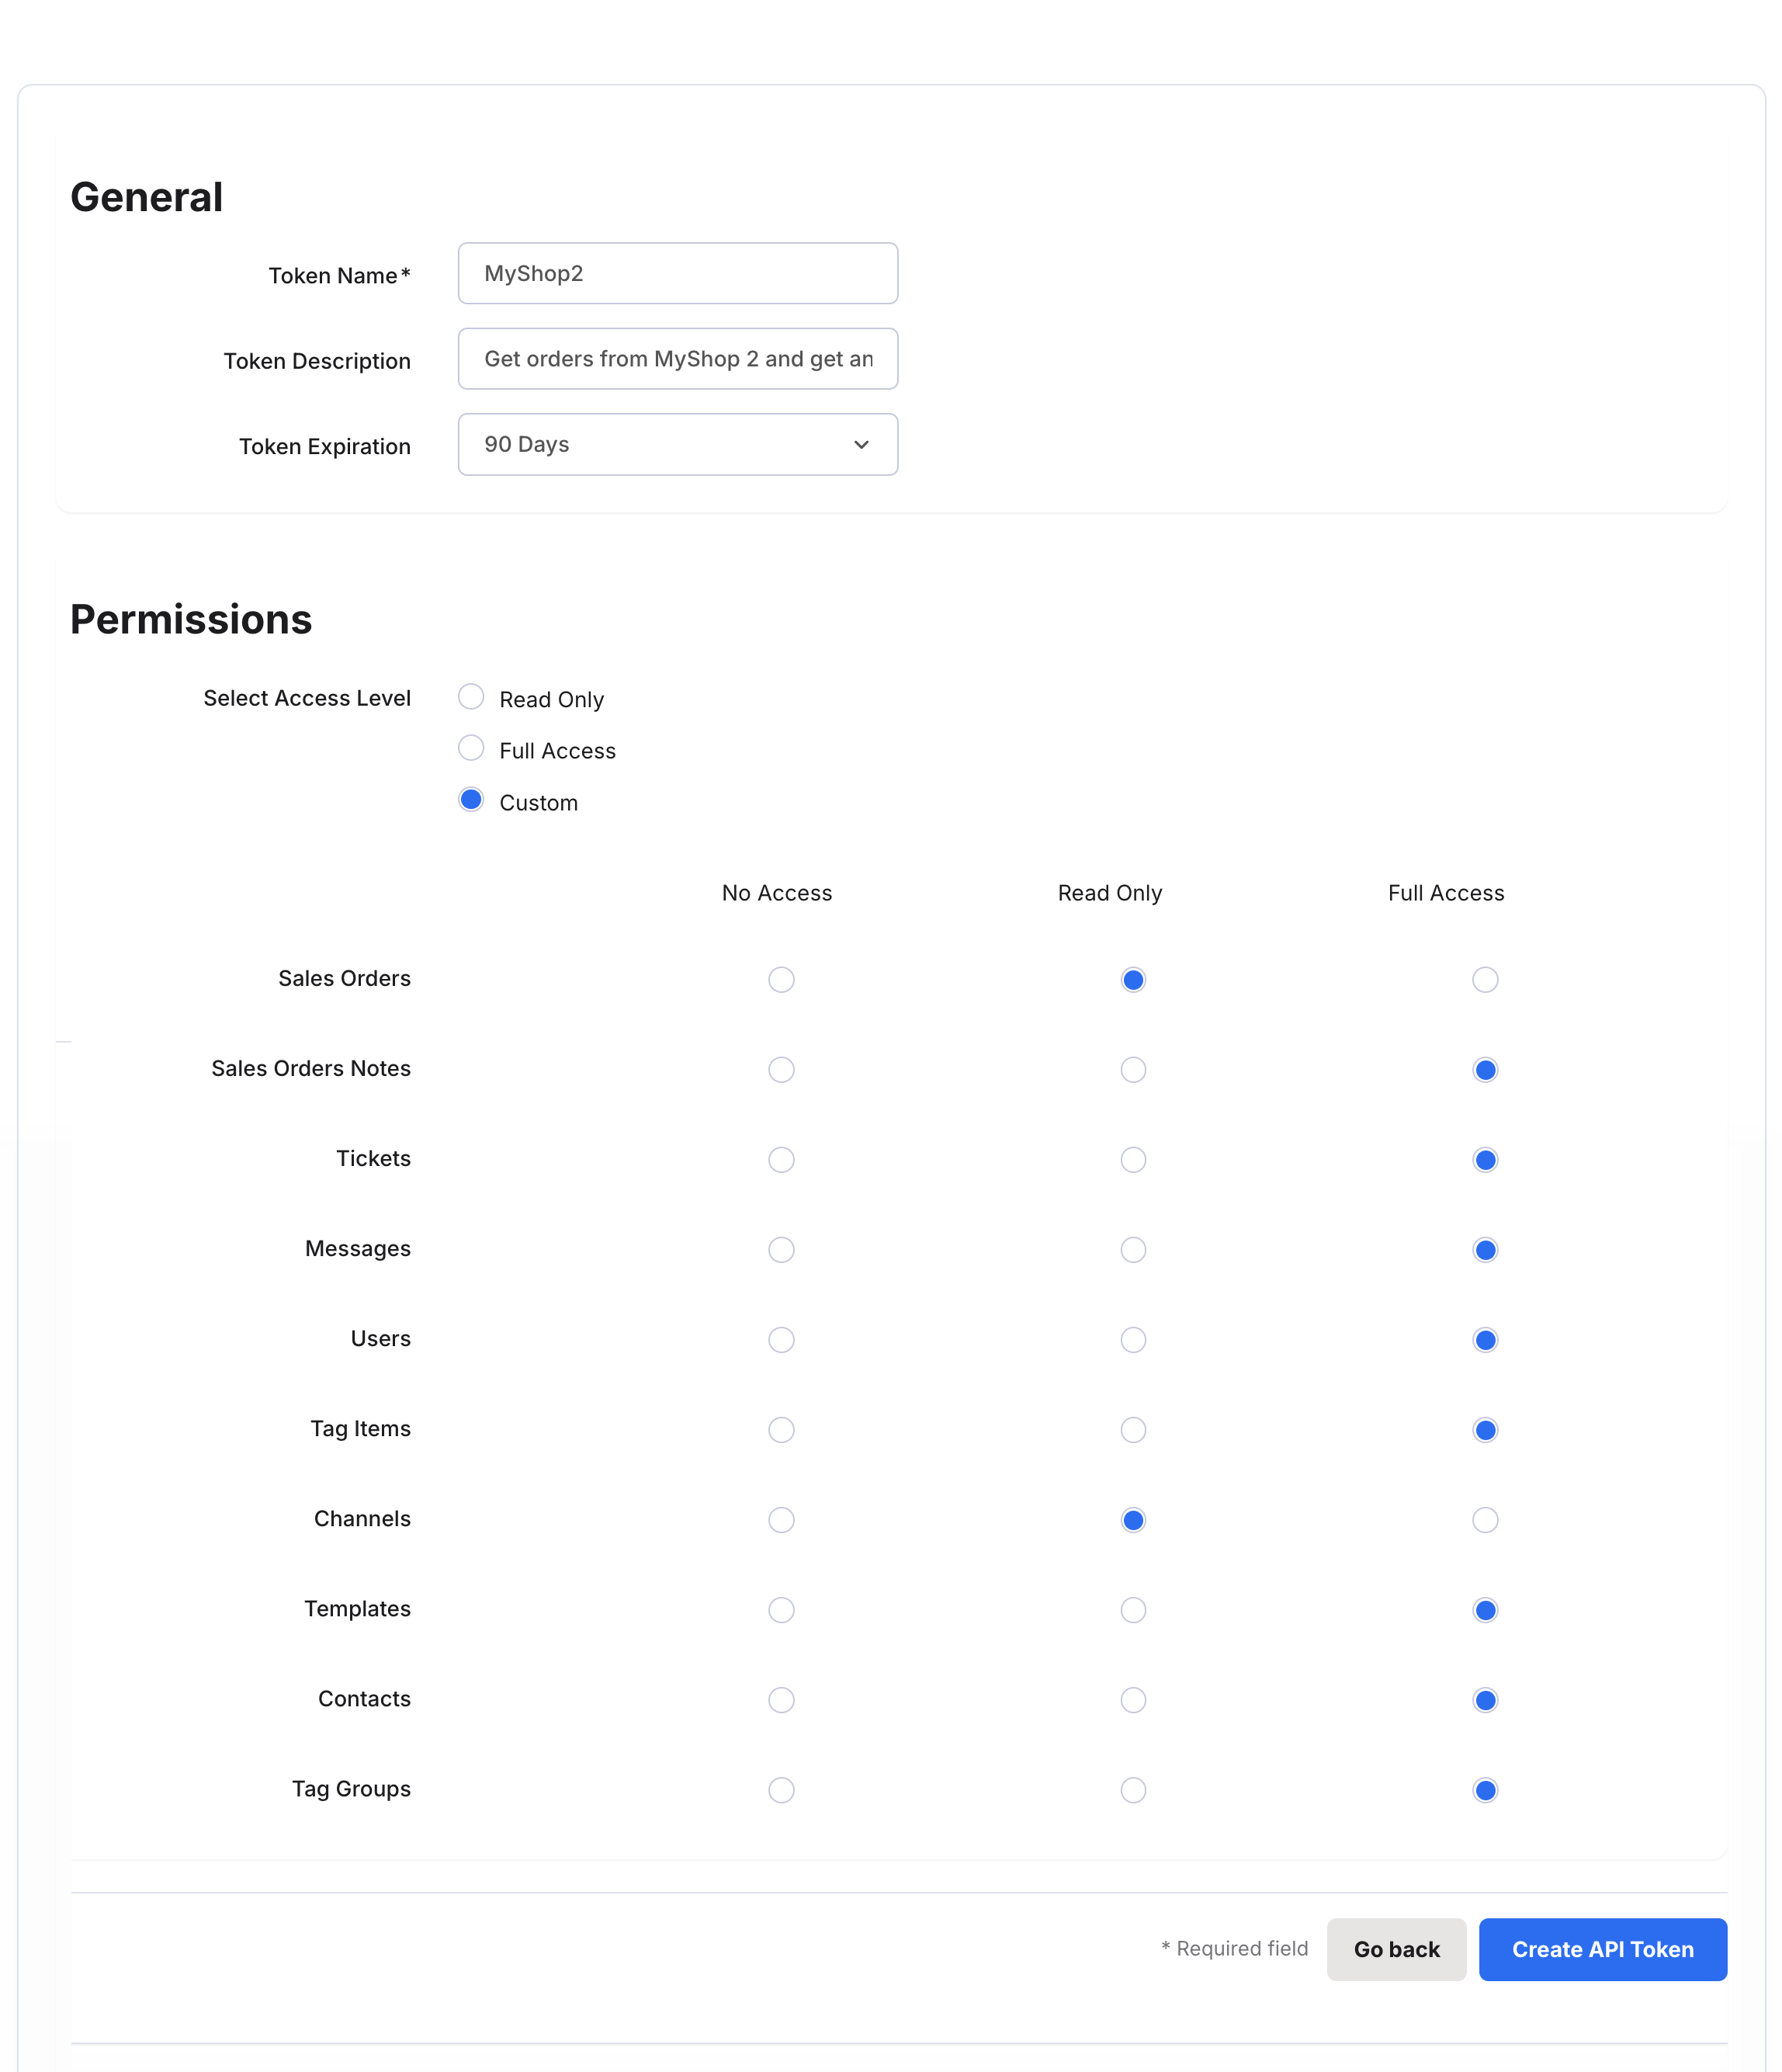
4. Complete the form as follows:
General
- Token Name
Name your token to indicate the application that will use it. - Token Description
Enter a description of how the application will use the API, e.g. to update shipping details. - Token Expiration
Set a date upon which the token will expire. 90 days is the default.
This is an important security measure, since API tokens with an infinite lifespan pose a data security risk.You will be notified by email 24 hours before the expiration date, and then again when the token expires.
Permissions
The Permissions section is where you select the type of access that the API token will provide. See section 02 eDesk'sAPI Tokens of this help file for a description of the access types.
- Select Access Level
For example, in the Sales Order section, select Full Access if the third party application needs to be able to create, delete, or update a Sales Order or get information about a Sales Order. Select Read Only if the application just needs to get information about a Sales Order. Select No Access if the application shouldn't have anything to do with Sales Orders.
The permissions apply to the following
- Sales Orders
- Sales Orders Notes
- Tickets
- Messages
- Users
- Tag items
- Channels
- Templates
- Contacts
- Tag Groups
You’ll be taken to a page where you’ll be able to copy your API key.
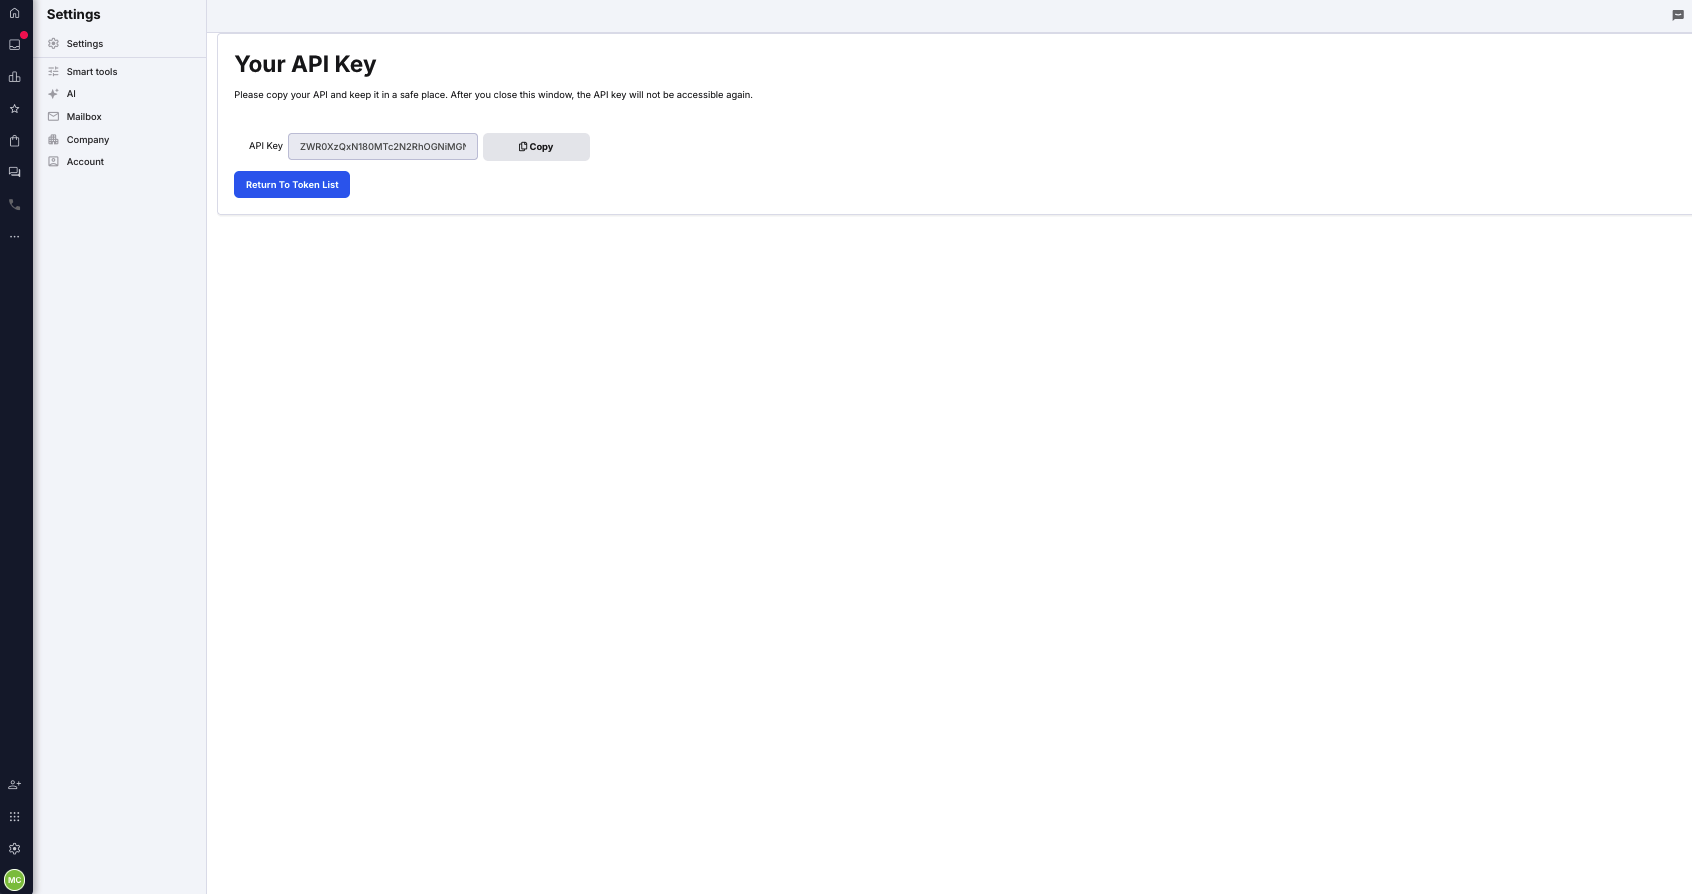
6.Select Copy to copy the token to the clipboard. Then paste it, either into your application, or into another secure location for later use. Be careful to protect the key from unauthorised people or applications.
Note: This is your only opportunity to copy the token. Once you close this page, you won't be able to copy the token again.
7. Select Return to Token List to see the new token in the list.
04 How do I delete an API token?
To delete an API token, go back to Settings > API token > click on the ellipsis next to your token and select Delete token.

05 How do I update an API token?
To edit an API token after it’s been created, simply select the token in the list to open a page showing the token details and then apply your changes. If you need to change the access provided by the API token, delete the token and create a new token with the correct access. You'll need to copy and paste the new/updated token to the third party application that uses it so that it has up-to-date access.Further Reading
To learn how to get started with the eDesk API, click here.
To read about different uses for the API, click here.