

This help file explains how to trial eDesk for free and explore the leading AI-powered customer support platform for all of your sales and communication channels.
Before you start
- Sign up to a free eDesk trial. Find out how here.
- If you'd like an introduction to eDesk, take a look at this interactive tour.
01 Trialling eDesk
As soon you've signed up to your 14 day free trial, eDesk will open and walk you through how to connect your sales and communication channels to eDesk so you can start receiving customer queries - known as tickets.1. Select the tile for each of the marketplaces and webstores that you want to connect. All selected channels are listed on the right-hand side. To deselect a channel, click the tile again or the X icon for that channel in the list to remove it.
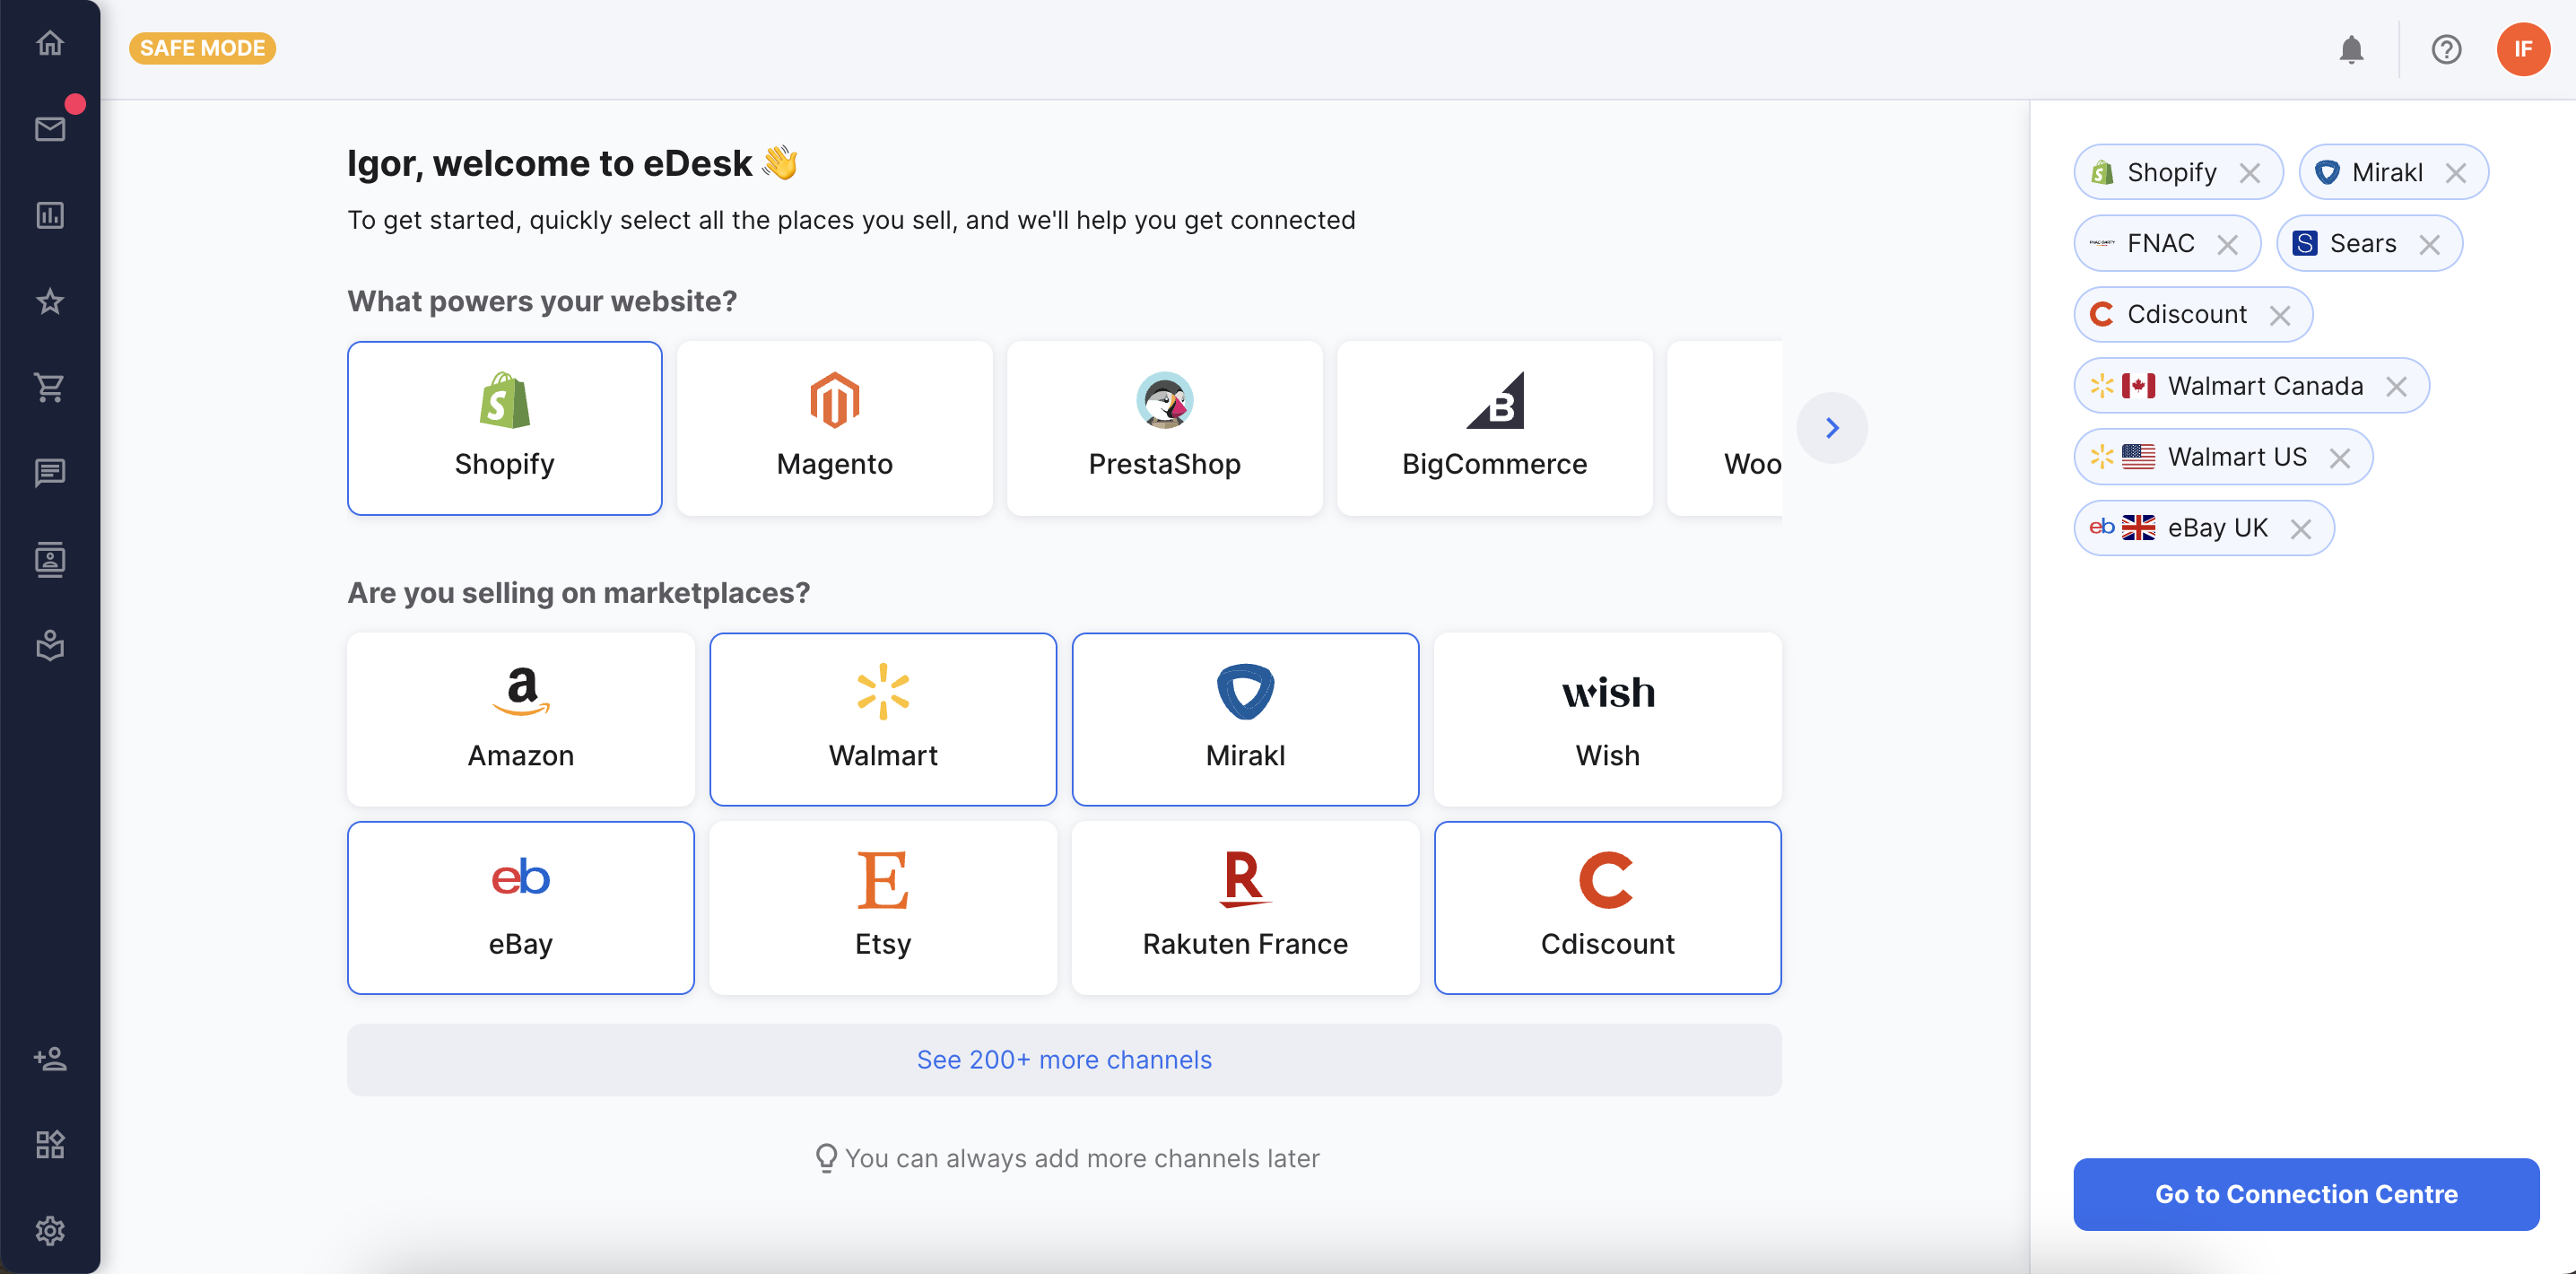
2. Once you've selected all the channels you use, select Go to Connection Centre.
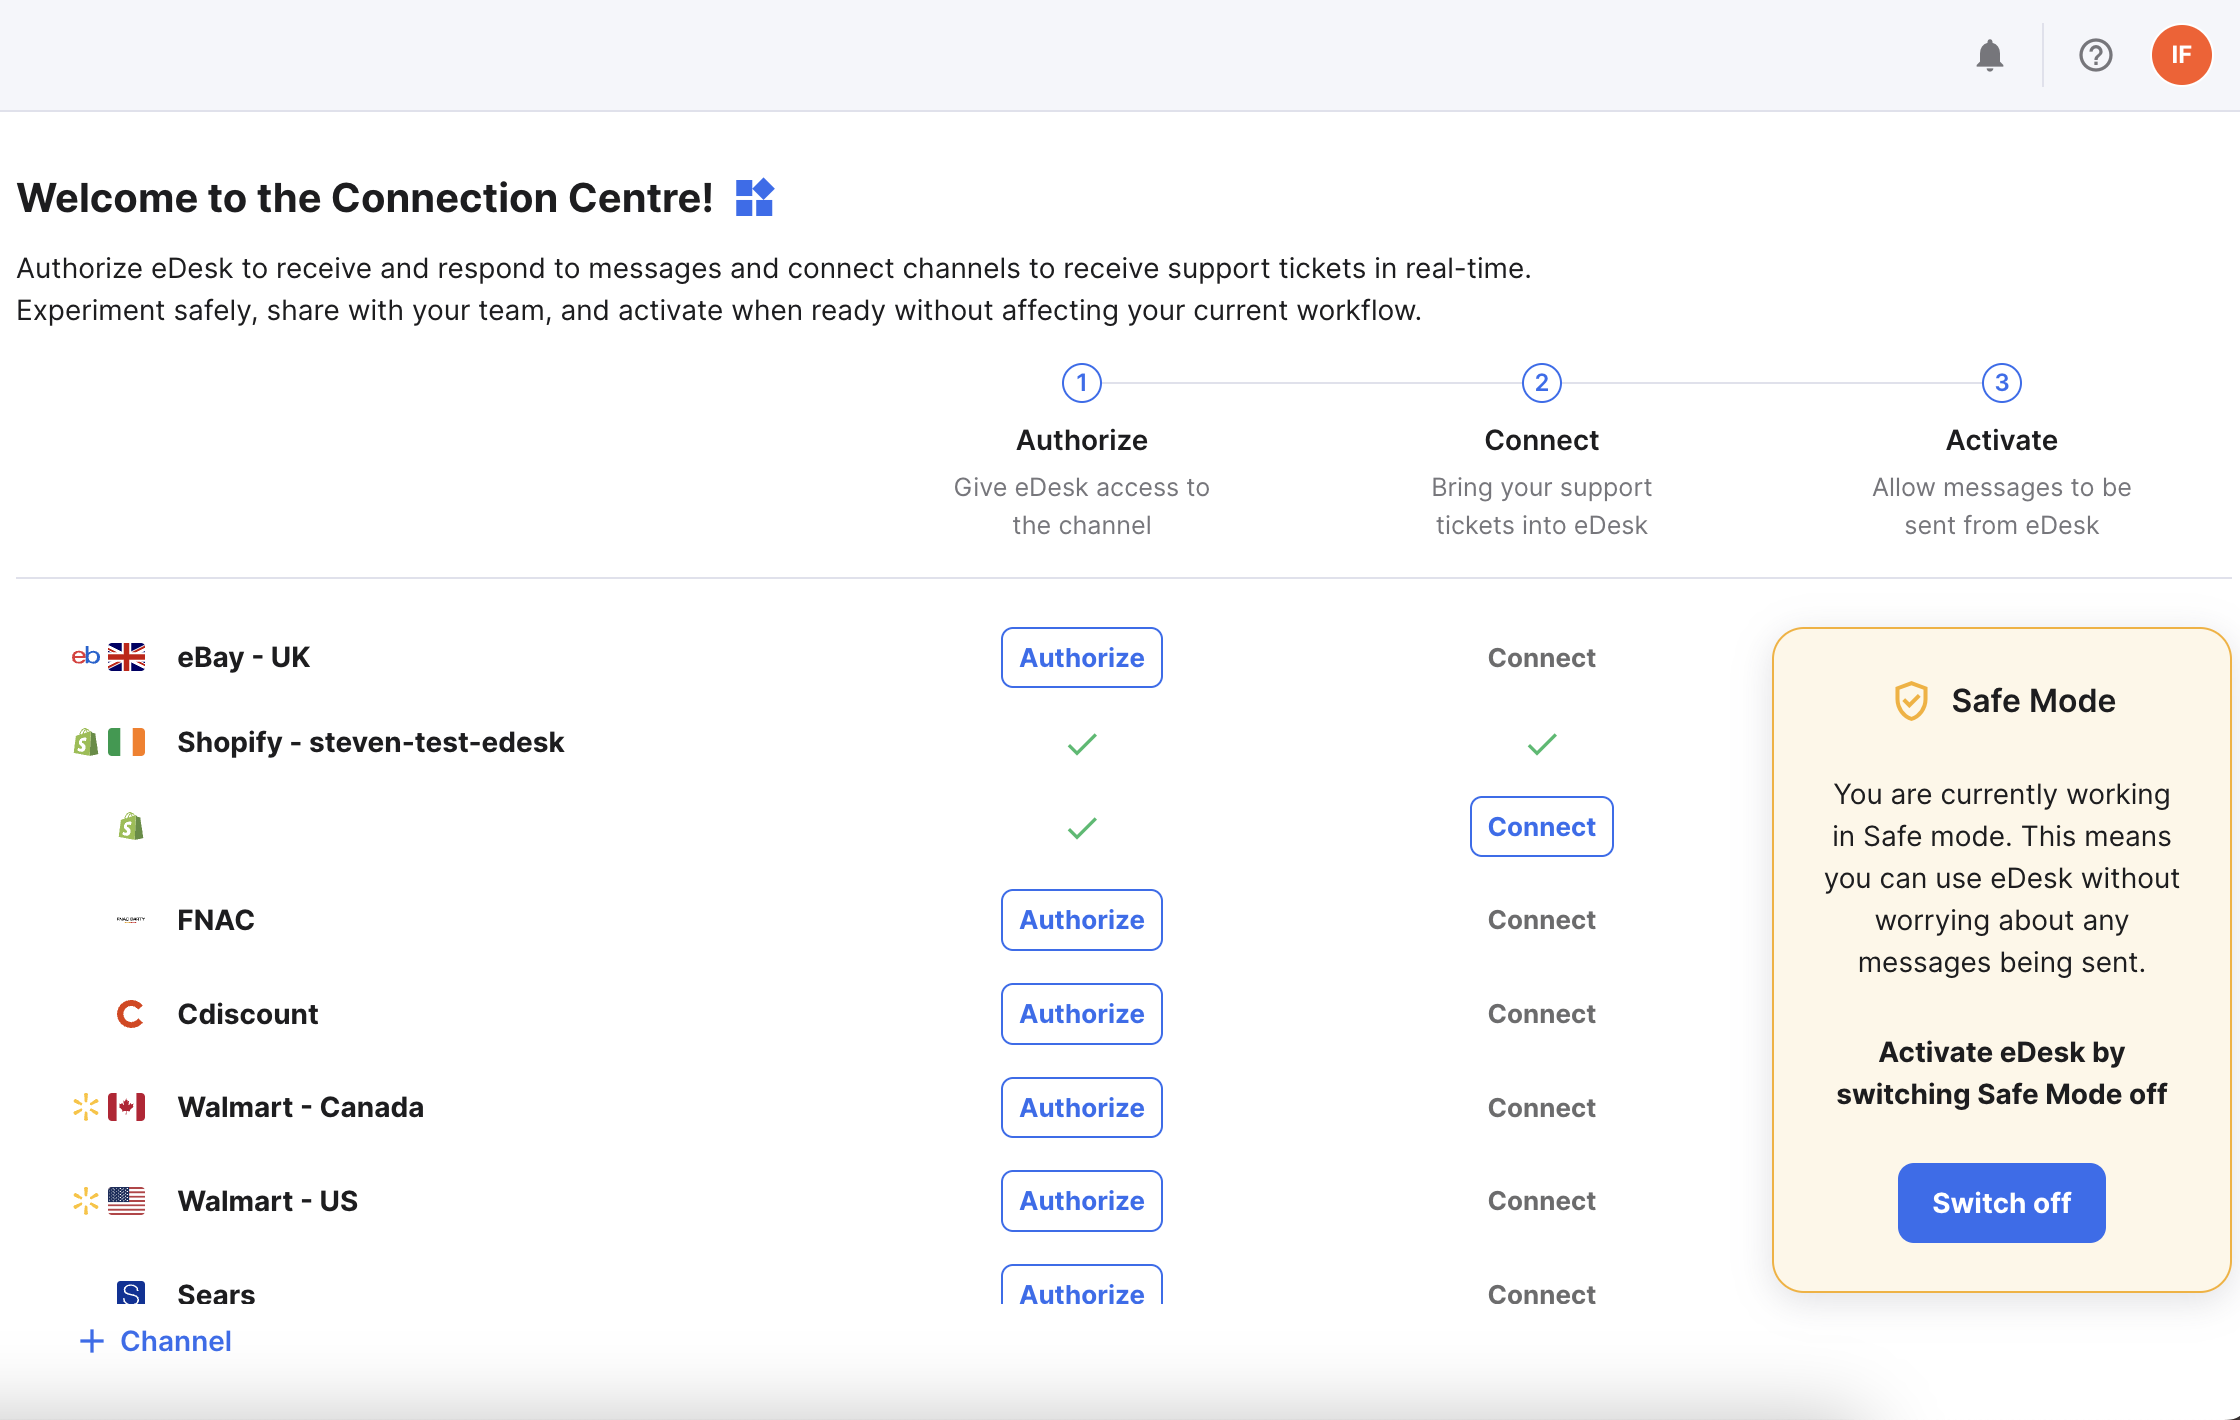
3. In the Connection Centre page, you'll see all the channels that you selected on the previous page, and for each channel, 3 columns: Authorize, Connect, and Activate.
 Connecting a channel to eDesk pulls copies of all the customer messages (and related order details) that are sent to the channel and displays them in your eDesk Mailbox
Pro Tip: It's well worth connecting all the channels that you'll use if you do decide to sign up with eDesk beyond the trial because we'll just convert this trial account into a real eDesk account and you won't have to revisit this step to add the channels you've missed.
Select +Channel to add further channels now, or if you want to add more later, you can go to Home or App Store in the navigation menu to return to the Connection Centre at a future time.
4. For each channel you want to connect, select Authorize to start the connection process, which opens a login page for that channel. In the example below, we show this login page for Shopify:
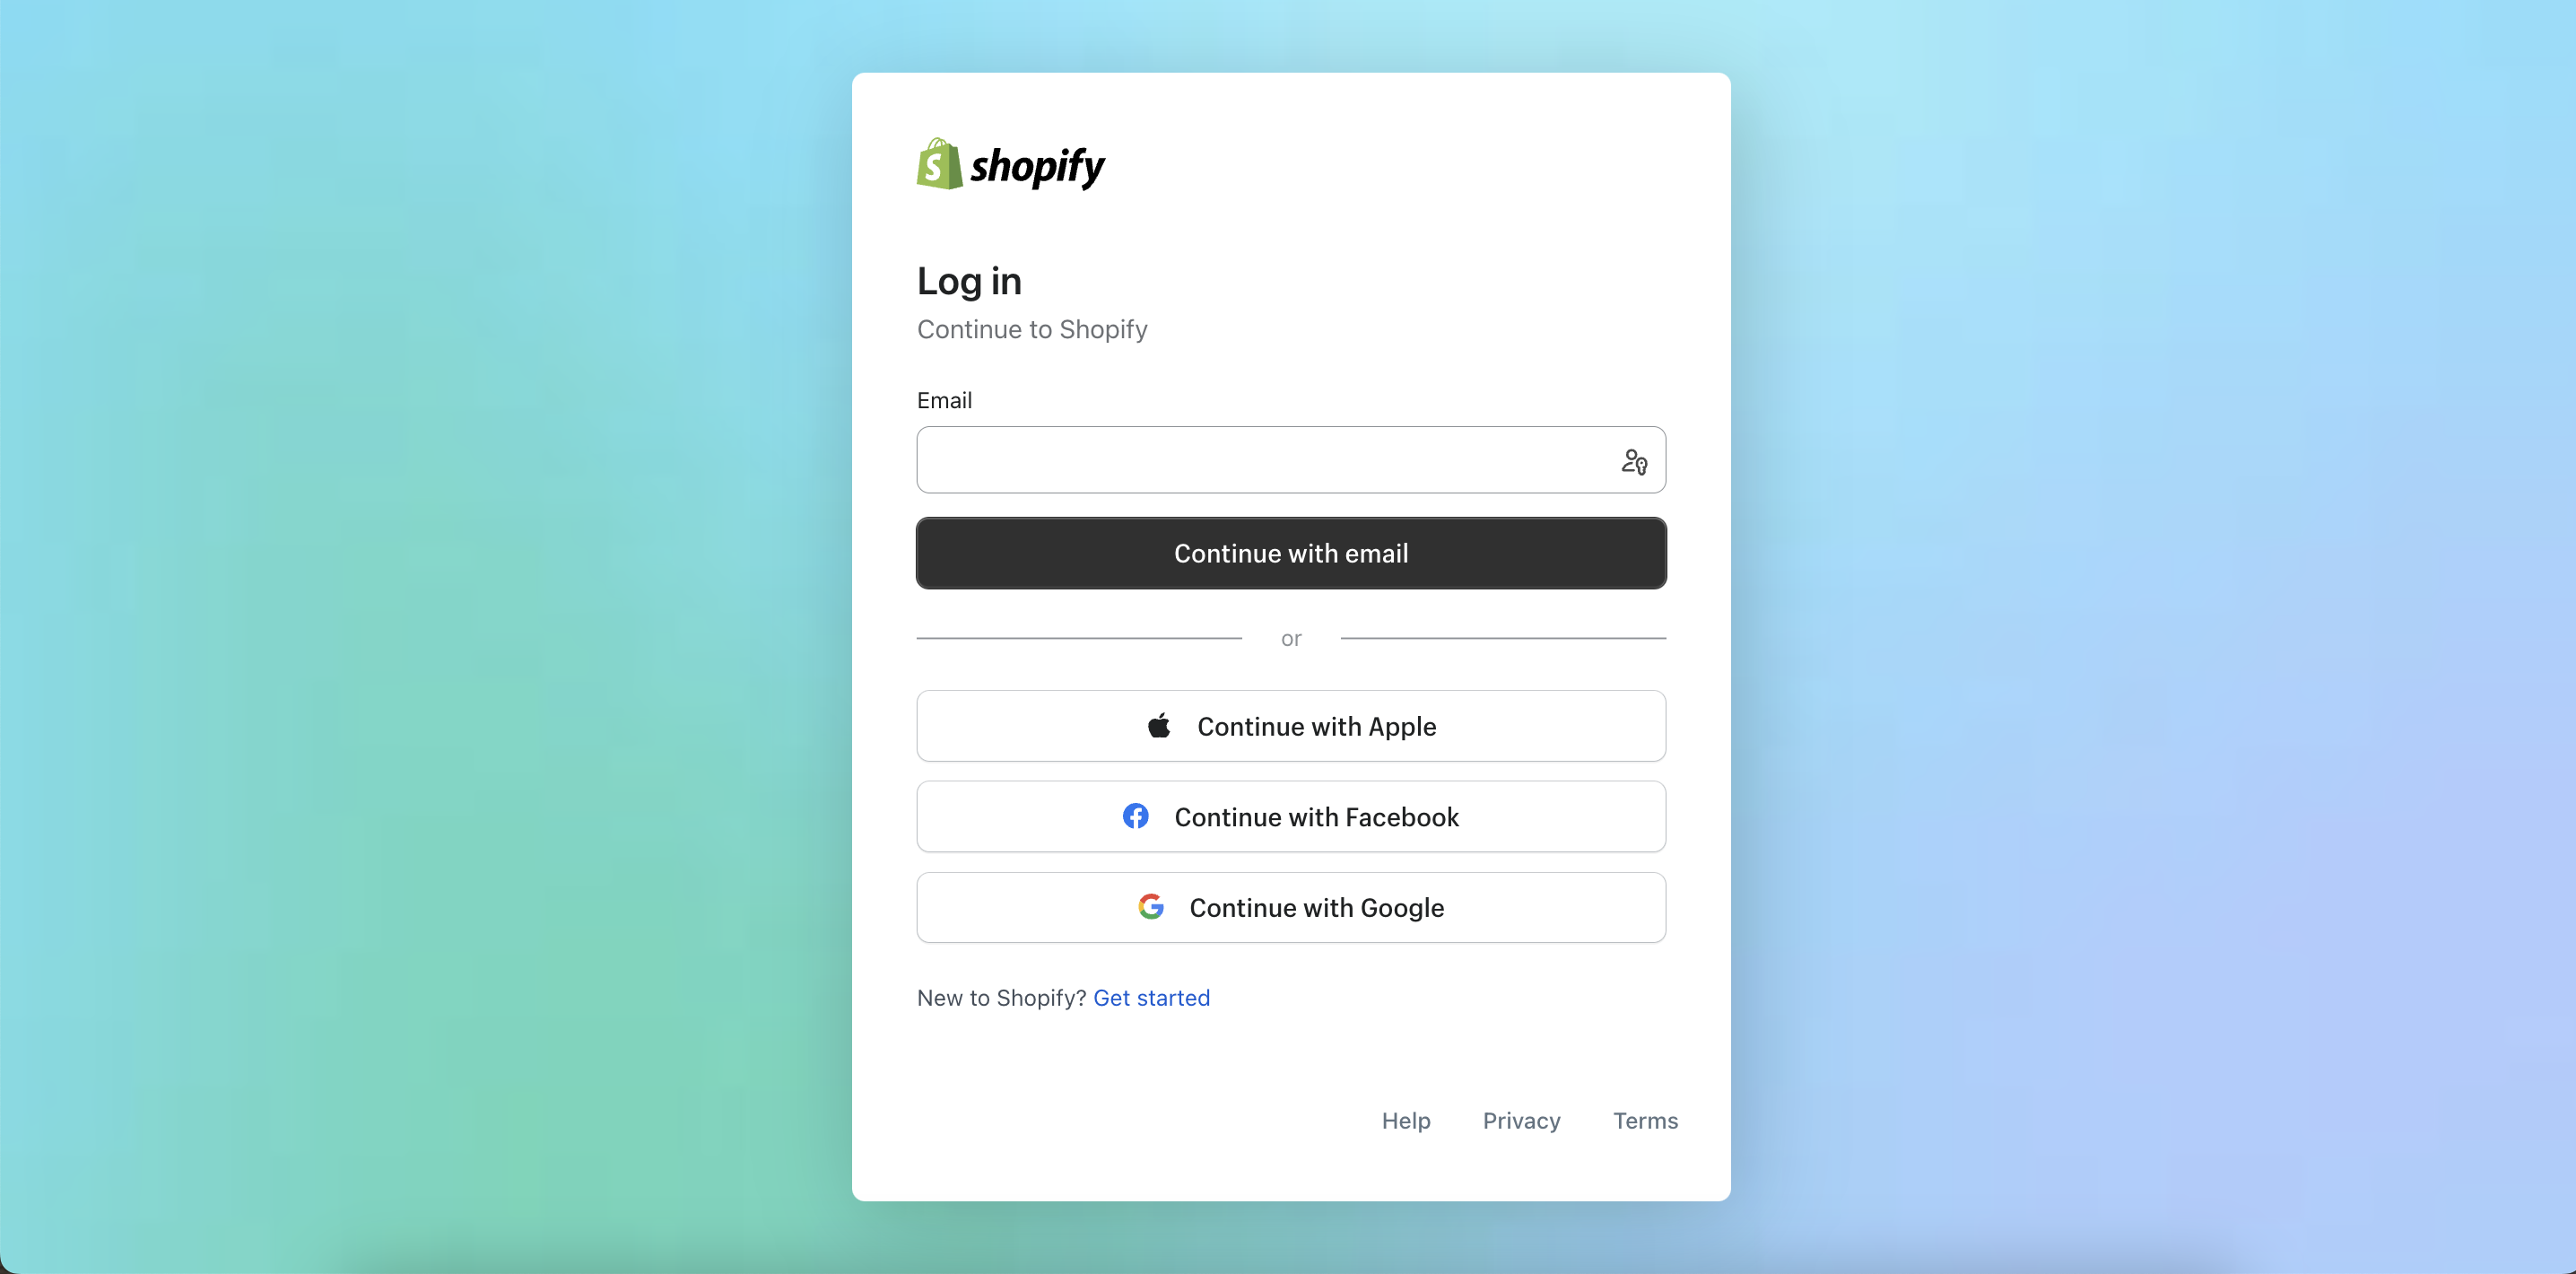
5. Login to the channel and follow the instructions on screen. Then return to eDesk's Connection Centre page, where you'll see that the Authorize column has a green tick to indicate that this step has been completed.

Note: For most channels, the Authorize step enables eDesk to access and pull in orders. Some channels require further steps to connect but eDesk will show you what you need to do to if this is the case.
6. The next step is to enable eDesk to receive a copy of each message sent to this channel by customers.
Select Connect to open the Email setup page.
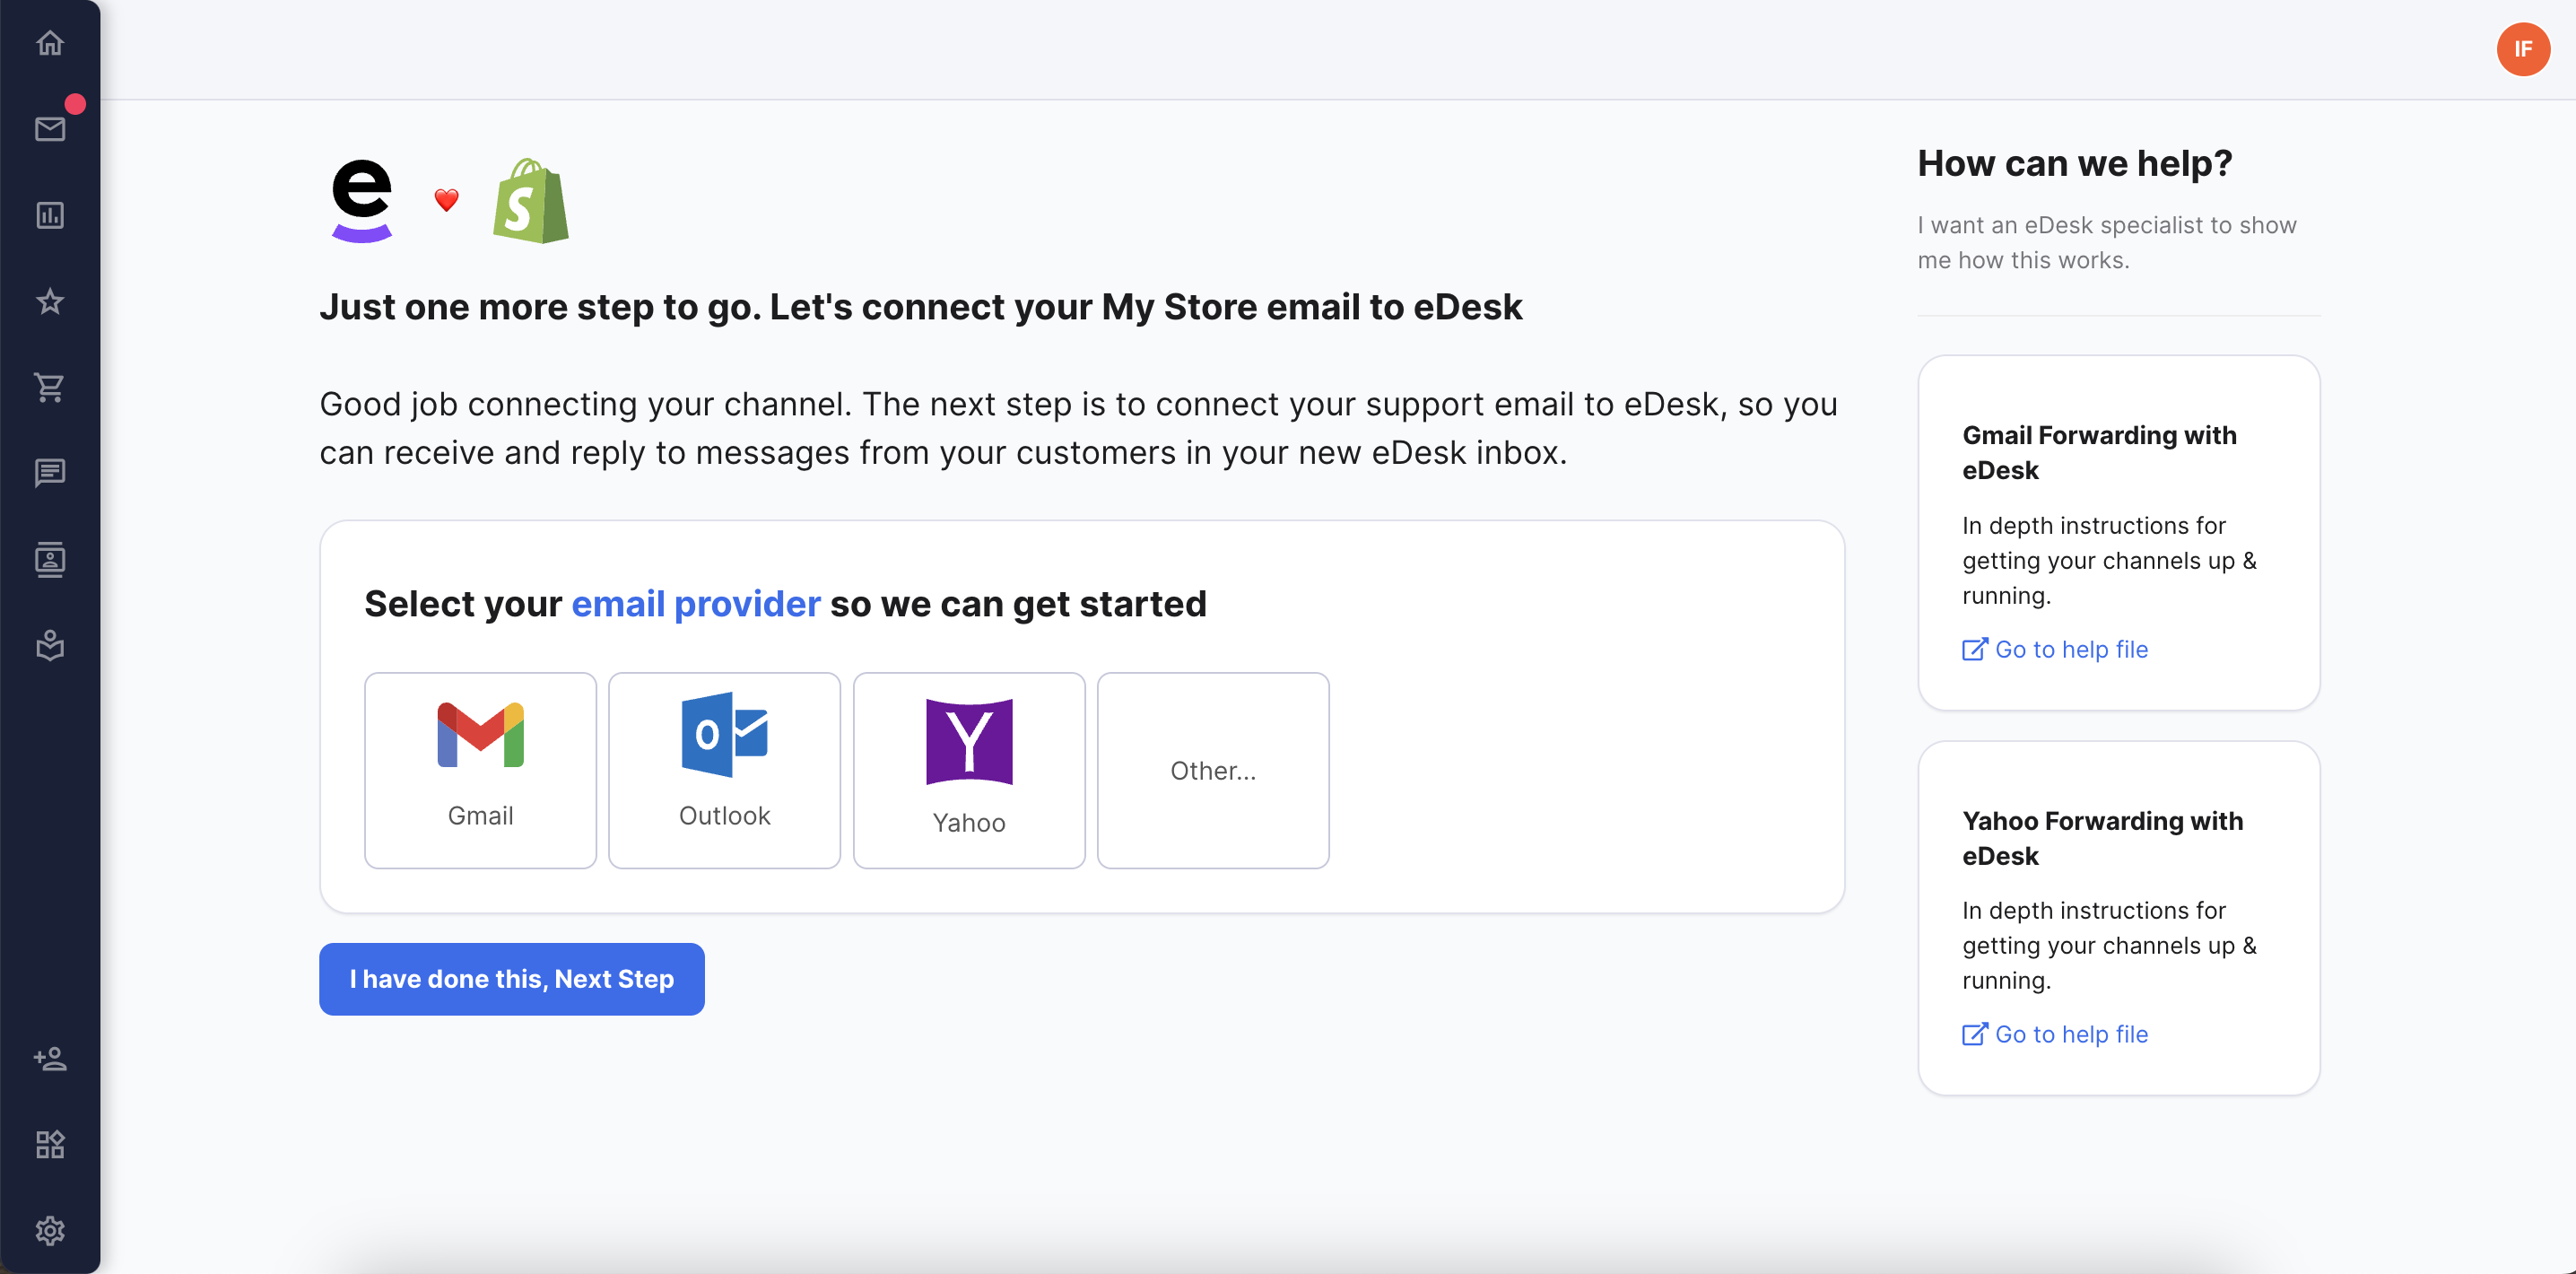
7. Follow the instructions on screen to set up the channel email and complete connecting the channel.
Once the channel is connected, a green tick is displayed in the Connect column in the Connection Centre.
Now, whenever a customer sends a message from this channel, you'll see it in a ticket in your eDesk Mailbox, and when you then open the ticket, you'll see the customer message and relevant order details as well as all the other eDesk ticket features.
8. You can now create templates, assign tags, and customize eDesk to meet your business requirement. Learn more about all the ways you can respond to your customers here. While in Safe Mode, you won't be able to actually send responses out to your customers yet until the trial ends and you choose a plan. Read more about Safe Mode below.
9. If you want to delete any connected channel during your trial, select the Settings icon for the channel to open the Channel Settings page and delete the channel from there.
02 Safe Mode
Safe Mode is switched on automatically for the duration of your 14 day trial. Safe Mode prevents any of your actions sending a real message out to your customers, so you can play away with eDesk without any fear of contacting anybody accidentally. If you want to go ahead and start using eDesk for real, then Safe Mode will be automatically switched off when you select a plan.When you're in Safe Mode, you'll always see the yellow SAFE MODE icon in the top left of the screen. Position the cursor over this icon to read about Safe Mode or switch off Safe Mode by selecting Switch Off that opens a page for you to sign up to start using eDesk for real.
In Safe Mode, you can create replies, test the AI features, try out snippets, set up rules, create templates etc to see how the message would look, without actually sending it. You can also leave notes in the tickets.
Safe Mode prevents all messages being sent including AI HandsFree and Quick replies, Auto-responders, External messages and manual responses. Learn more about all the ways you can respond to customers via eDesk. You also can't share tickets in Safe Mode.
03 Sign me up!
You've seen what eDesk can do and you want to sign up? When your trial expires or if you choose to switch off Safe Mode during your trial, you'll be directed to a page that allows you to view the eDesk plans and sign up to the one that best suits you.
Once you have signed up to a plan (including our Free 30 tickets/month plan), all the channels that you set up during your trial will continue to be connected and all your rules and templates etc will continue to be available. The channels will also now be activated. An activated channel allows you to send responses back to customers whose messages have come in from that channel.
To check if a channel has successfully been activated:
1. Go to App Store > Connection Centre.
If the channel has been successfully activated, you'll see a green tick in the Activate column (which displayed a Safe Mode notice during the trial). If there is a red cross instead, you'll need to complete the channel connection by following the steps mentioned in the first section in this help file.
Further Readings
For a short video tour of your eDesk Mailbox, click here.
You can also use eDesk's Live Chat to support your customers. For more information, click here.

