Take your customer care to the next level with Live Chat! It’s quick to set up and customers love the real-time support you can provide.
This help file will guide you through setting up Live Chat for your team and customers.
Before you start
- Learn all about how eDesk’s Live Chat works here.
- You’ll need to have access to Settings → Smart tools → Widgets. If you don’t have access, request it from an Admin user within your business.
- You’ll need to have already added the website or webstore that will host the live chat as a channel to eDesk. For more information on channels, click here.
Setting up Live Chat involves three simple steps:
- Create and customise a Chat Widget.
- Add the Chat Widget to your website or web store.
- Permission your Agents for Live Chat.
Read on for the detailed steps.
01 Create and customise a Widget
1.1 Create a Widget
- Go to: Settings > Smart tools > Widgets.

- Click Add Widget and complete the setup:

- Name: Give it a descriptive name for easy identification.
- Channel: Select where the widget will appear.
- Default Tag (optional): Assign a tag to chats originating from this widget.
- Click Save.
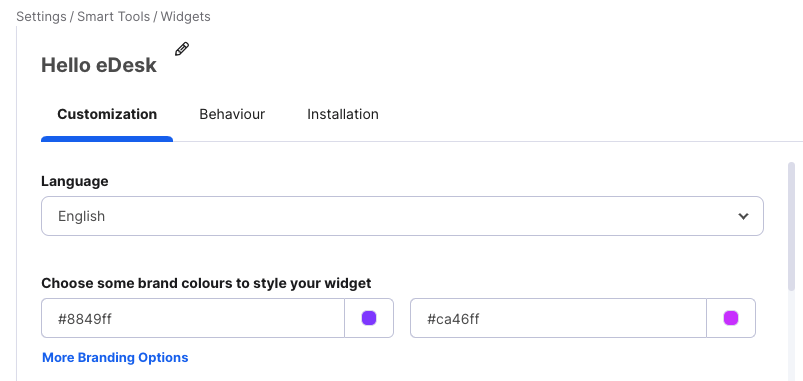
1.2 Customise the Widget
- In the Customisation tab, personalise:
- Language: Pre-configured messages’ language.
- Colors: Customise button colors.
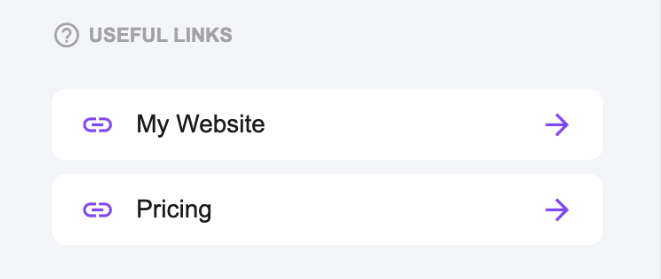
- Useful links: You can include up to 2 text-based hyperlinks in the widget. Any URL can be added here and the Link title will be displayed on the widget on the website. This may be a help or FAQ section or a sale link etc.

- Avatars: Show/hide avatars over the Chat widget. Agents can upload their Avatars under Settings > Account > Profile preferences of their own accounts.
- Omnichannel Support: This is only relevant if you have integrated with WhatsApp. Learn more here.
- Tone of Voice: Tailor what the customer will see when they first click on the Chat button.


- Chat transcript: After every chat, your customer is sent a transcript of the chat to the email they came in on. Here you can customise the follow-up transcript email sent to customers.
1.3 Set Widget Behavior
- In the Behavior tab, define how the widget functions:
- Tags: Assign tags to chats from this widget.
- Custom fields: Request additional info (e.g., phone number) before starting chats. Learn more about Custom fields here.
- Chat Rating: This option allows you to ask for feedback after the Chat has been completed. Upon closing the Chat, your customer will get the option to select a rating and leave a comment.

- Disable Chat Window if no agents are online: Leave this OFF if you want a Contact form to show if agents are offline. By default, this is off and a Contact form will show. Turn this ON so that no Chat button will show if agents are offline.Note: If you have a Chatbot enabled, it will show whether your Chat Window is disabled or not.
- Header, Sub header & Message field placeholder text: Customise text for contact forms during offline hours. (These options will not show if you have turned on the 'Disable Chat Window if no agents are online' above).
- Chatbots: If using an eDesk Chatbot select it from the dropdown. The Chatbot will handle chats before routing them to agents thereby deflecting a number of your chats and it will handle chats during hours when agents are offline, creating tickets in your Mailbox if needed.
- Customise Chatbot text: Customise the text customers see if you have a Chatbot selected:
 The above fields would look like this in the Chatbot itself:

1.4 Configure Proactive Chat (Optional)
- Use the Prompts tab to trigger a pop-up chat message on your website to engage visitors. Learn more here.

02 Position and add the Chat widget to your website
3.1 Position the Widget:
- Go back to the Installation tab in your widget in eDesk and use the Positioning section to adjust:
- Delay: Choose the number of seconds the customer must be on the page before the Chat button appears.
- Button & Chat Position & size: You can select your Button and Chat window position and size from the drop-down menus and then customise them further using Offset options.

- If you want to prevent your Live Chat widget from being used on other web pages, enter the URL of your website into the Allowed Domains field. If you want to use the Chat Widget on multiple websites, then you can leave this field blank.
-
Click Save Changes
3.2 Enable the widget and generate the widget code:
- Go to the Installation tab in your widget settings.
- Enable the widget. If Inactive the widget won't display on your website.
- Click Copy to Clipboard to copy the code. Note that widgets for a Shopify store will ask you to copy a Widget ID instead of a code snippet, and the link will read Click to copy.

3.3 Embed the Code in Your Website
Some popular webstores have a unique process for this step - select one of the links below for instructions:
For all other channels, do this:- Access your website’s HTML code. If you are editing the code in a browser, open a new browser tab as you'll need to return to the eDesk screen to complete setup.
- In the code for your website or store, find the closing body tag and paste in the widget code snippet immediately above it. Then save. This step is critical to adding the Chat Widget to your website.

The Chat widget has now been created, customised, and added to your website. Well done!
03 Permission your Support Agents for Live Chat
- Enable the Chat permission for your agents’ roles. Learn about roles and permissions.
- Agents can manually mark themselves online or offline via their Avatar settings when they are free to take live chats.

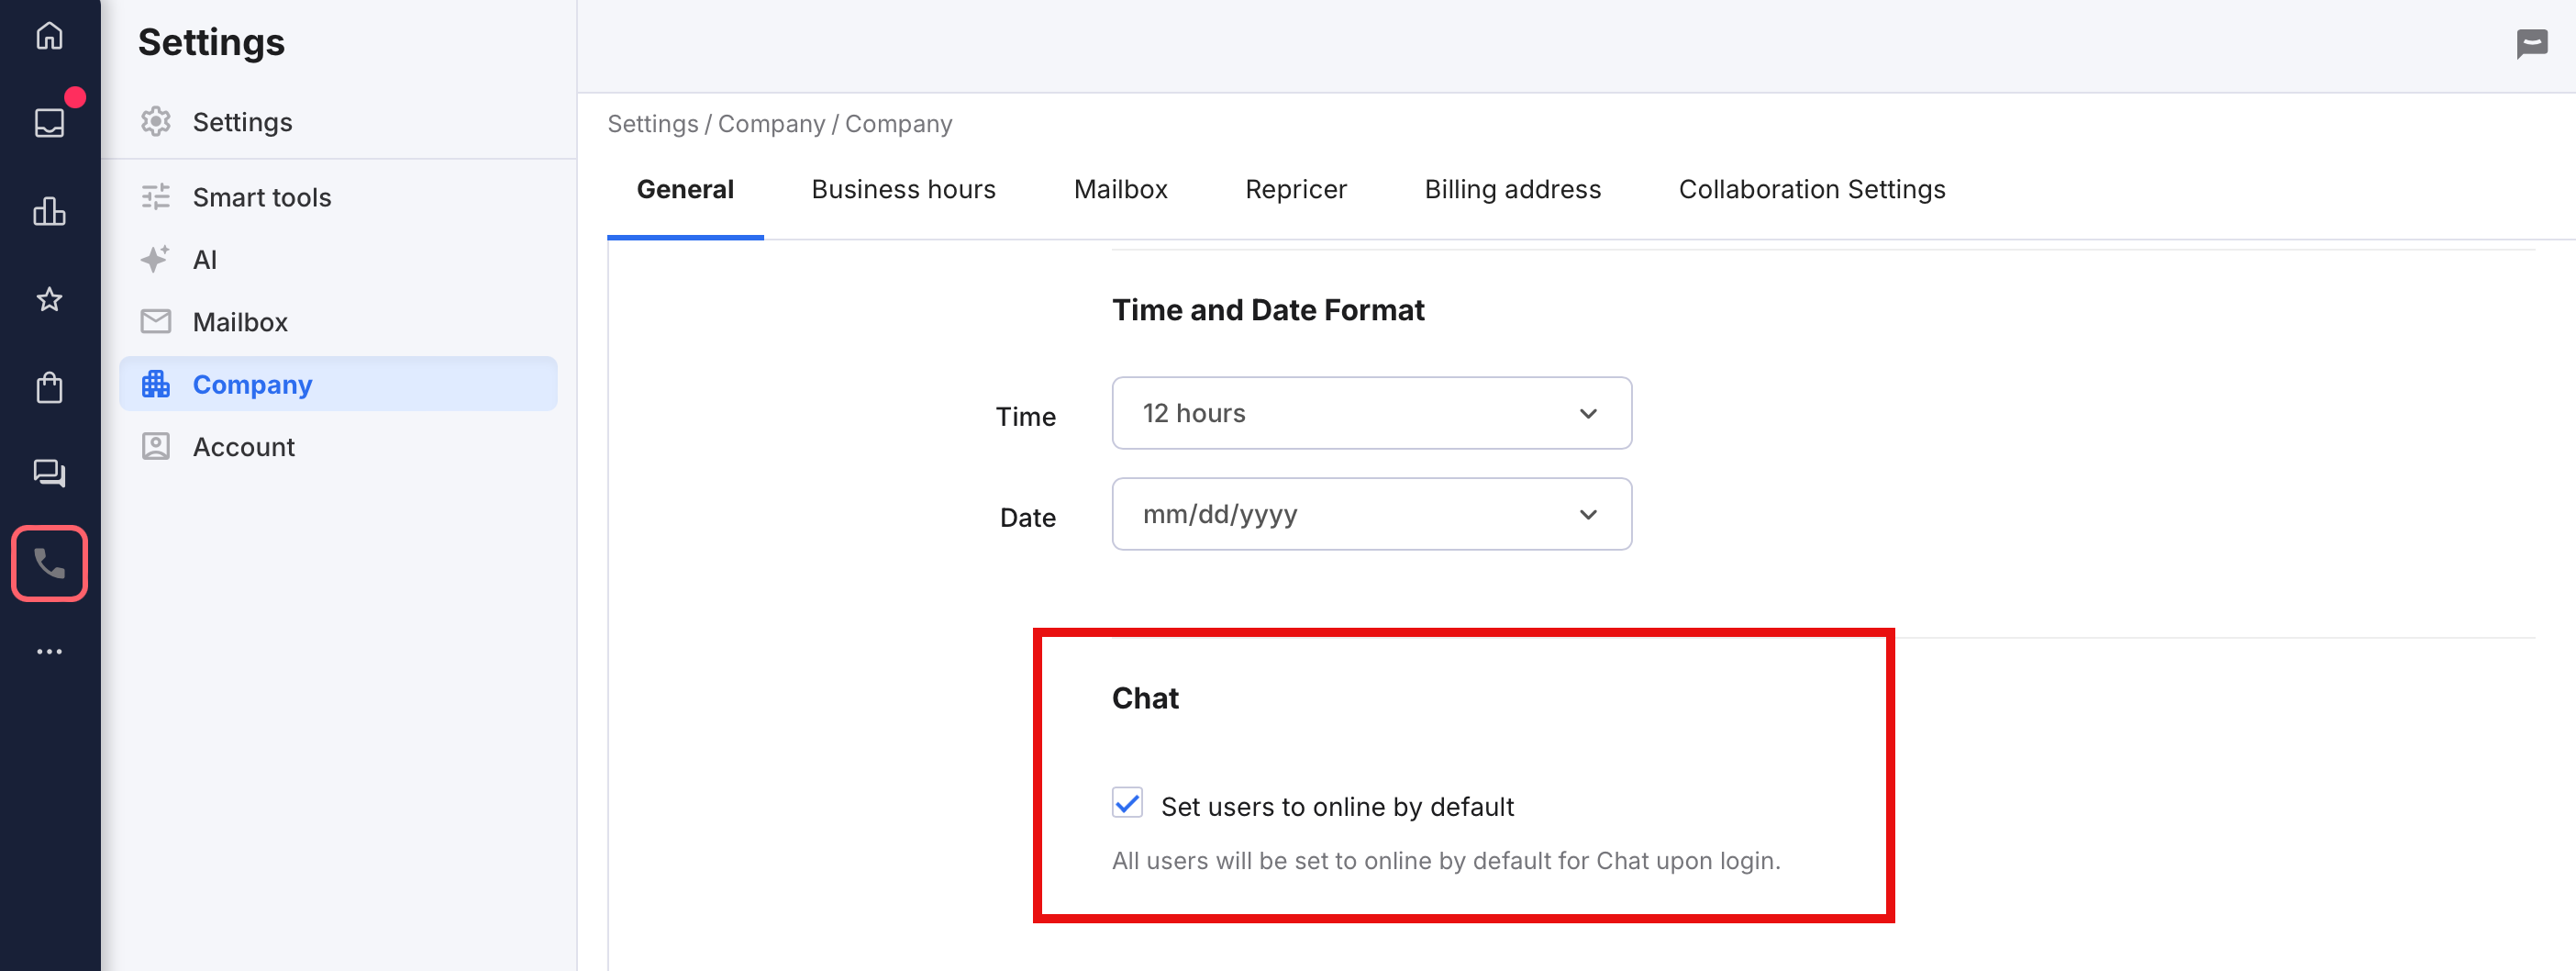
By default, Agents will be offline when they log in, but Admin users can change this to automatically make all Agents online as soon as they log in. To do this, go to Settings > then in the Company tile, select Company > then in the General tab, tick the Set users to online by default checkbox in the Chat section, and save.
Note: If the Agent has set up online working hours (see next bullet point) and they login outside the working hours they have set up, their status will be set to online.
- If you haven't enabled Set users to online by default (see previous bullet point), you can ask your Agents to set what their online hours will be by going to Settings > Account > Profile Preferences > Chat tab and adding their Online working hours there.
Note: This will only ensure they are automatically marked offline outside their working hours. It will not automatically mark anyone online. For more see Section 05 of this guide.

Further Reading
If you need help Troubleshooting Live Chat, click here.If you want to find out more about creating a Chatbot from our Chatbot template, click here.