

Rule Only Templates let you automatically respond to repetitive customer queries using Message Rules. Rule Only Templates are ideal for:
-
Automatically replying to common queries at any point in a ticket thread.
-
Responding without AI Automations (if AI Automations isn't enabled on your account or if you want to answer more than just the first incoming message).
This guide walks you through creating a Rule Only Template that can be paired with a Message Rule to automatically reply to specific customer messages.
Before you start
- You’ll need to have access to Templates in your Settings in order to view, create and edit templates. If you don’t have access, you can request it from an Admin user within your account.
- You’ll need to have access to Message Rules in your Settings in order to view, create and edit rules. If you don’t have access, you can request it from an Admin user within your account.
01 What is a Rule Only Template?
Rule Only Templates are triggered by Message Rules based on the conditions you define (e.g. ticket type, keywords, ticket subject, etc). They are great for auto-responding to things like:
-
“Where is my order?”
-
“Thank you”
-
Simple tracking requests
For example, you can create a Rule Only Template to respond to a “Where is my order” message with:
“Hi #consumer_firstname#, thank you for your query!
Your order #order_number# was dispatched on #dispatched_on# and it's expected delivery date is #expected_delivery_date_to#.
If your order has not arrived by this date, please don't hesitate to reach out to us again"
You would then bind that Rule Only Template to a Message Rule so that when eDesk receives a message that matches the rule’s conditions, it auto-responds with the template.
02 Creating a Rule Only Template - General tab
To get started:
-
Go to Settings > Smart Tools > Templates.
-
Click + Add Template.
-
Choose Rule Only as the template type.

Pro-tip: You can also create a new template from a copy of an existing Rule Only Template by selecting the three dots on the right.
Template Setup
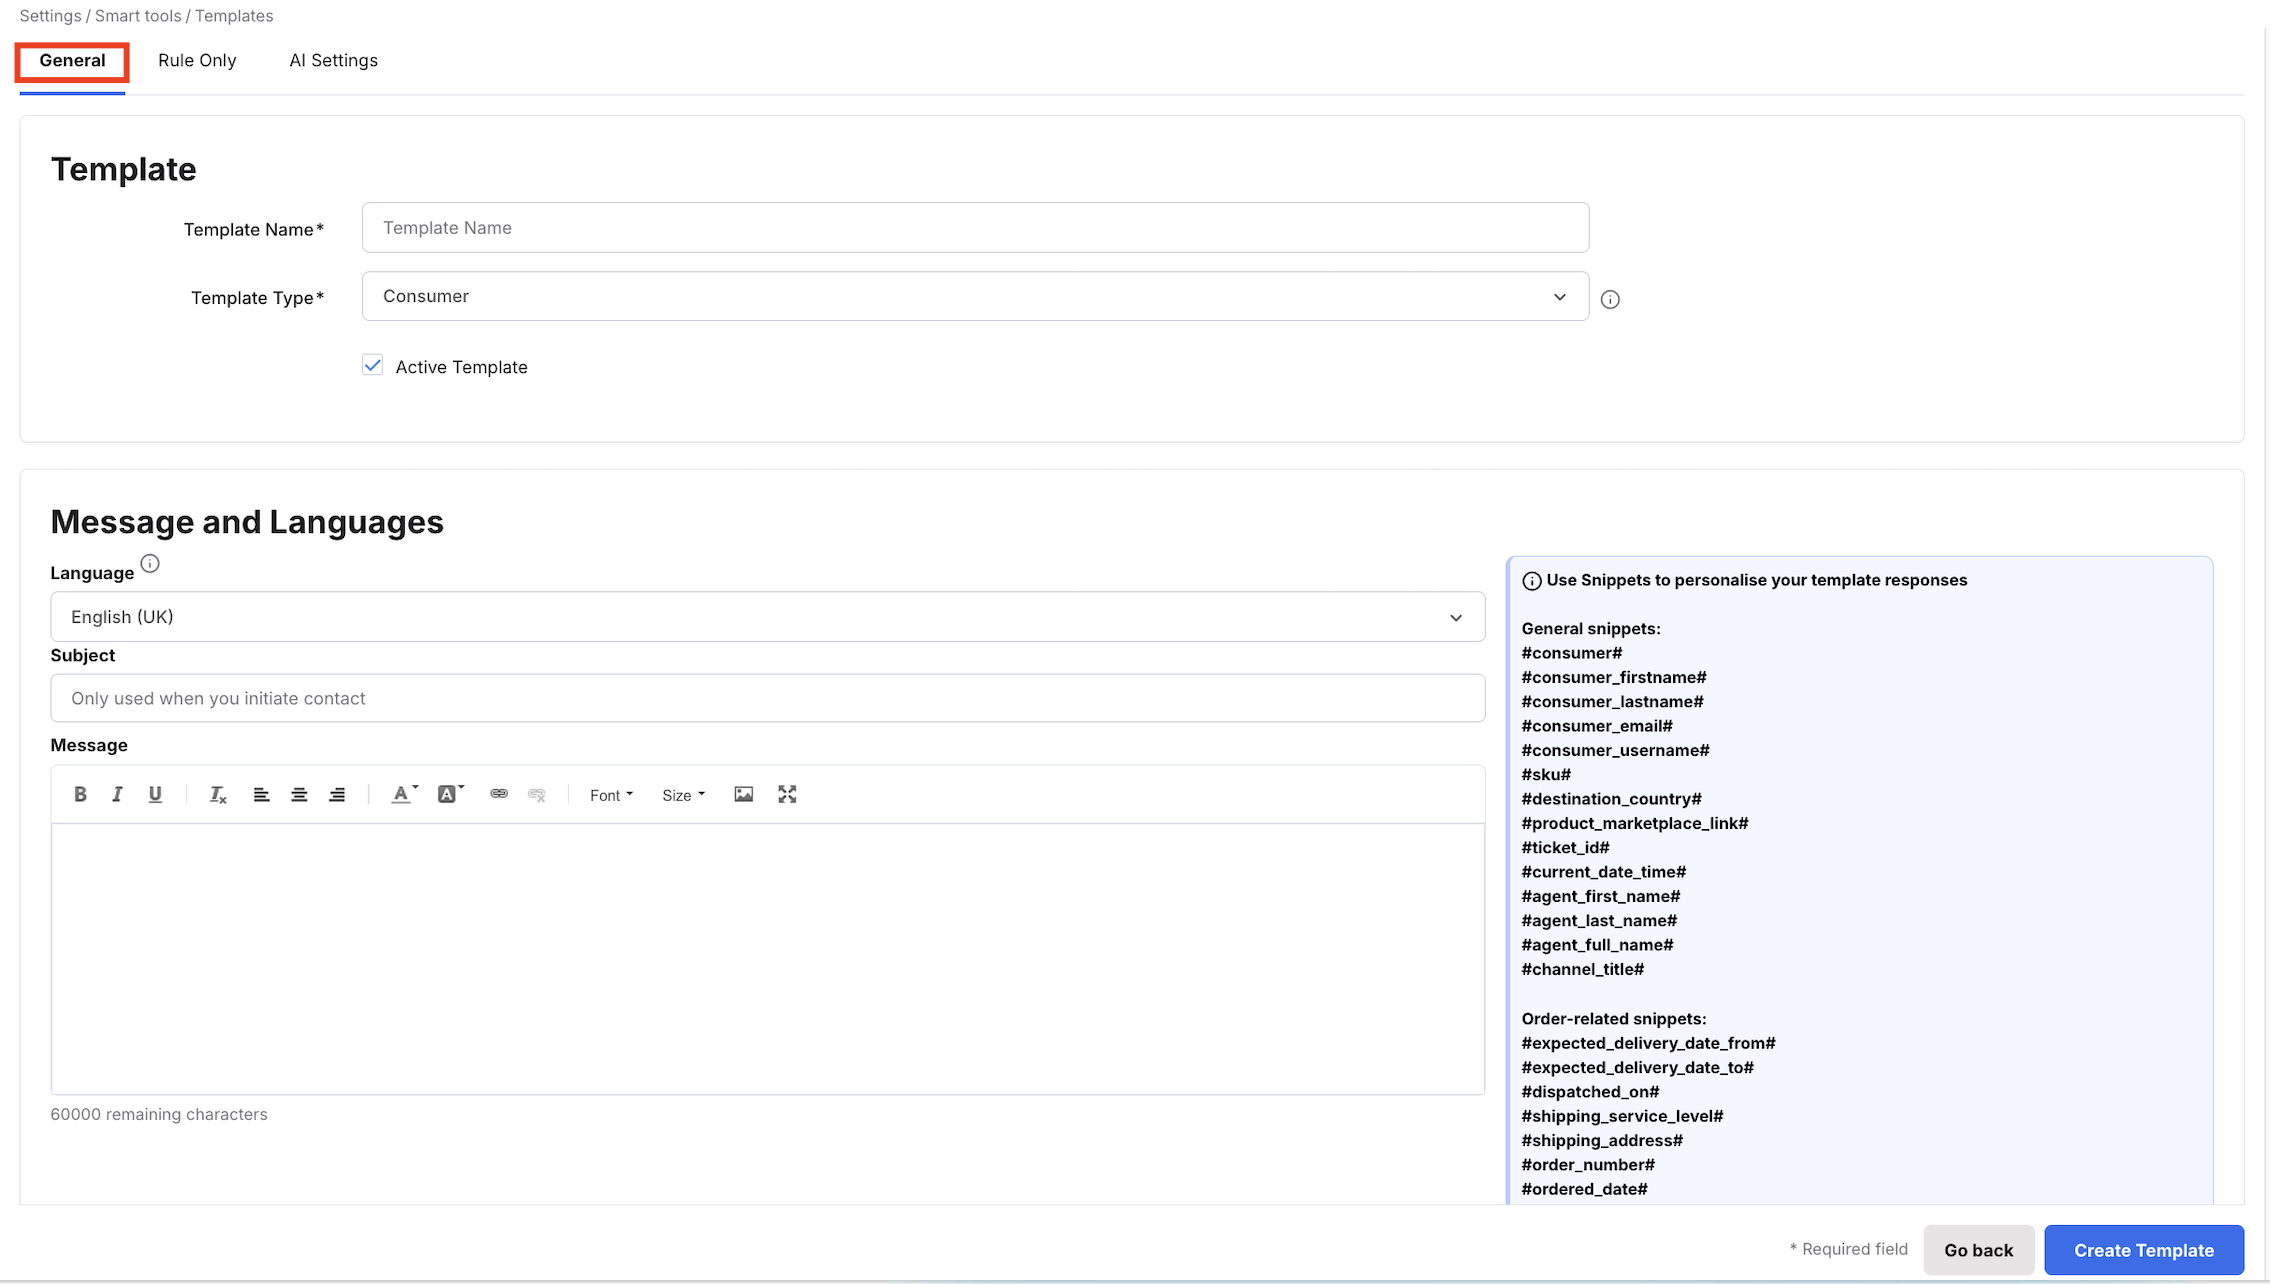
-
Template name: Give your template a clear, unique name.
-
Template Type: As this is a Rule Only Template, you can just leave this setting on Consumer.
-
Active Template: Tick this box to activate the template. Inactive templates won’t be sent.
Note: eDesk will use a Rule Only Template only after it is bound to a Message Rule. -
Message: Choose your primary language for the template and enter your auto-reply message in the message field. You can include text, links, and images. You can add further languages once your template has been created.
-
You don’t need to fill out the Subject field.
-
To personalise your message, insert Snippets like #consumer_firstname# from the right-hand list.
Important: Be aware that snippets that contain customer information will not work on Amazon messages. -
If you include order-related snippets, you must define an Order Status in the Usage Conditions section later.
-
- Add an attachment (optional): Upload an attachment if you want to include one.
-
Attach Invoice (optional): Tick this box if you want to include the customer’s invoice with the reply.
Note: The fields in the Usage Conditions section are not used for Rule-only templates, as we set the conditions in the rule. Leave this section unchanged.
02 Creating a Rule Only Template - Rule Only tab
Date & Time Conditions
In the Rule Only tab, you can configure eDesk to only send this template outside of your working hours and also whether it should change the ticket status.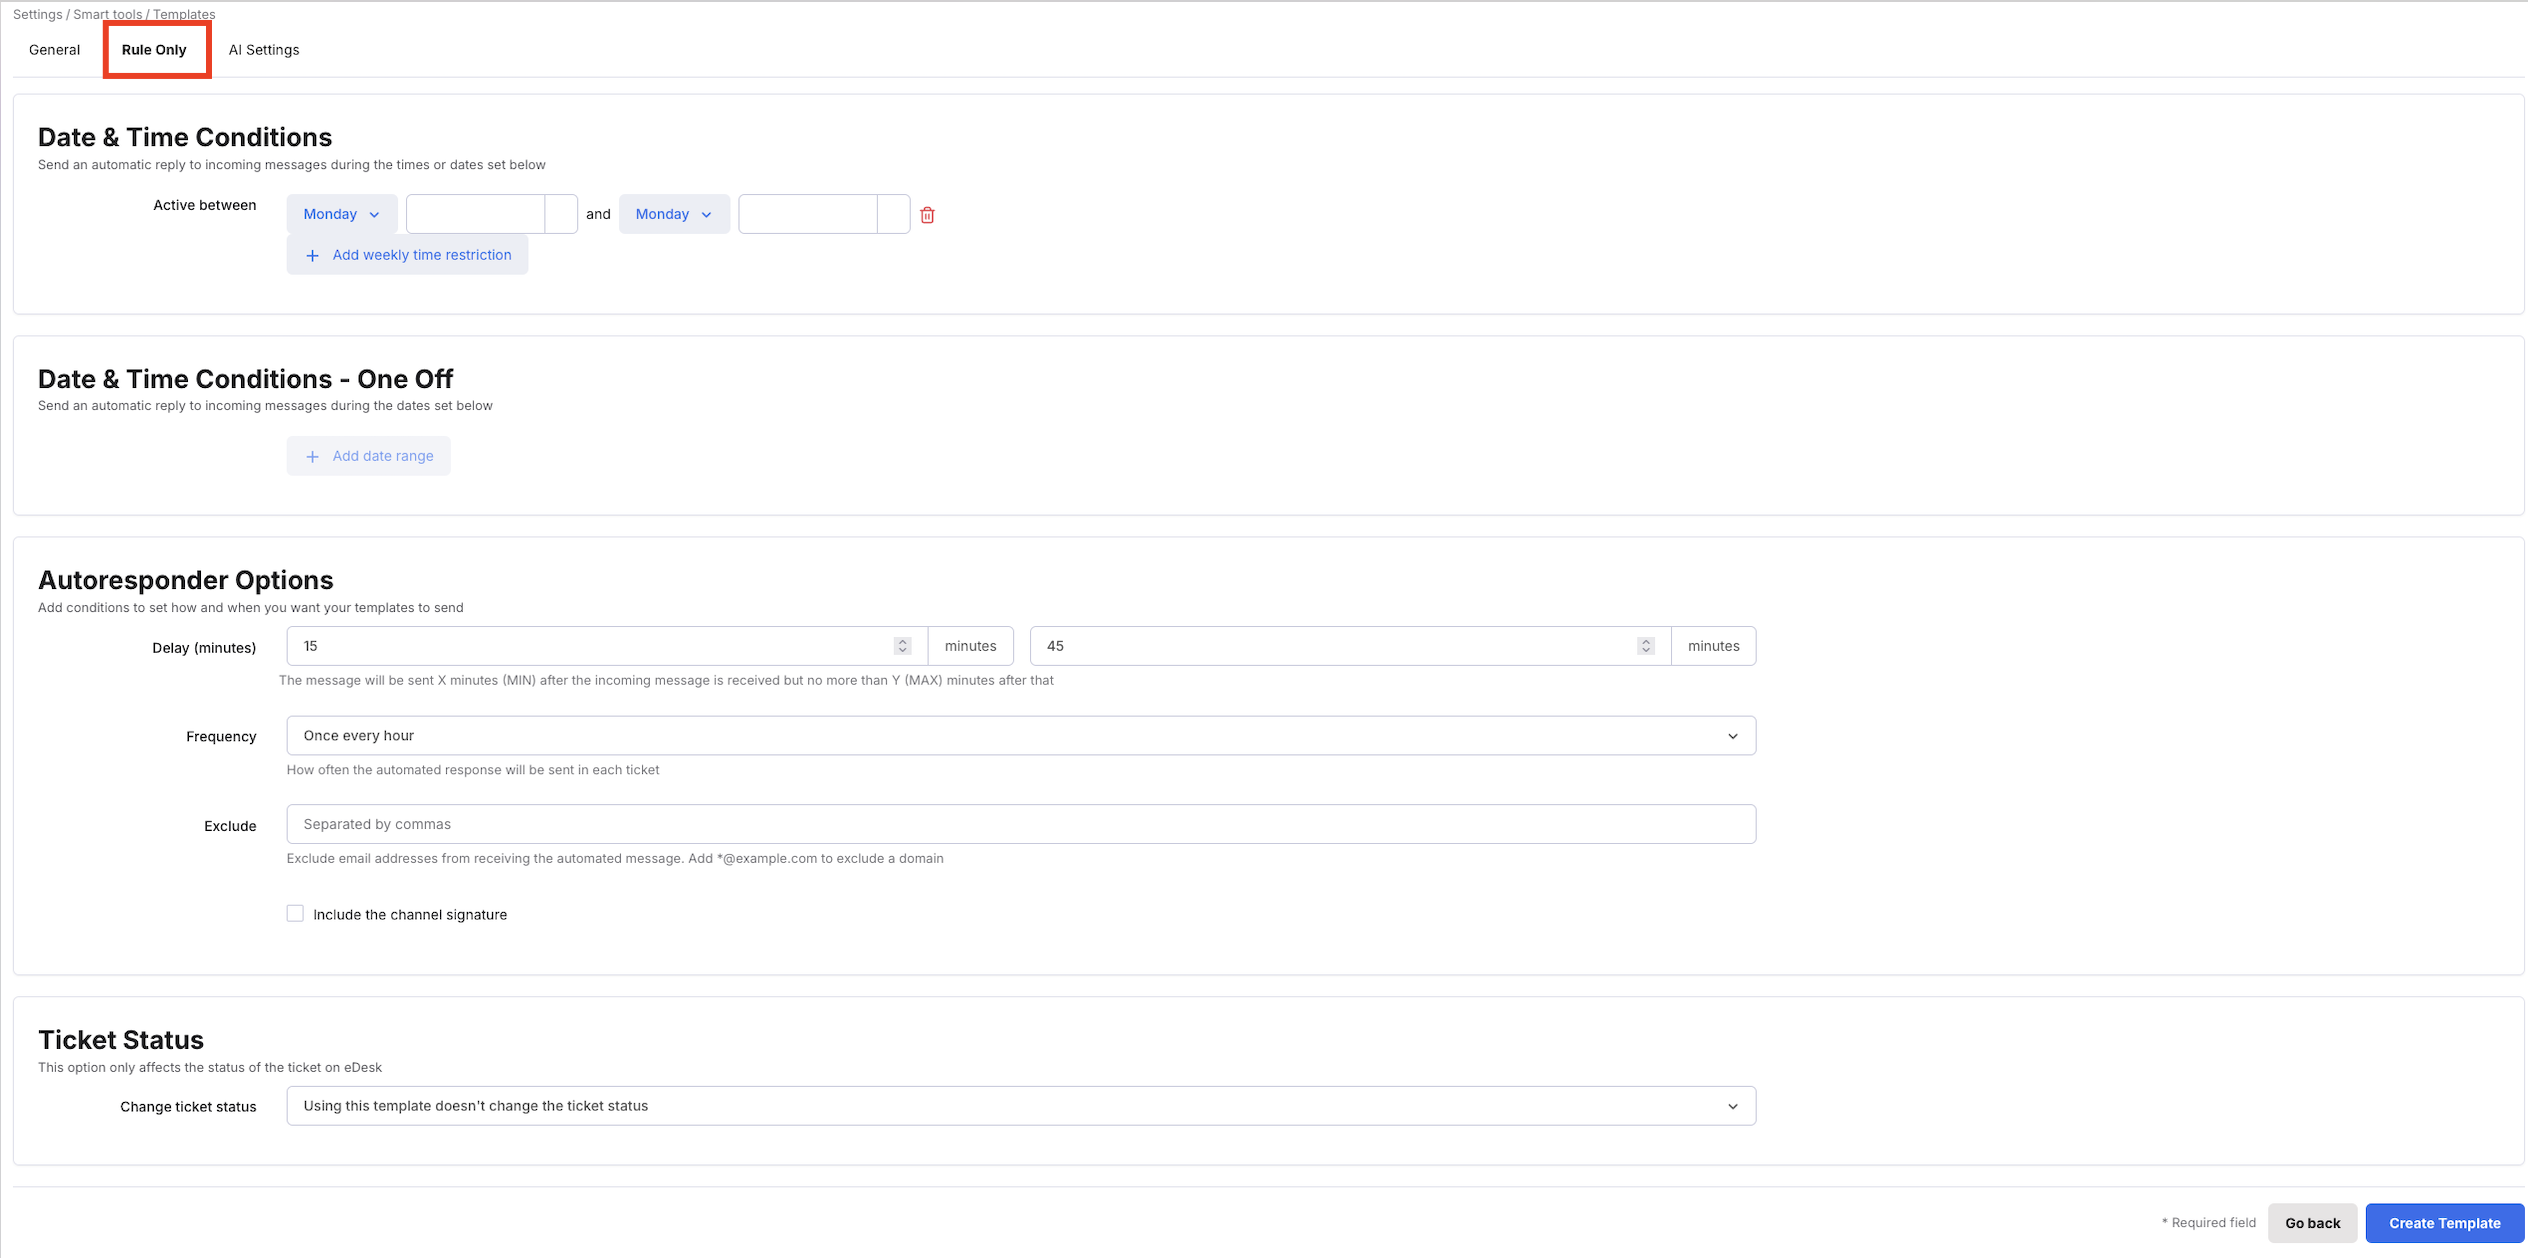
- You can set either Date & Time Conditions for weekly time frames OR Date & Time conditions - One Off for holiday periods for your Rule Only template. Or you can leave these blank if you want the template to send any time it triggers the Message Rule you will set for it.
- To set Date & Time Conditions, click + Add weekly time restriction and select a day and time for your Rule Only message to send out. So if you work 9-5pm Mon-Fri, you would set your auto-reply to send from Monday 17:00 - Tuesday 08:00 etc. The weekend can be covered by choosing Friday 17:00 - Monday 08:00
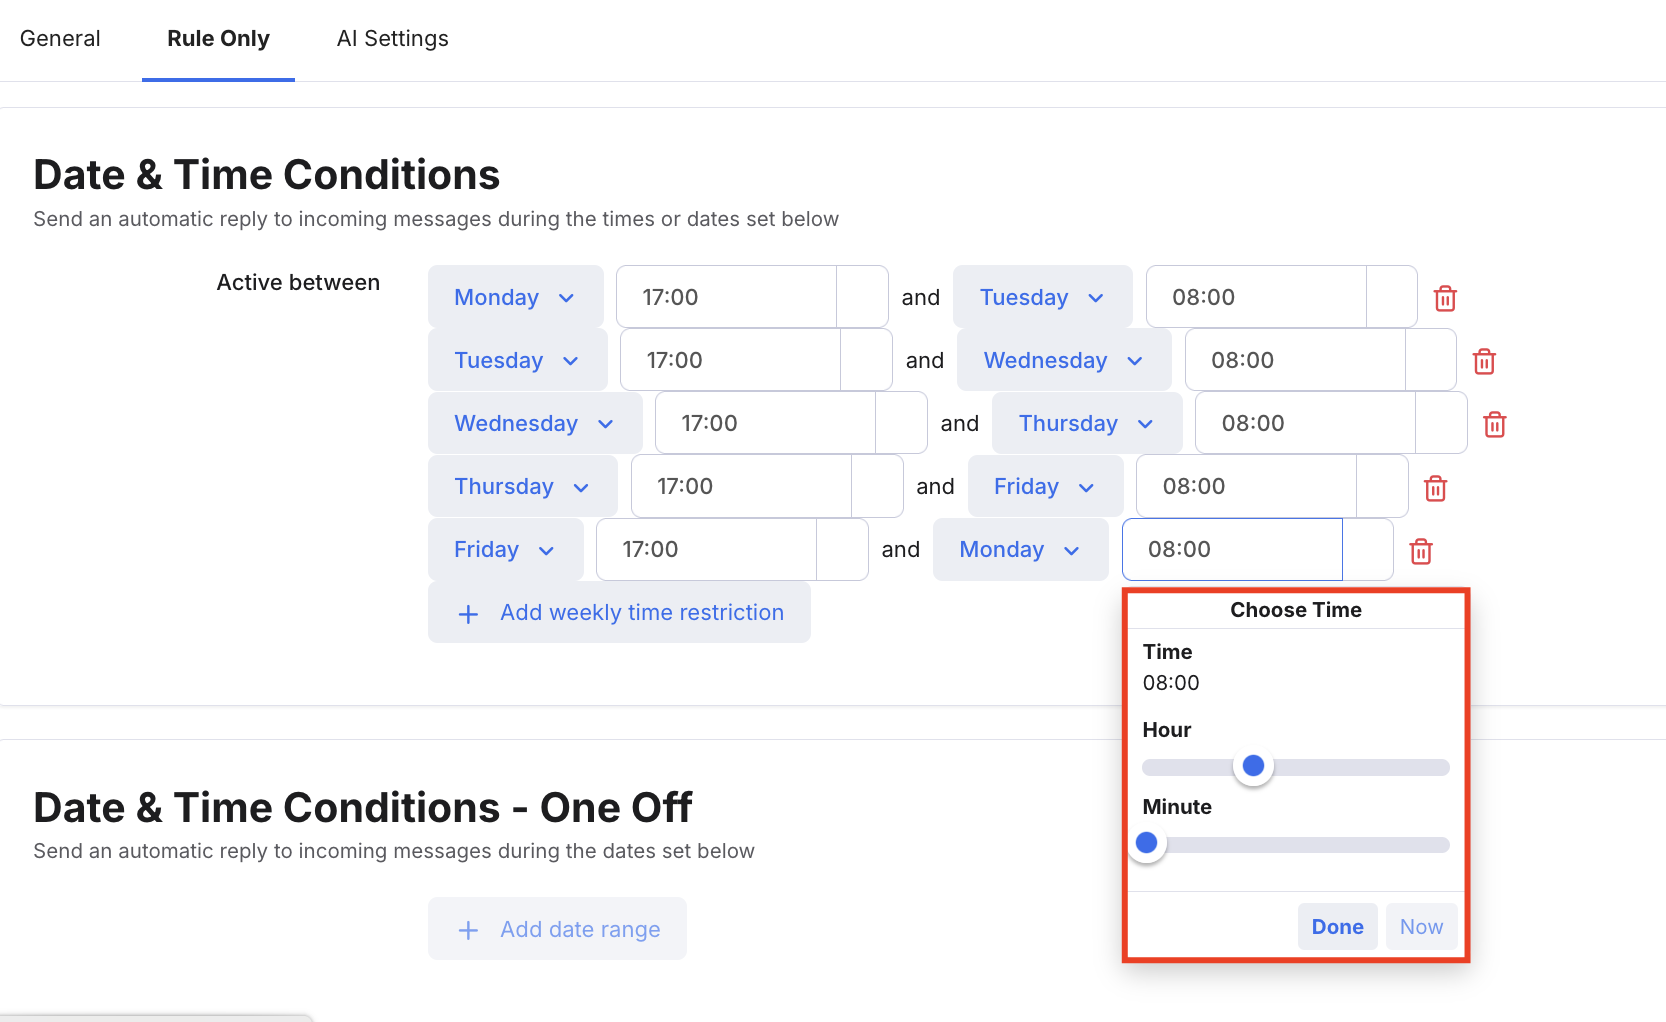
- To set Date & Time Conditions - One Off, click +Add date range and select a start and end date and time for your Rule Only message.

Autoresponder Options
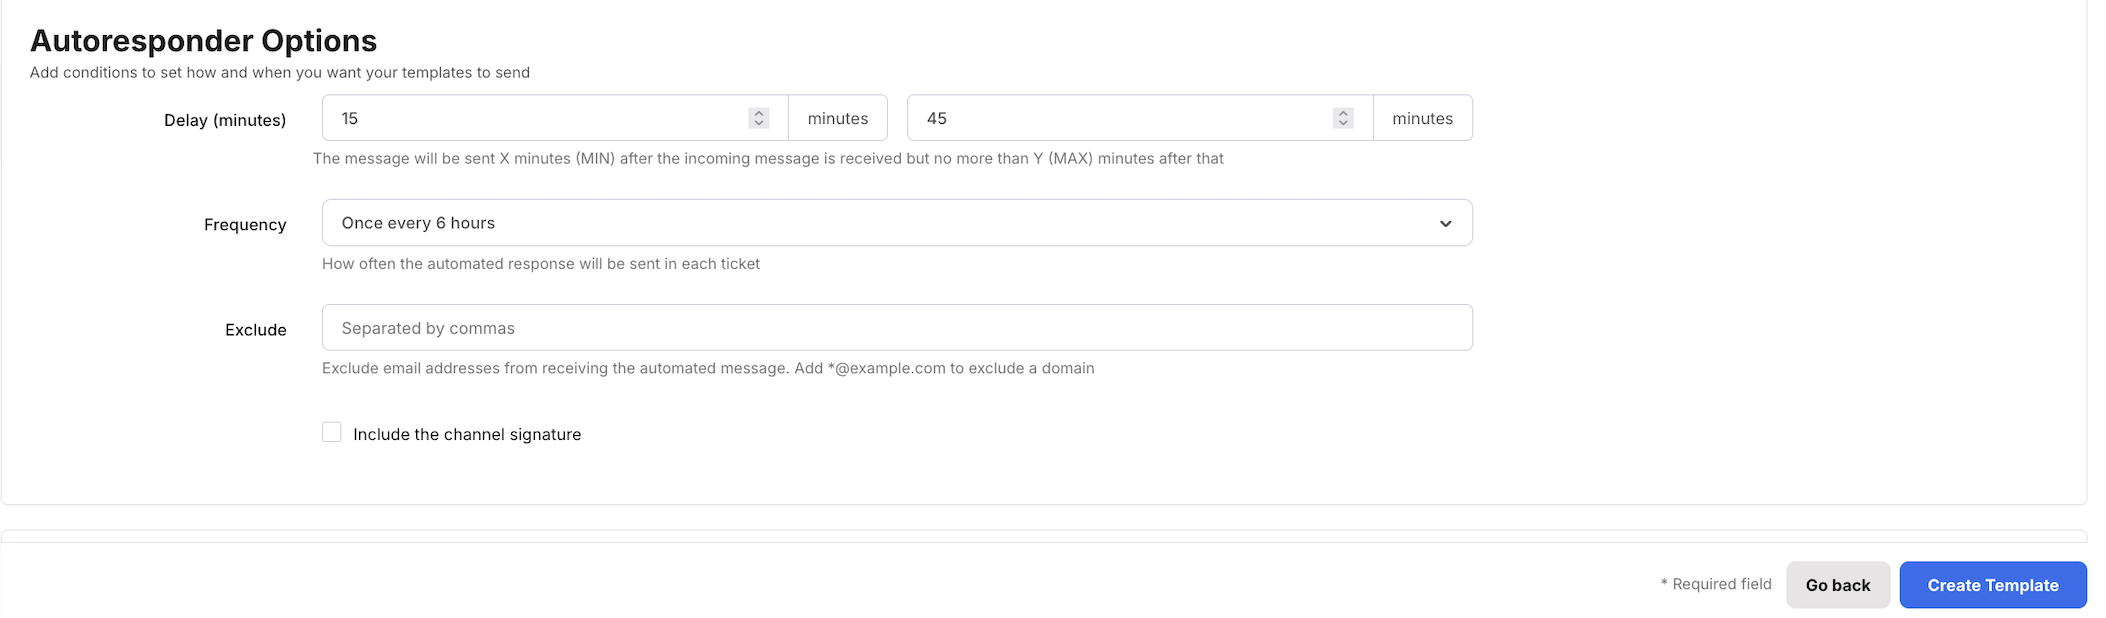
These options control how and when the message is sent:
-
Delay: Add a delay (in minutes) to make the auto-response feel more like a human is answering. This is particularly important for messages to marketplaces like Amazon and eBay who may have auto-reply detectors active that could stop the message from sending
-
e.g. 15 - 45 minutes = eDesk replies anytime between 15 - 45 minutes after the customer message is received.
-
-
Frequency: Choose how often this template should reply to multiple incoming messages in the same ticket. This is important so that you do not get caught up in an auto-reply loop - which can happen if your customer has an auto-reply set up incorrectly.
-
Common setting: Auto-reply to messages once every 6 or 12 hours for overnight auto-replies.
-
- Exclude: Prevent auto-replies to specific emails (e.g. name@example.com) or whole domains (e.g. *@example.com)
-
Include channel signature: Tick to include the channel signature at the end of the message.
To find out more about creating signatures, click here.
Ticket Status
In this section, you can choose what happens to the ticket status after the Auto-reply is sent:
-
Using this template doesn't change the ticket status: The ticket will stay in To Do and may show as overdue in eDesk, even though the SLA will still update correctly (stop) on the marketplace.
-
Using this template changes the ticket status to Waiting: Useful if you don't want overdue tickets to show in eDesk, but remember to follow up once you're back - your customer might still be waiting for a response.
-
Using this template changes the ticket status to Closed: The ticket will be marked as resolved in eDesk.
Tip: If you set the status to Waiting/Resolved, it’s a good idea to assign a Tag like 'Rule Only follow-up', then create a Pinned Filter for tickets with this tag and status. This makes it easy to find and check on these tickets when you're back in the office.
03 Creating a Rule Only Template - AI Settings tab (optional)
Optionally, if you want eDesk to ‘suggest’ this template for Agent Assist in relevant tickets, click the AI Settings tab and select an AI Classification.
To find out more about Agent Assist templates, click here.

04 Finish set-up & bind to a Message Rule
Click Create Template to save the new template.
The new template is added to the list in Settings > Smart Tools > Templates.
To start using it, you’ll need to bind it to a Message Rule.
Binding your Rule Only Template to a Message Rule
The next steps are to bind the Rule-only template to a rule.
To do this you need to:
- Go to Settings > Smart Tools > Rules > Add Message Rule
- Create the Conditions that you want your Message Rule to trigger the Rule Only Template to send (for eg. Message body > contains > "order missing" OR "where's my order").
- Under the Actions section, click on the Bind an Autoresponder dropdown and choose your Rule Only Template from there.

- The Rule Only Template will send out when an incoming ticket triggers the Conditions set in the Rule during the Date & Time Conditions (if any) that you have set.
Further Reading
To find out more about creating Message Rules, click here.To learn more about Manual-Usage Templates with eDesk, click here.
To find out how to create Auto-replies, click here.
And to find out how to create Out of Office templates for holiday periods, click here.

