Did you know that eDesk allows you to organise your channels into dedicated groups for each brand you sell through? If you sell under more than one brand, then this feature will make it even easier to stay on top of orders and queries in eDesk. Read on to learn more!
This help file explains how to organise your channels by Brand in eDesk.
Before you start
- You’ll need an Admin login to eDesk. If you don’t have an Admin login, you can request one from an Admin user within your business.
- The channels that you want to link to a Brand must already be connected to your eDesk. See here for instructions on connecting channels.
01 Brands in eDesk
When we talk about Brands, we mean the different brand names that you sell under.
For example, a bike retailer sells through two brands called Joe's Bikes and Scooters and Joe's Motorcross.
The retailer uses a channel called Motorcross Marketplace to sell products under Joe's Motorcross, and uses eBay, Shopify, and FNAC to sell products under Joe's Bikes and Scooters.
- filter channels by Brand.
- filter reports by Brand.
- limit access to channels by Brand for other users in your organisation.
- automatically attach an order to a ticket based on the Brand, or suggest possible matches.
Learn more here about instructing eDesk to apply Brand-related rules to order attachment.
02 How do I assign channels to a Brand?
One Brand can have many channels. To link channels to a Brand, you'll first add your Brand to eDesk and then link channels to it.1. Go to Settings > Mailbox > Channels.
2. Select the Brands tab.
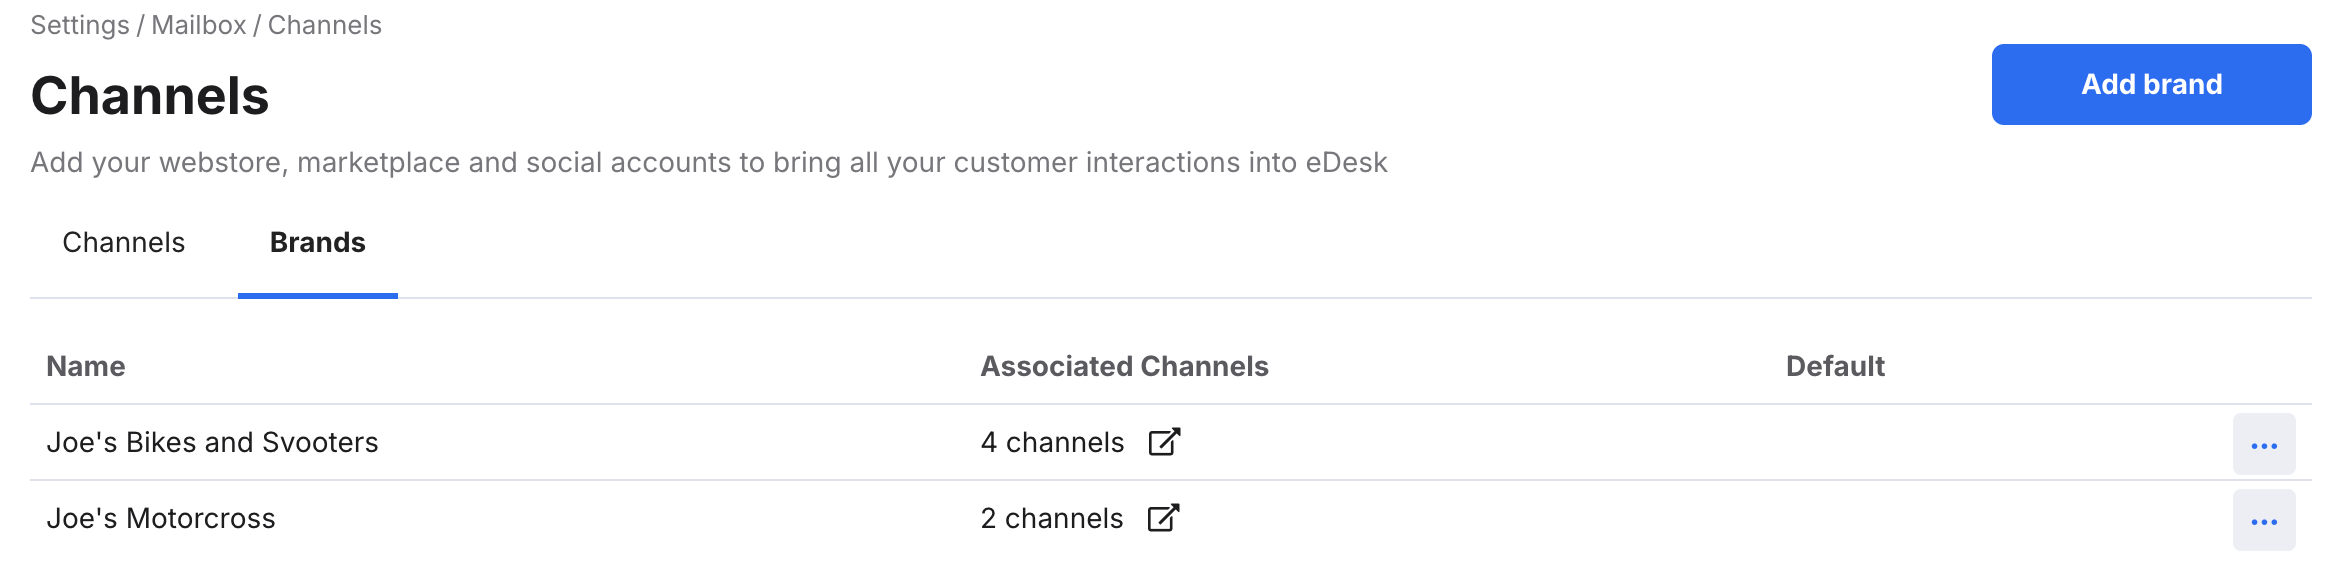
If you have already created brands, they are listed here.
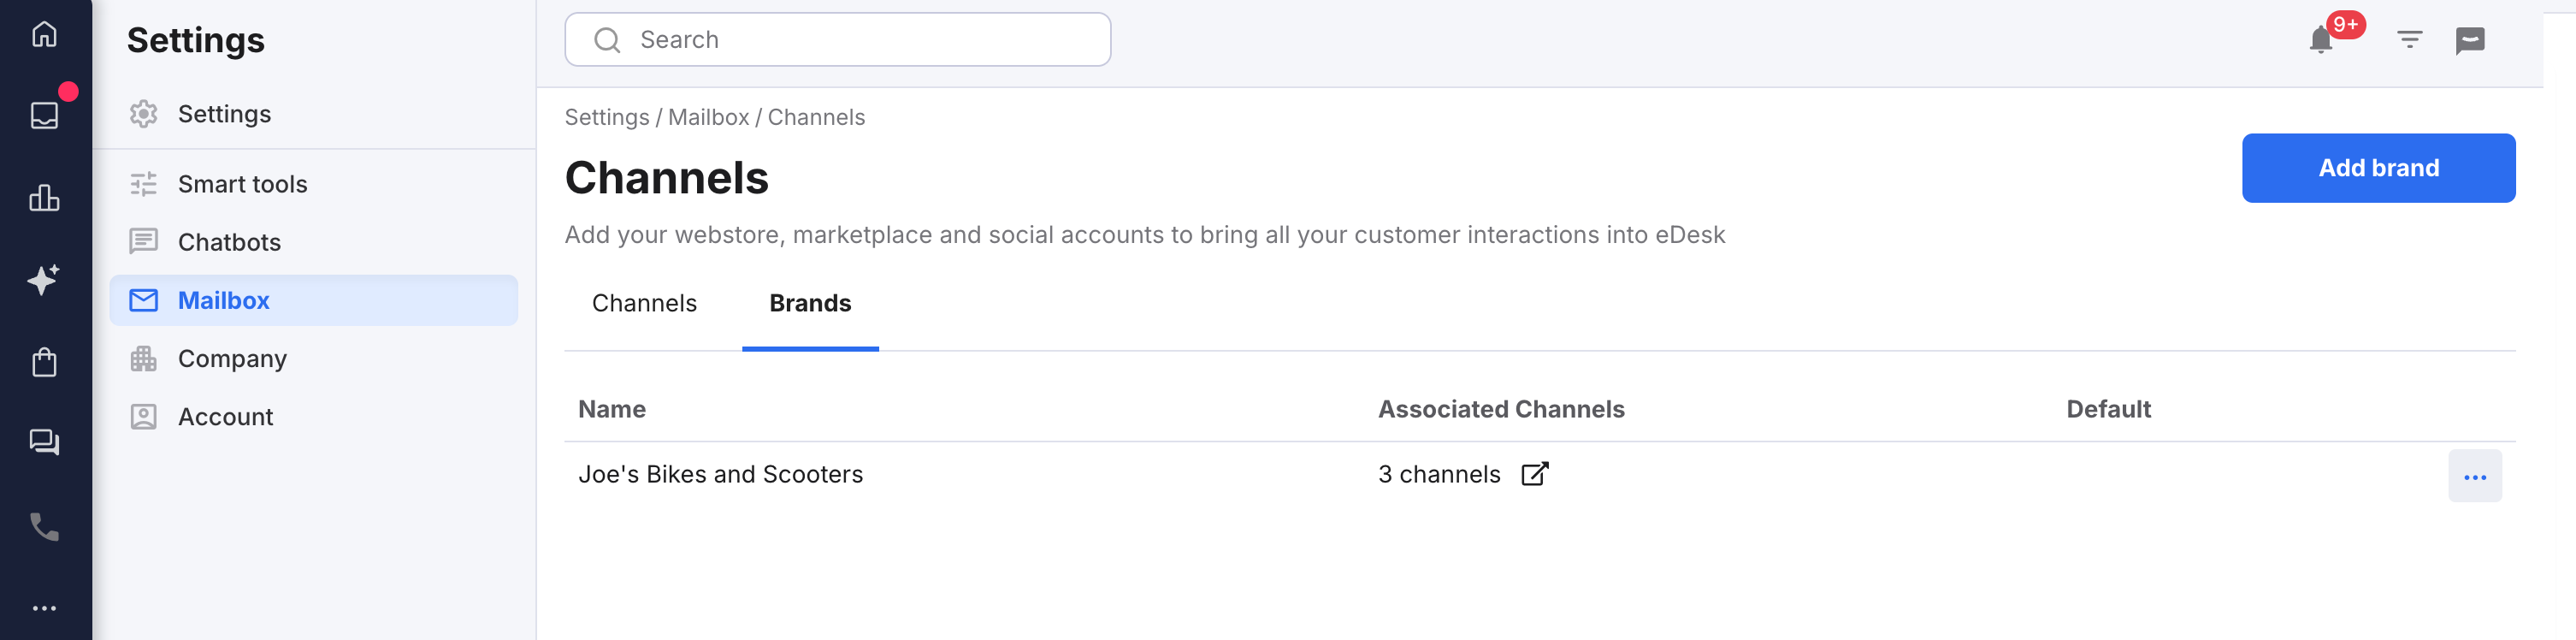
3. Select Add brand, to open the Add brand modal window.
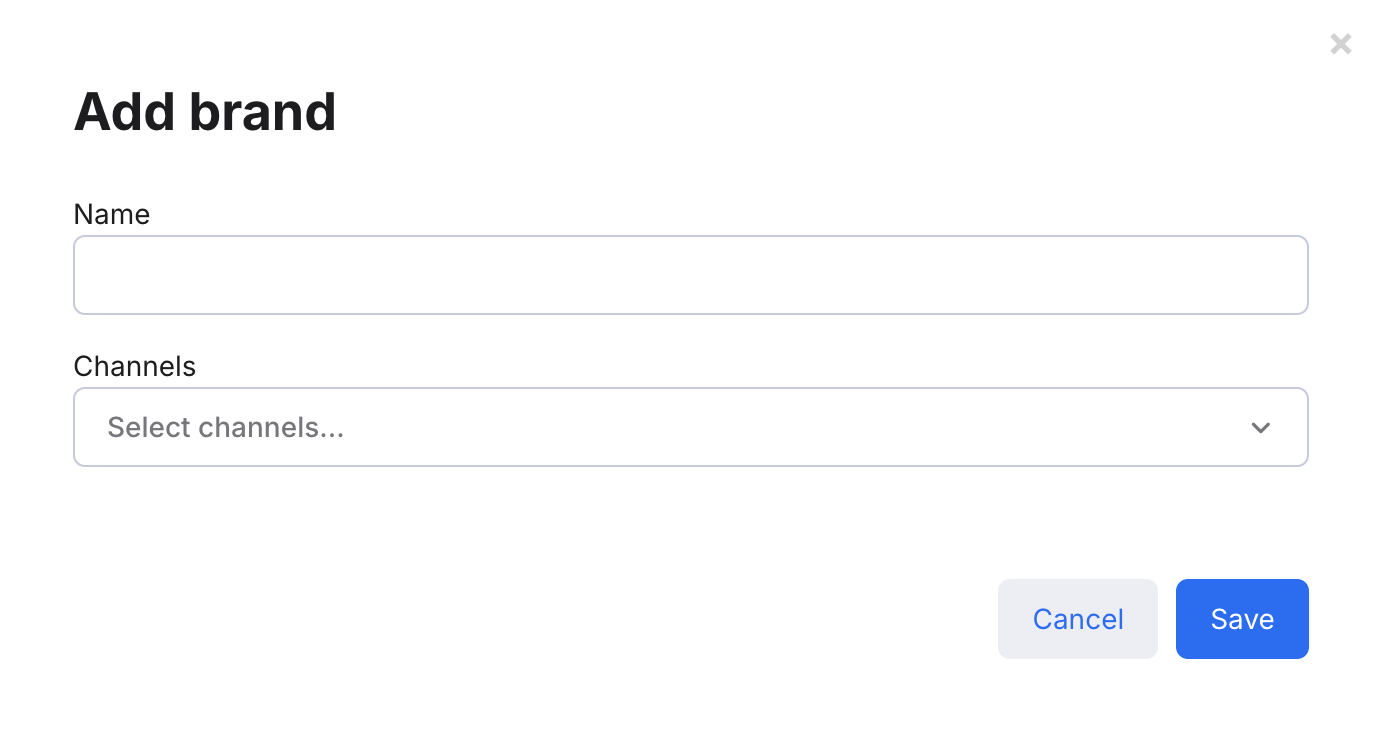
4. In the Name field, enter the name of the Brand, e.g. Joe's Motorcross.
5. In the Channels field, select the channels that you want to add to this Brand. To deselect a channel, click it again.
6. Save.
The Brands tab is redisplayed showing the new Brand you've added.
Alternatively, you can create the Brand and assign it to your channels:
1. Go to Settings > Mailbox > Channels.
2. In the Channels tab, select the channel to which you'll add the new Brand.
3. The Channels page opens showing the General tab.
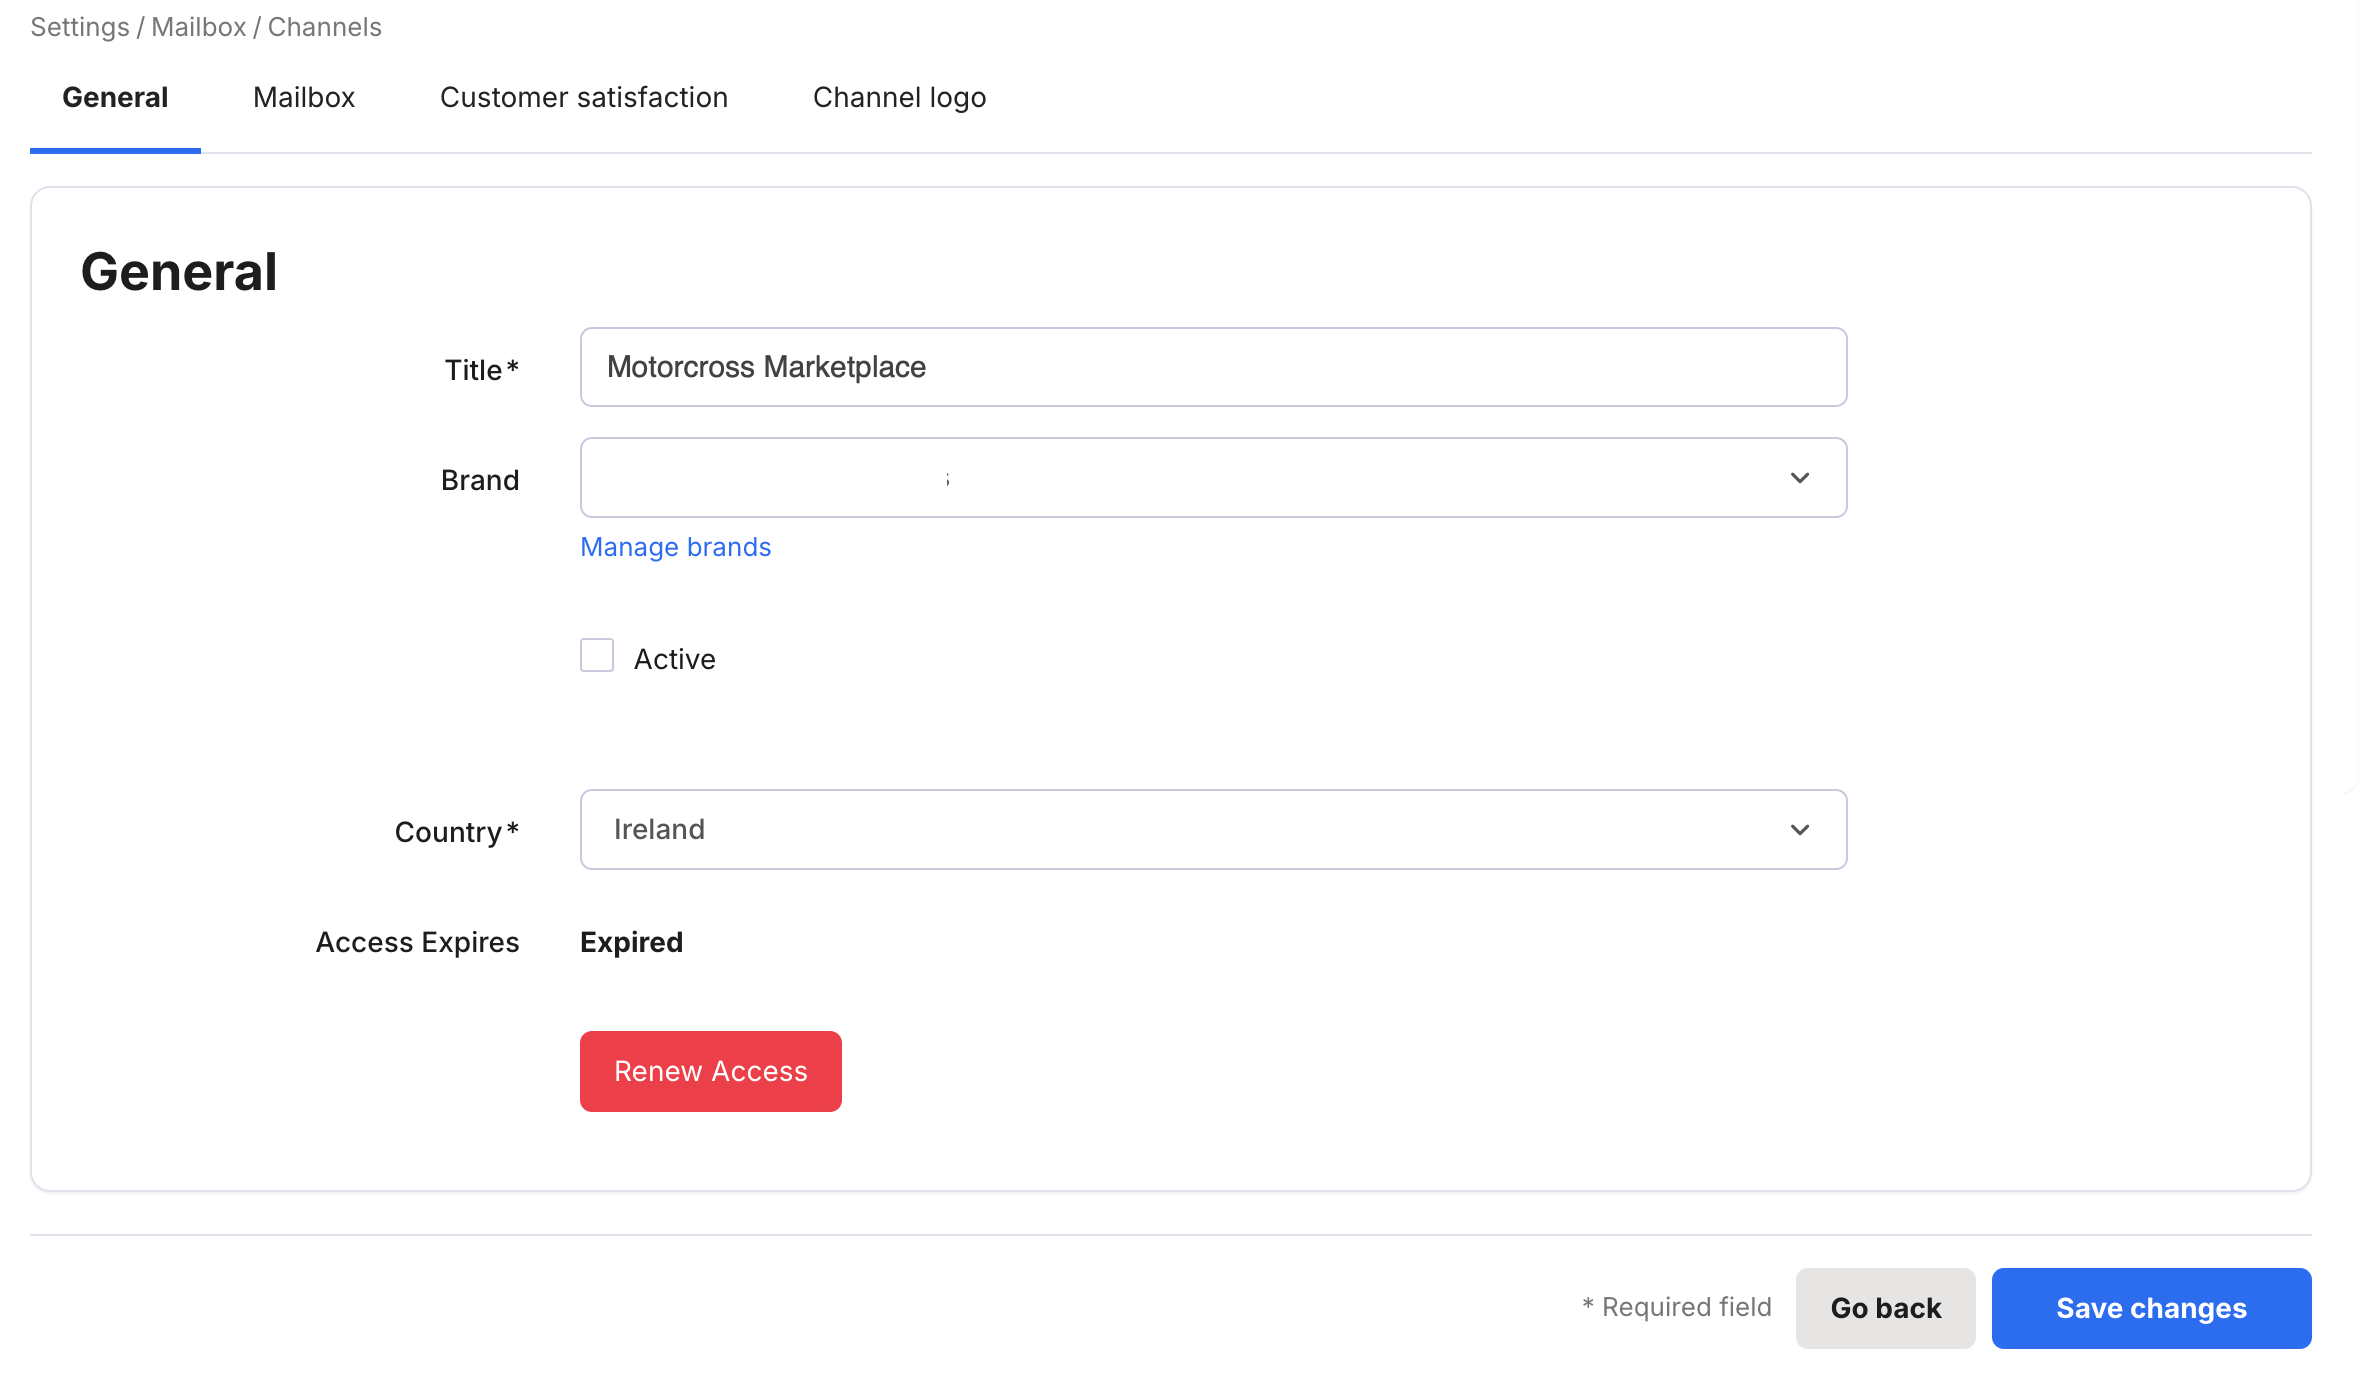
4. Select the Brand field to display a list of Brands.
5. Select the Brand you want to link to this channel.
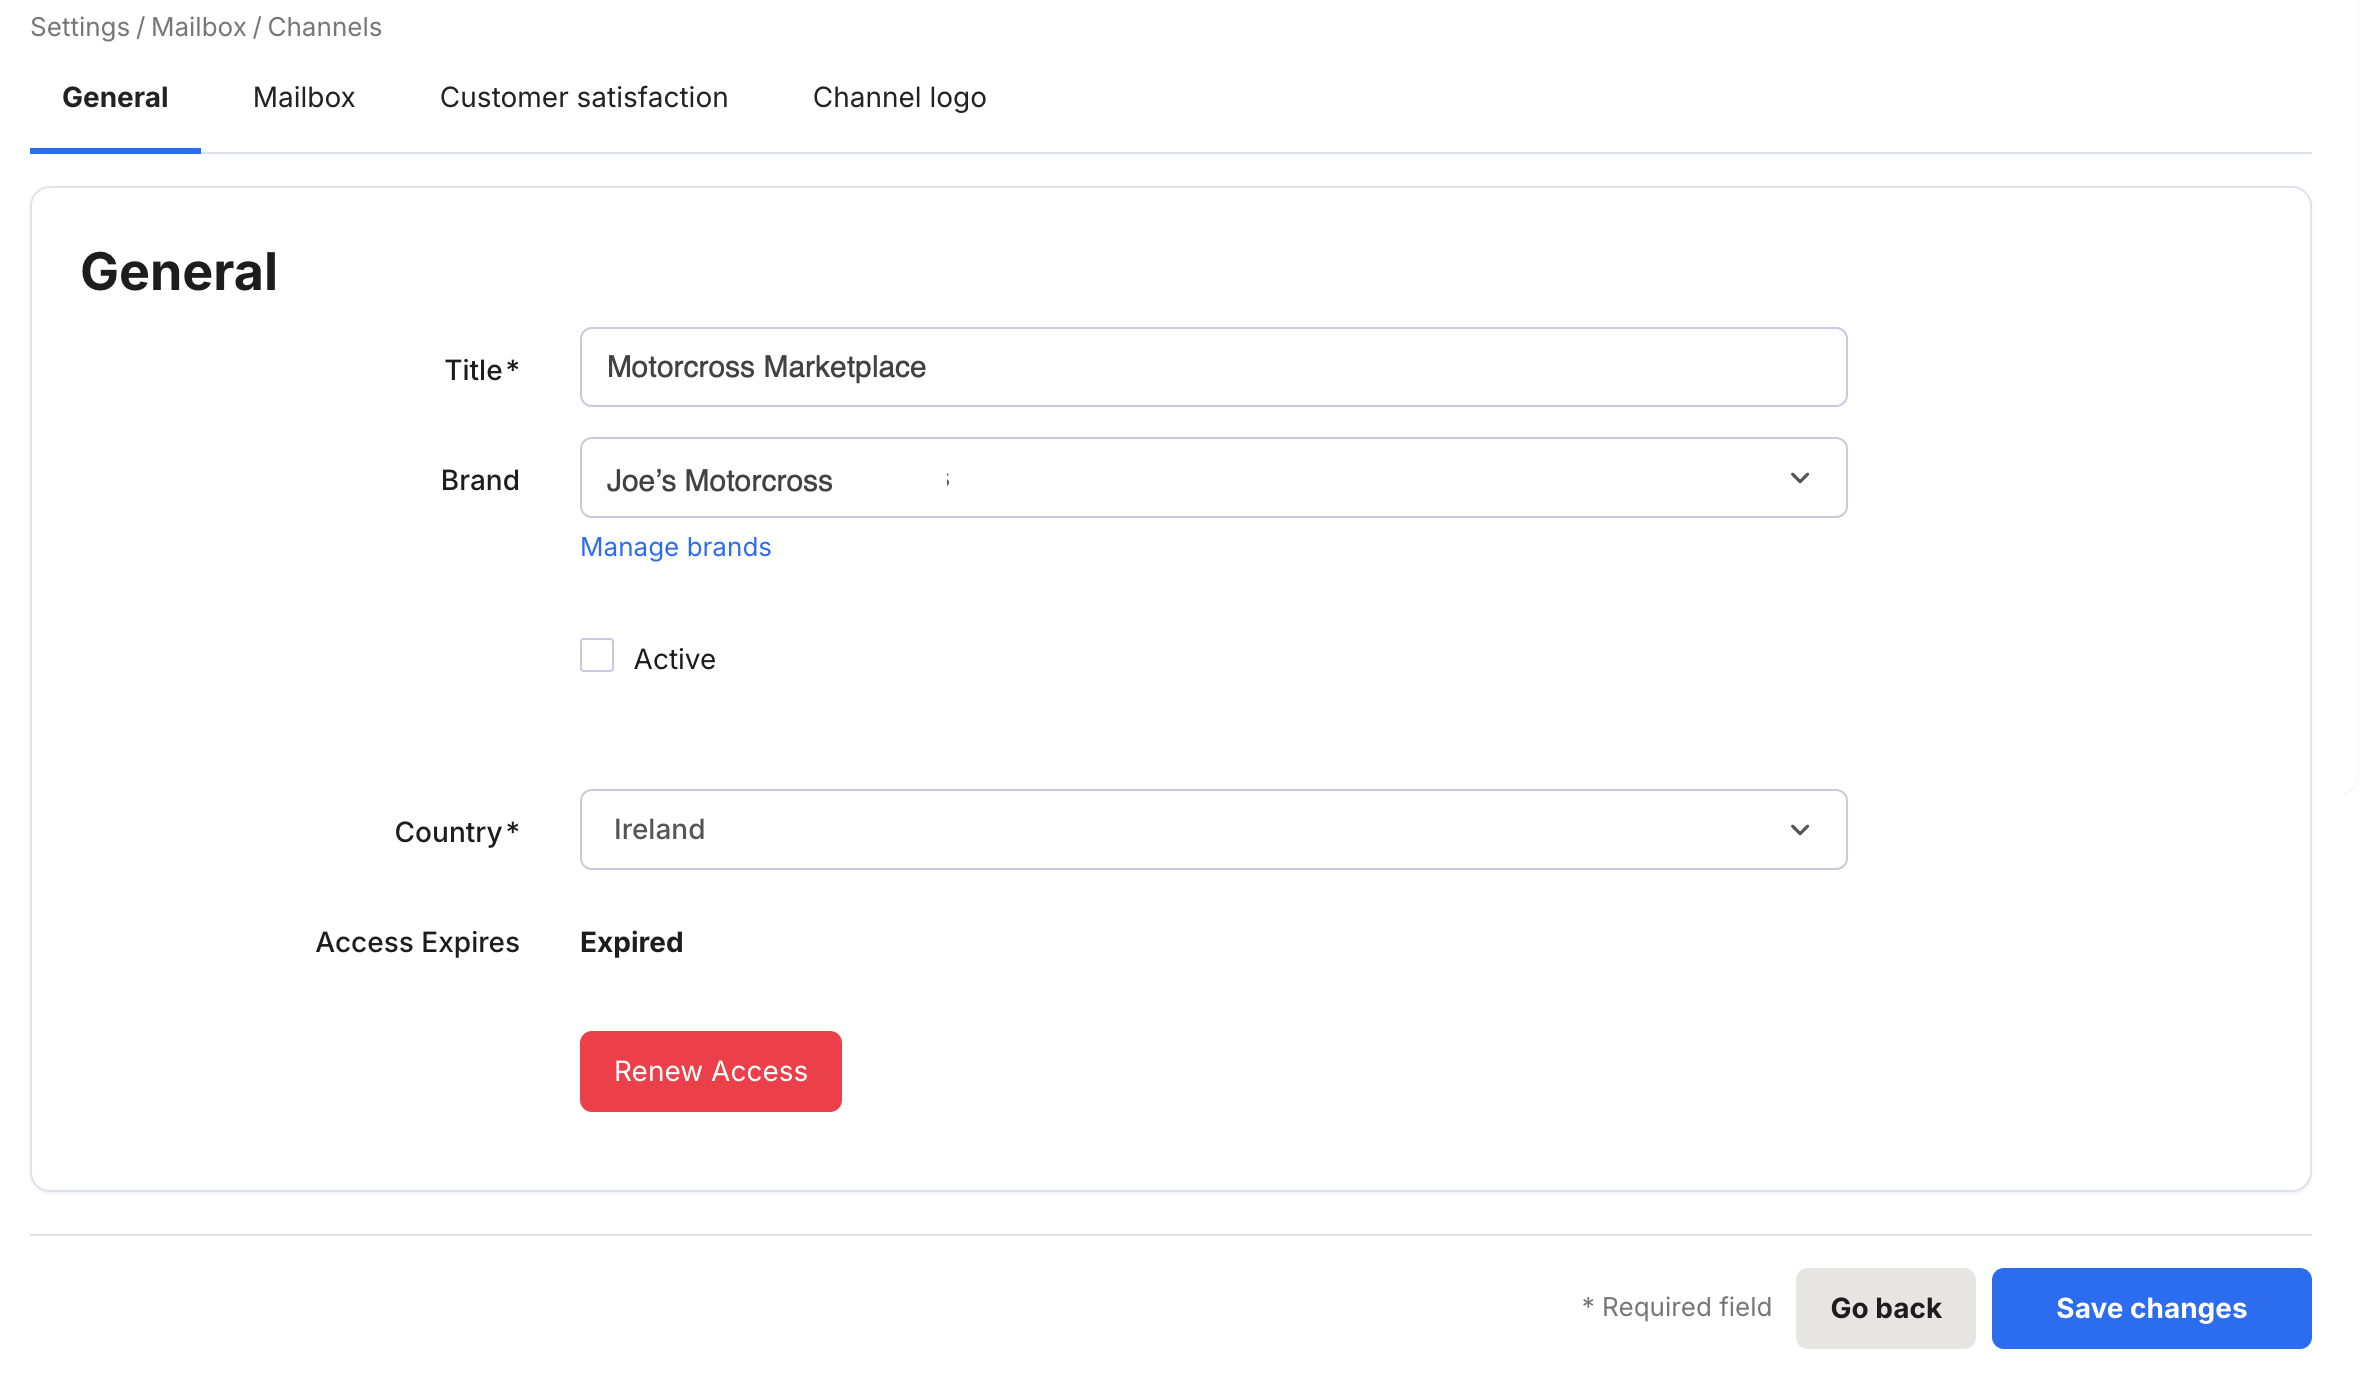
6. Save your changes.
03 Editing or deleting Brands
To remove a channel from a Brand or rename a Brand
1. Either select Manage Brands in the General tab for that channel, or go to Settings > Mailbox > Channels. and open the Brands tab.
2. In the row for the Brand, select the More Actions (three dots) icon and select Edit.
The Edit brand window opens.
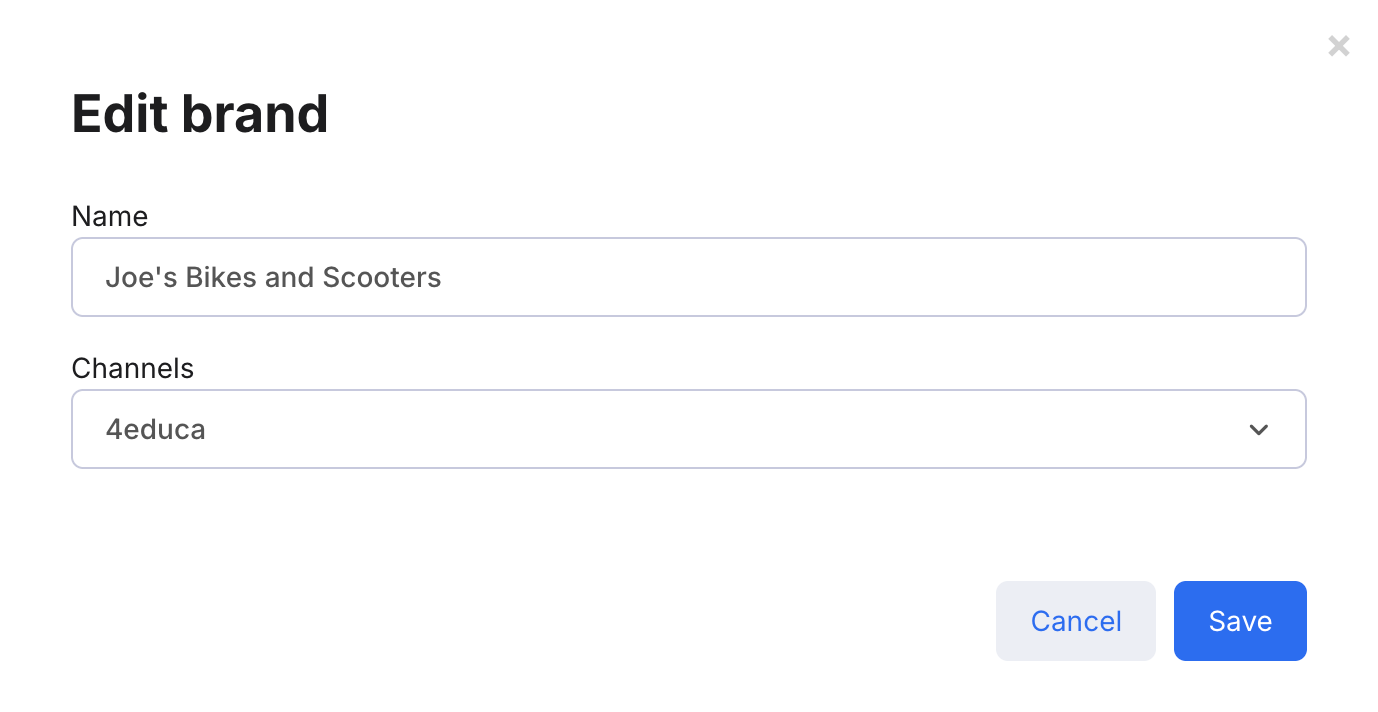
3. To remove channels, select the Channels field and click the brands you want to remove.
To rename the Brand, edit the Name field.
4. Save your changes.
To delete a Brand
1. Either select Manage Brands in the General tab for that channel, or go to Settings > Mailbox > Channels. and open the Brands tab.
2. In the row for the Brand, select the More Actions (three dots) icon and select Delete.
In the Confirmation window, select Yes.
To set a Brand as your default Brand
1. Either select Manage Brands in the General tab for that channel, or go to Settings > Mailbox > Channels. and open the Brands tab.
2. In the row for the Brand, select the More Actions (three dots) icon and select Set as default.
04 Filtering by Brand
Once you have set up Brands, Agents can use the Brands filters in the Mailbox and Insights.Filtering tickets in the Mailbox by Brand
Select the Brands button and choose the Brands from the menu.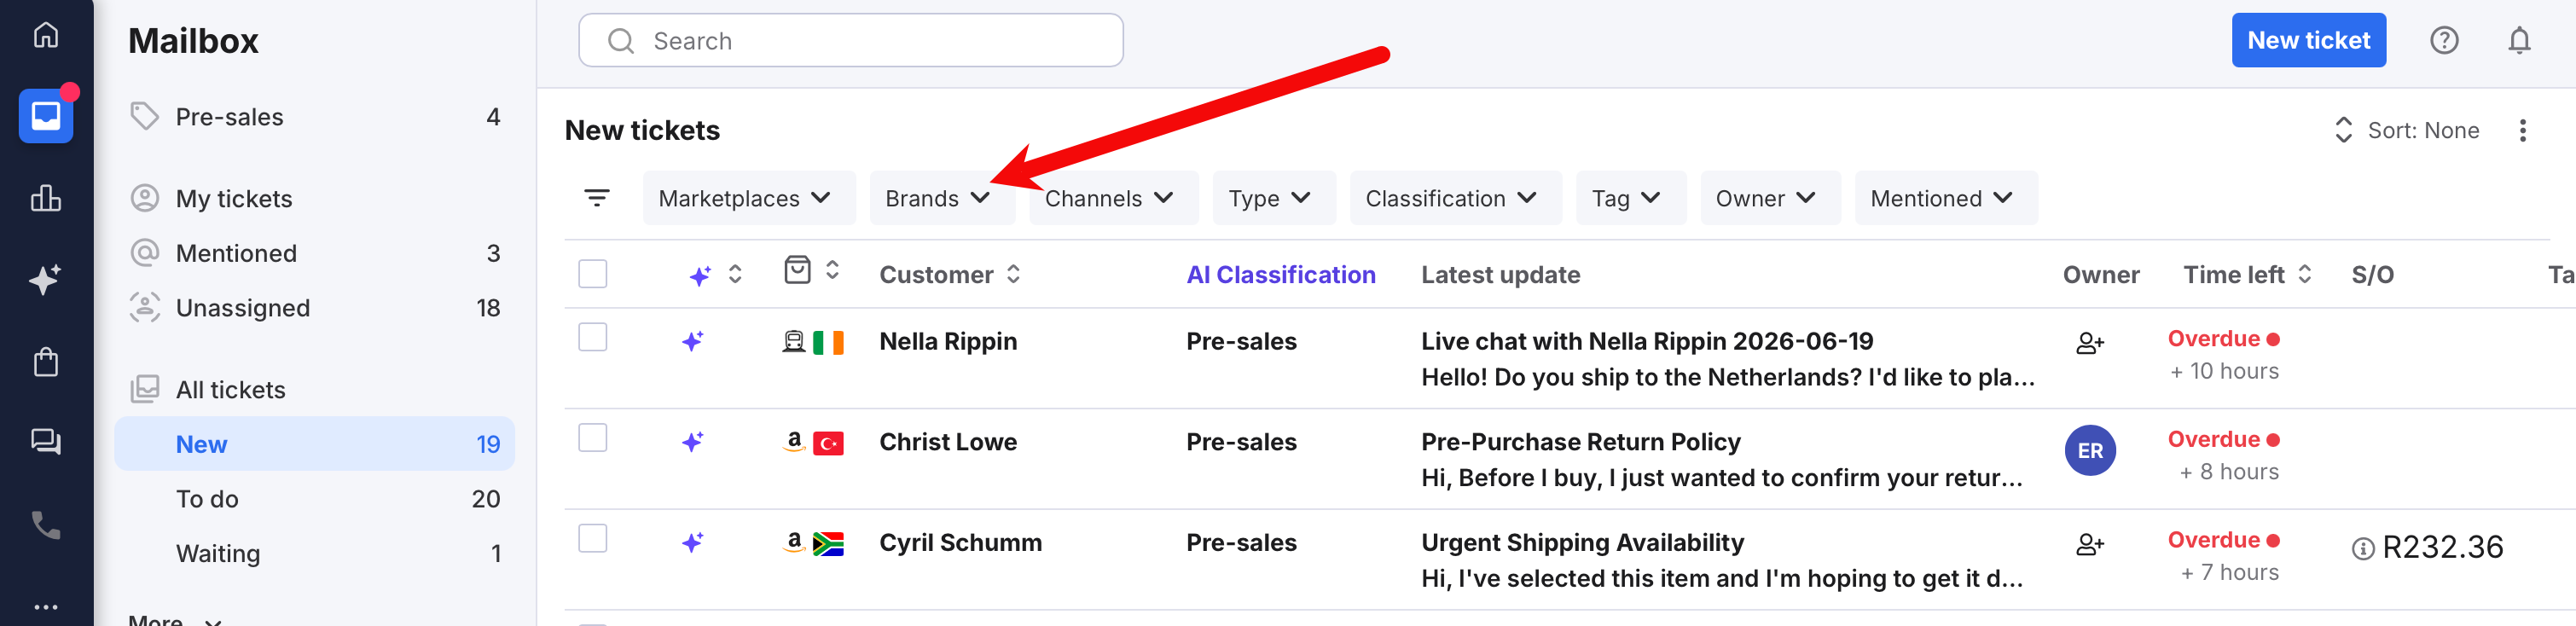
The Mailbox will refresh to show only tickets for the Brands you have selected.
Filtering Insights by Brand
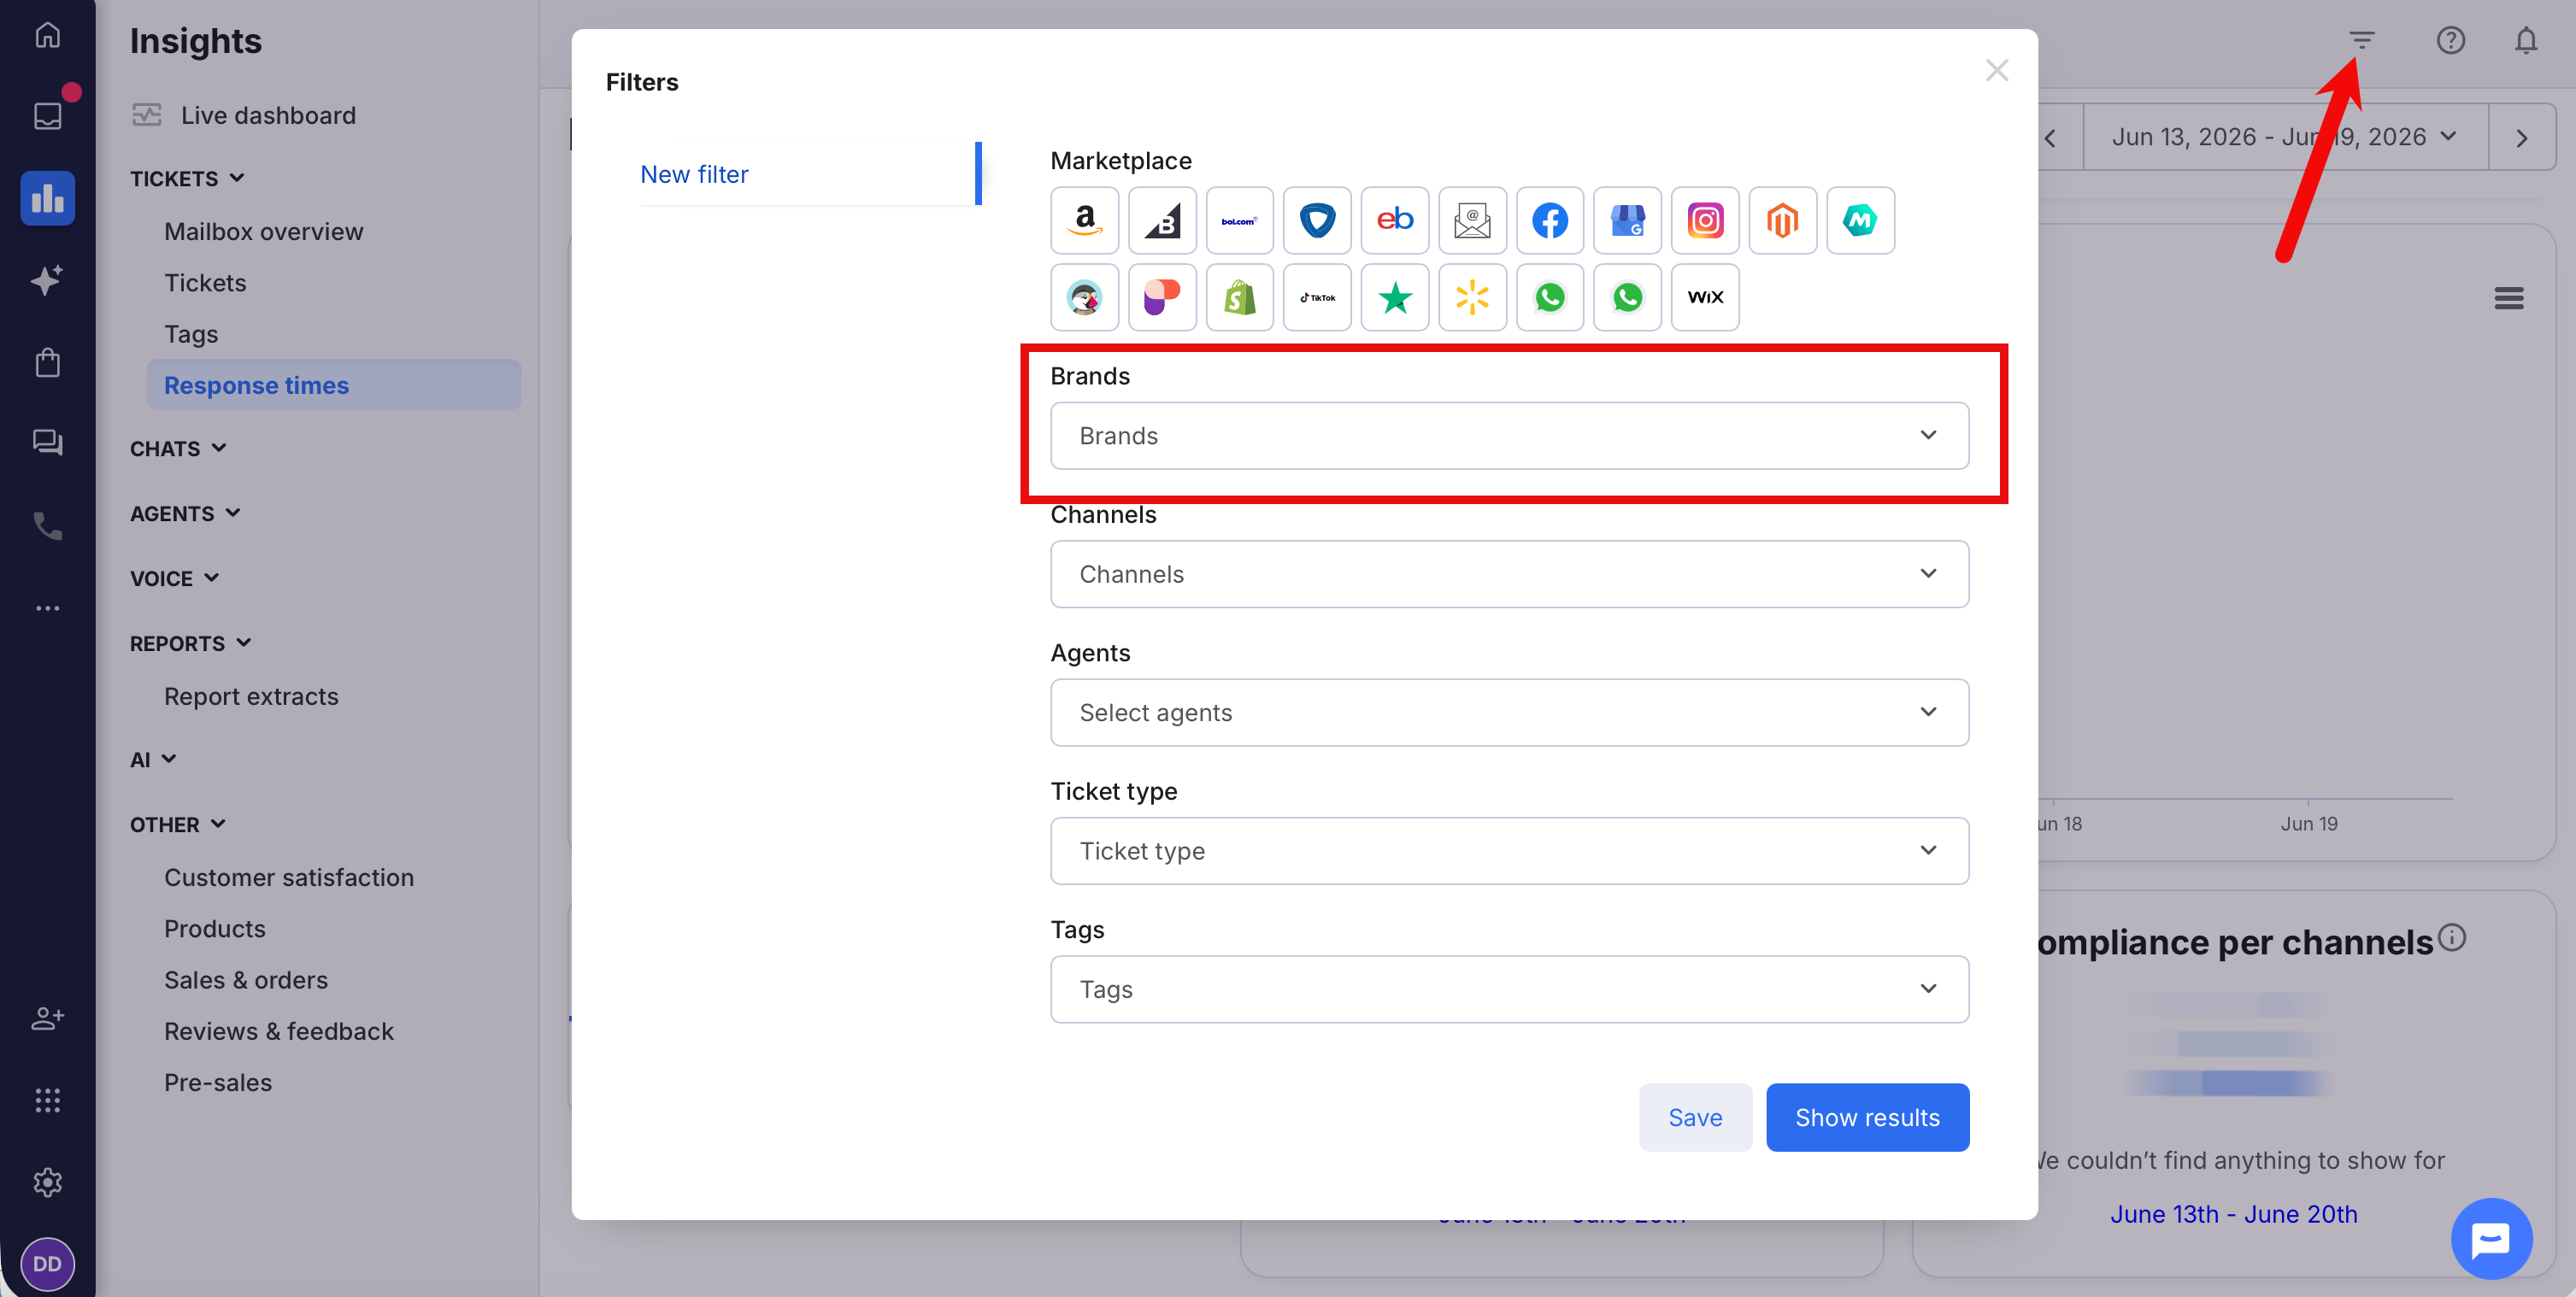
1. Select the Filters icon to display the Filters window.2. Select the Brands field, and choose the Brands you are interested in.
3. Select Save changes.
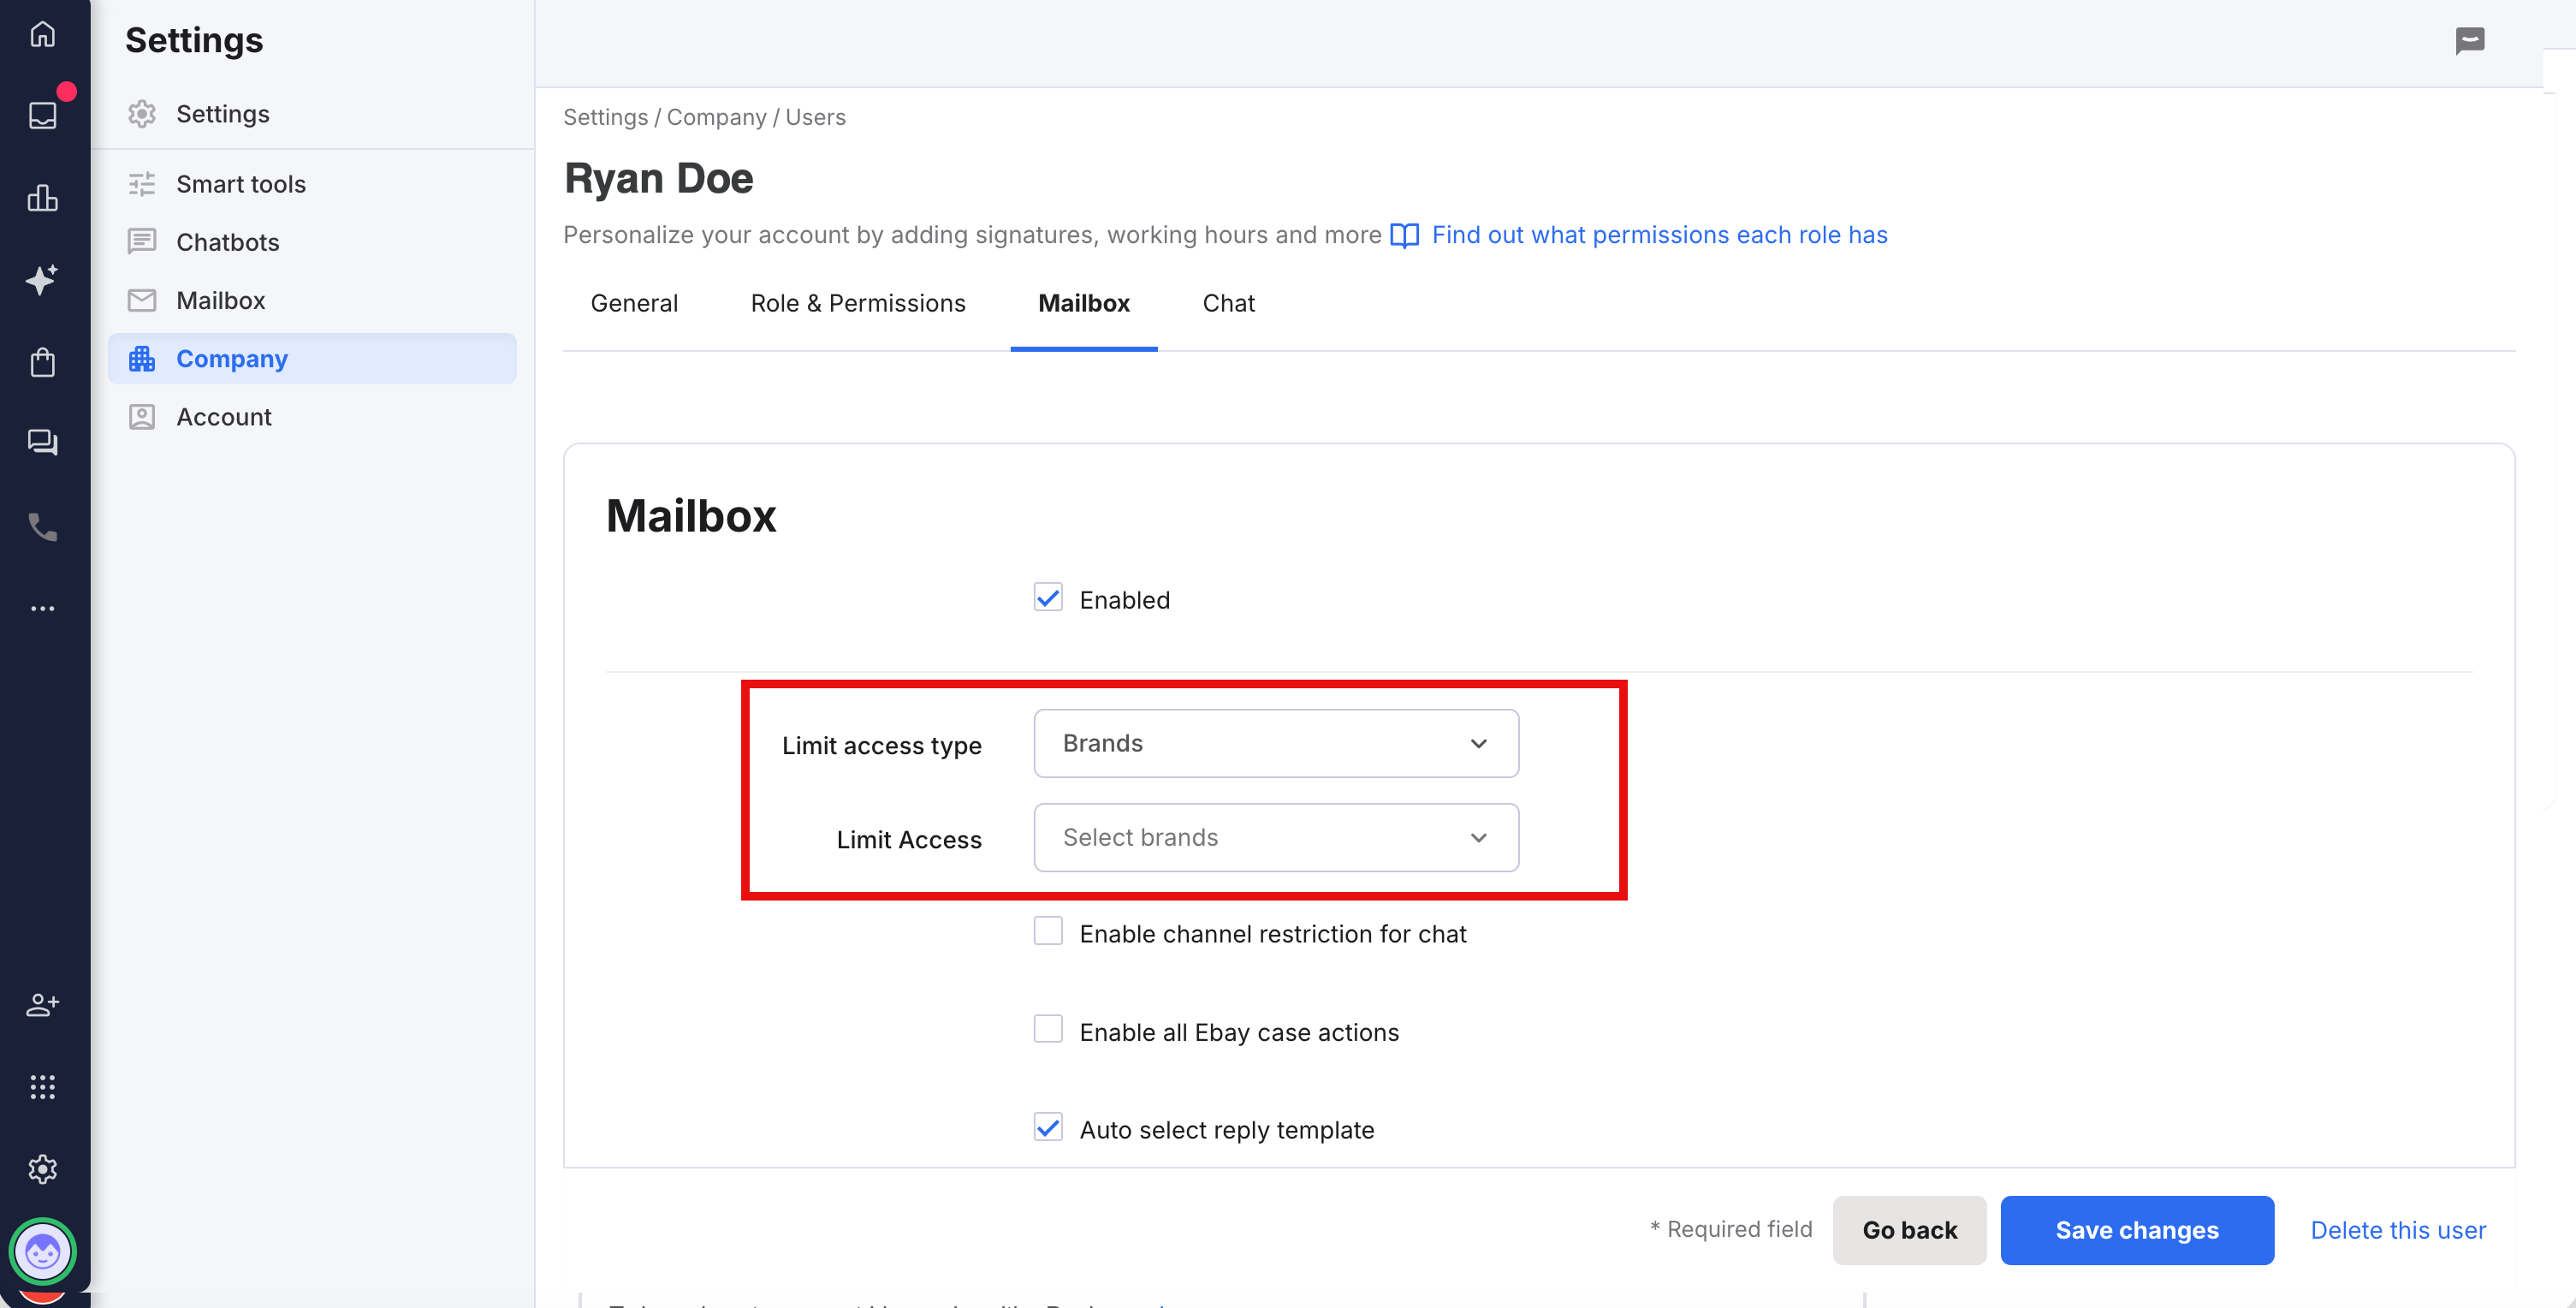
05 Restricting users to tickets for specific Brands
Once Brands have been set up, Admin users can restrict users to be able to view only tickets for specific Brands.1. Login as an Admin user.
2. Go to Settings > Company > Users to list the users in your organisation.
3 Select the user you want to limit to a given Brand.
4. Select the Mailbox tab.
5. In the Limit access type field, select Brands.
6. In the Limit Access field, select the Brands you want this user to be able to see tickets for. To deselect a Brand, click it again.
7. Save your changes.
06 Attaching orders to tickets by Brand
eDesk allows Admins to apply rules that determine whether details of a related order are included in a ticket. One of the rules stipulates that an order will be attached only if the customer message and the order arrived in eDesk from channels within the same Brand. Learn more in this help file.Further Reading
To learn more about orders in eDesk, see here.
To learn how to connect Linnworks with eDesk, see here.