This help file provides an overview on Training Content and explains how you can add and manage content that the AI will use.
Before you start
- AI Training Content is part of our AI Automation and AI Assist features, so you must be on a pack that contains one of these features. For pricing, click here.
- You’ll need to have access to Settings > AI > Training Content in your permissions.
- If you don’t have access, you can request it from an Admin user within your business.
01 Adding content to the library
Click on the name of the Sample Policies library and click 'Add content'.
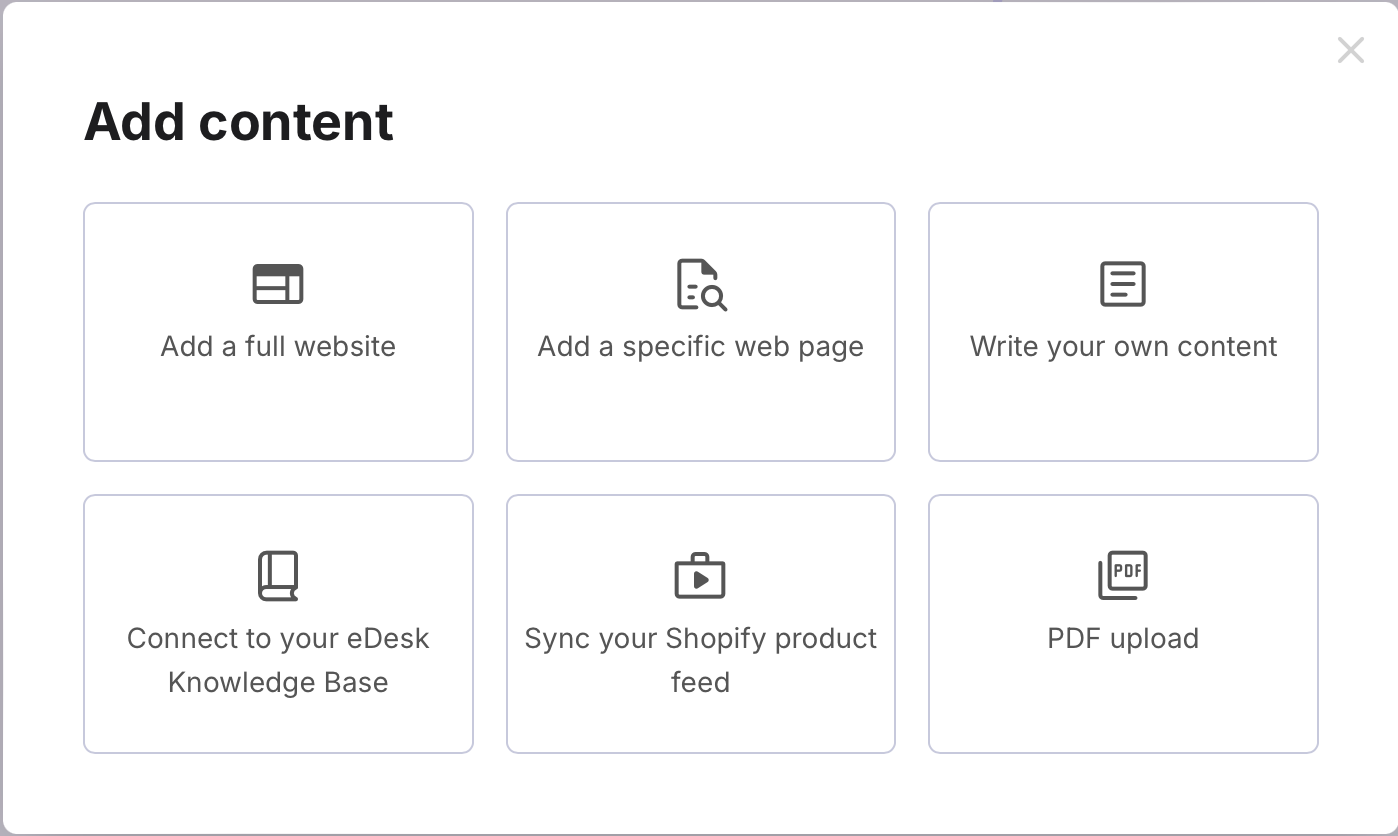
This opens an Add content window that allows you to add content to the library in the following ways:
- Get information from an entire website
- Get information from a single web page
- Add content as plain text (custom content)
- Pull all content from an existing Knowledge base
- Sync Shopify product feed
- Get information from a PDF
Note: We can also add content using a Sitemap or by Scraping an external web page which can save you time by eliminating the need to add individual external links. If you have a Sitemap or would like us to scrape an external web page, let us know and we can add it for you.
The next sections in this help file describe how to import from each of these options.
Get information from an entire website
To import content from an entire website:1. Select Import from website via URL to open a pane that allows you to enter a website URL:

2. In the Website URL field, add the main domain URL of the website, e.g., https://www.edesk.com, and not https://www.edesk.com/pricing.
You must include the http prefix e.g. https://
3. Select Import at the bottom of the pane.
The import will begin immediately and all web pages belonging to the domain will be added to the Training Content. There is a limit of 10,000 pages. If the website contains a high volume of pages, this will take time - even a few hours.
You'll see each imported page appear as an article inside the library.
4. To preview the content, select the article in the library. You'll see the URL and a preview of the content.
 5. To reimport this content from the relevant page in the website, select the Refresh Content in the preview.
If you want to import only one page from a website rather than the entire website, follow the steps in the next section of this help file.
Get information from a single web page
To import content from one web page:1. Select Import a single page via URL to open a pane that allows you to enter a website URL:
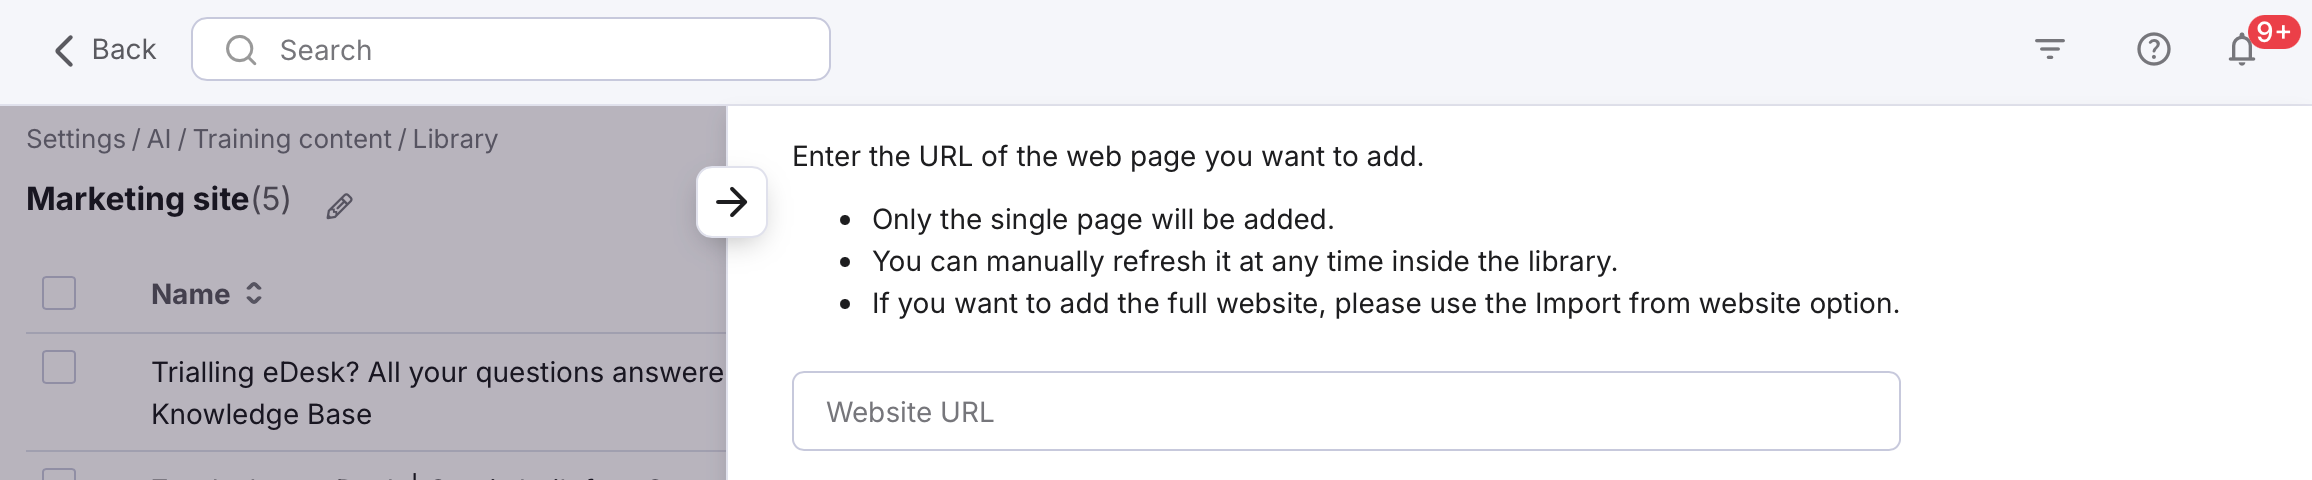
2. In the Website URL field, add the URL of the web page, e.g., http://www.edesk.com/pricing
3. Select Import at the bottom of the pane.
The import will begin immediately and the chosen web page will be added to the Training Content. The imported page will appear as an article inside the library. When you select it, you'll see the URL and a preview of the content. You can manually refresh each page here if needed by selecting Refresh Content.
Pull all content from an existing Knowledge Base
If you already have a Knowledge Base set up in eDesk, you can connect it to your Training Content to make it available for your chatbots and Smart Reply to use. To learn about eDesk's Knowledge Base feature, see here.1. Select Import from existing Knowledge Base to open a pane that allows you to choose the Knowledge Base.
2. Select the Select knowledge base to display a list of libraries.

3. Select Import at the bottom of the pane.
The import will begin immediately. All articles belonging to that Knowledge base will be added to the Training Content library as individual articles.
4. To preview the content, select the article in the library.
Add content as plain text
The plain text or custom content option is the simplest way to add material. It is a free text field and can be updated at any time.1. Select Add custom content to open a pane that allows you to enter custom content:
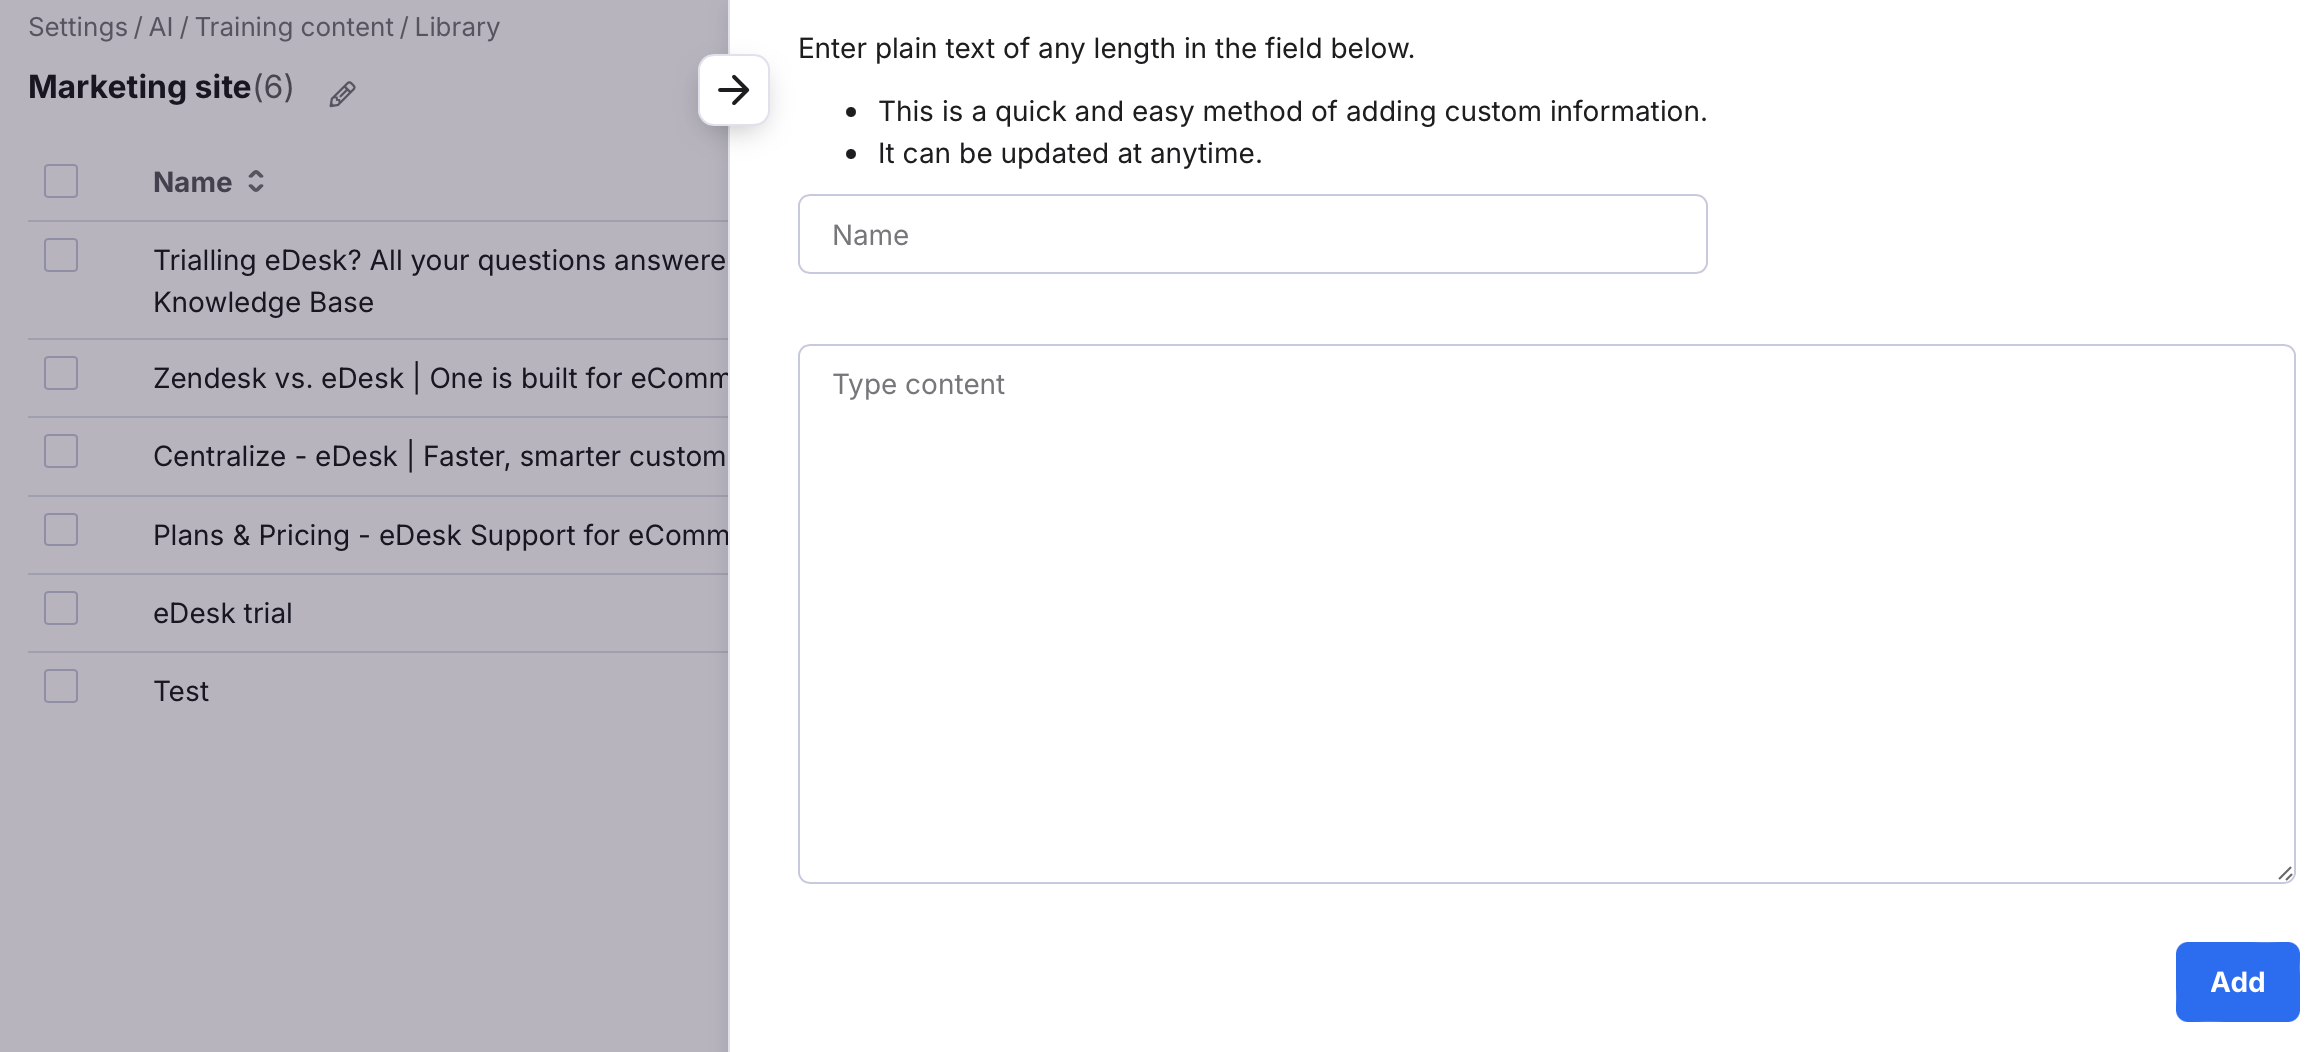 2. Enter a name for the article - this will be displayed in the list of articles in the library.
3. Enter text for the AI to use. Here are some guidelines for creating formatted and hyperlinked text in your custom content.
4. Select Add to add this to the Training Content.
Please note, once saved, custom content may take up to 15 minutes to be ready for the AI to use.
Sync Shopify product feed
If you have added a Shopify channel via the App Store, you'll have the option to sync your Shopify product feed with your Training Content:1. Select Sync Shopify product feed to open a pane that allows you to choose your Shopify channel:

2. Select a channel.
3. Select Save.
All active products that are available in the store for this channel will be added to the Training Content library. The product feed will then be synced with the Training Content once every 24 hours to ensure it's kept up to date.
4. If you don't want specific products to be synced, manually disable that article in the library.
Important information: Only 1000 products will be synced during a trail. Please check the list of products before testing to ensure you are asking about products that have been imported. Once moving to a paid account, all products will be automatically imported.
Get information from a PDF
eDesk can import text from a PDF into your Training Content, allowing your AI tools to learn from the content in the PDF.Images in the PDF are not imported and the AI tools will be unaware of them.
Note: The PDF must be 10MB or less.
1. Select PDF upload to open a pane that allows you to choose the PDF:
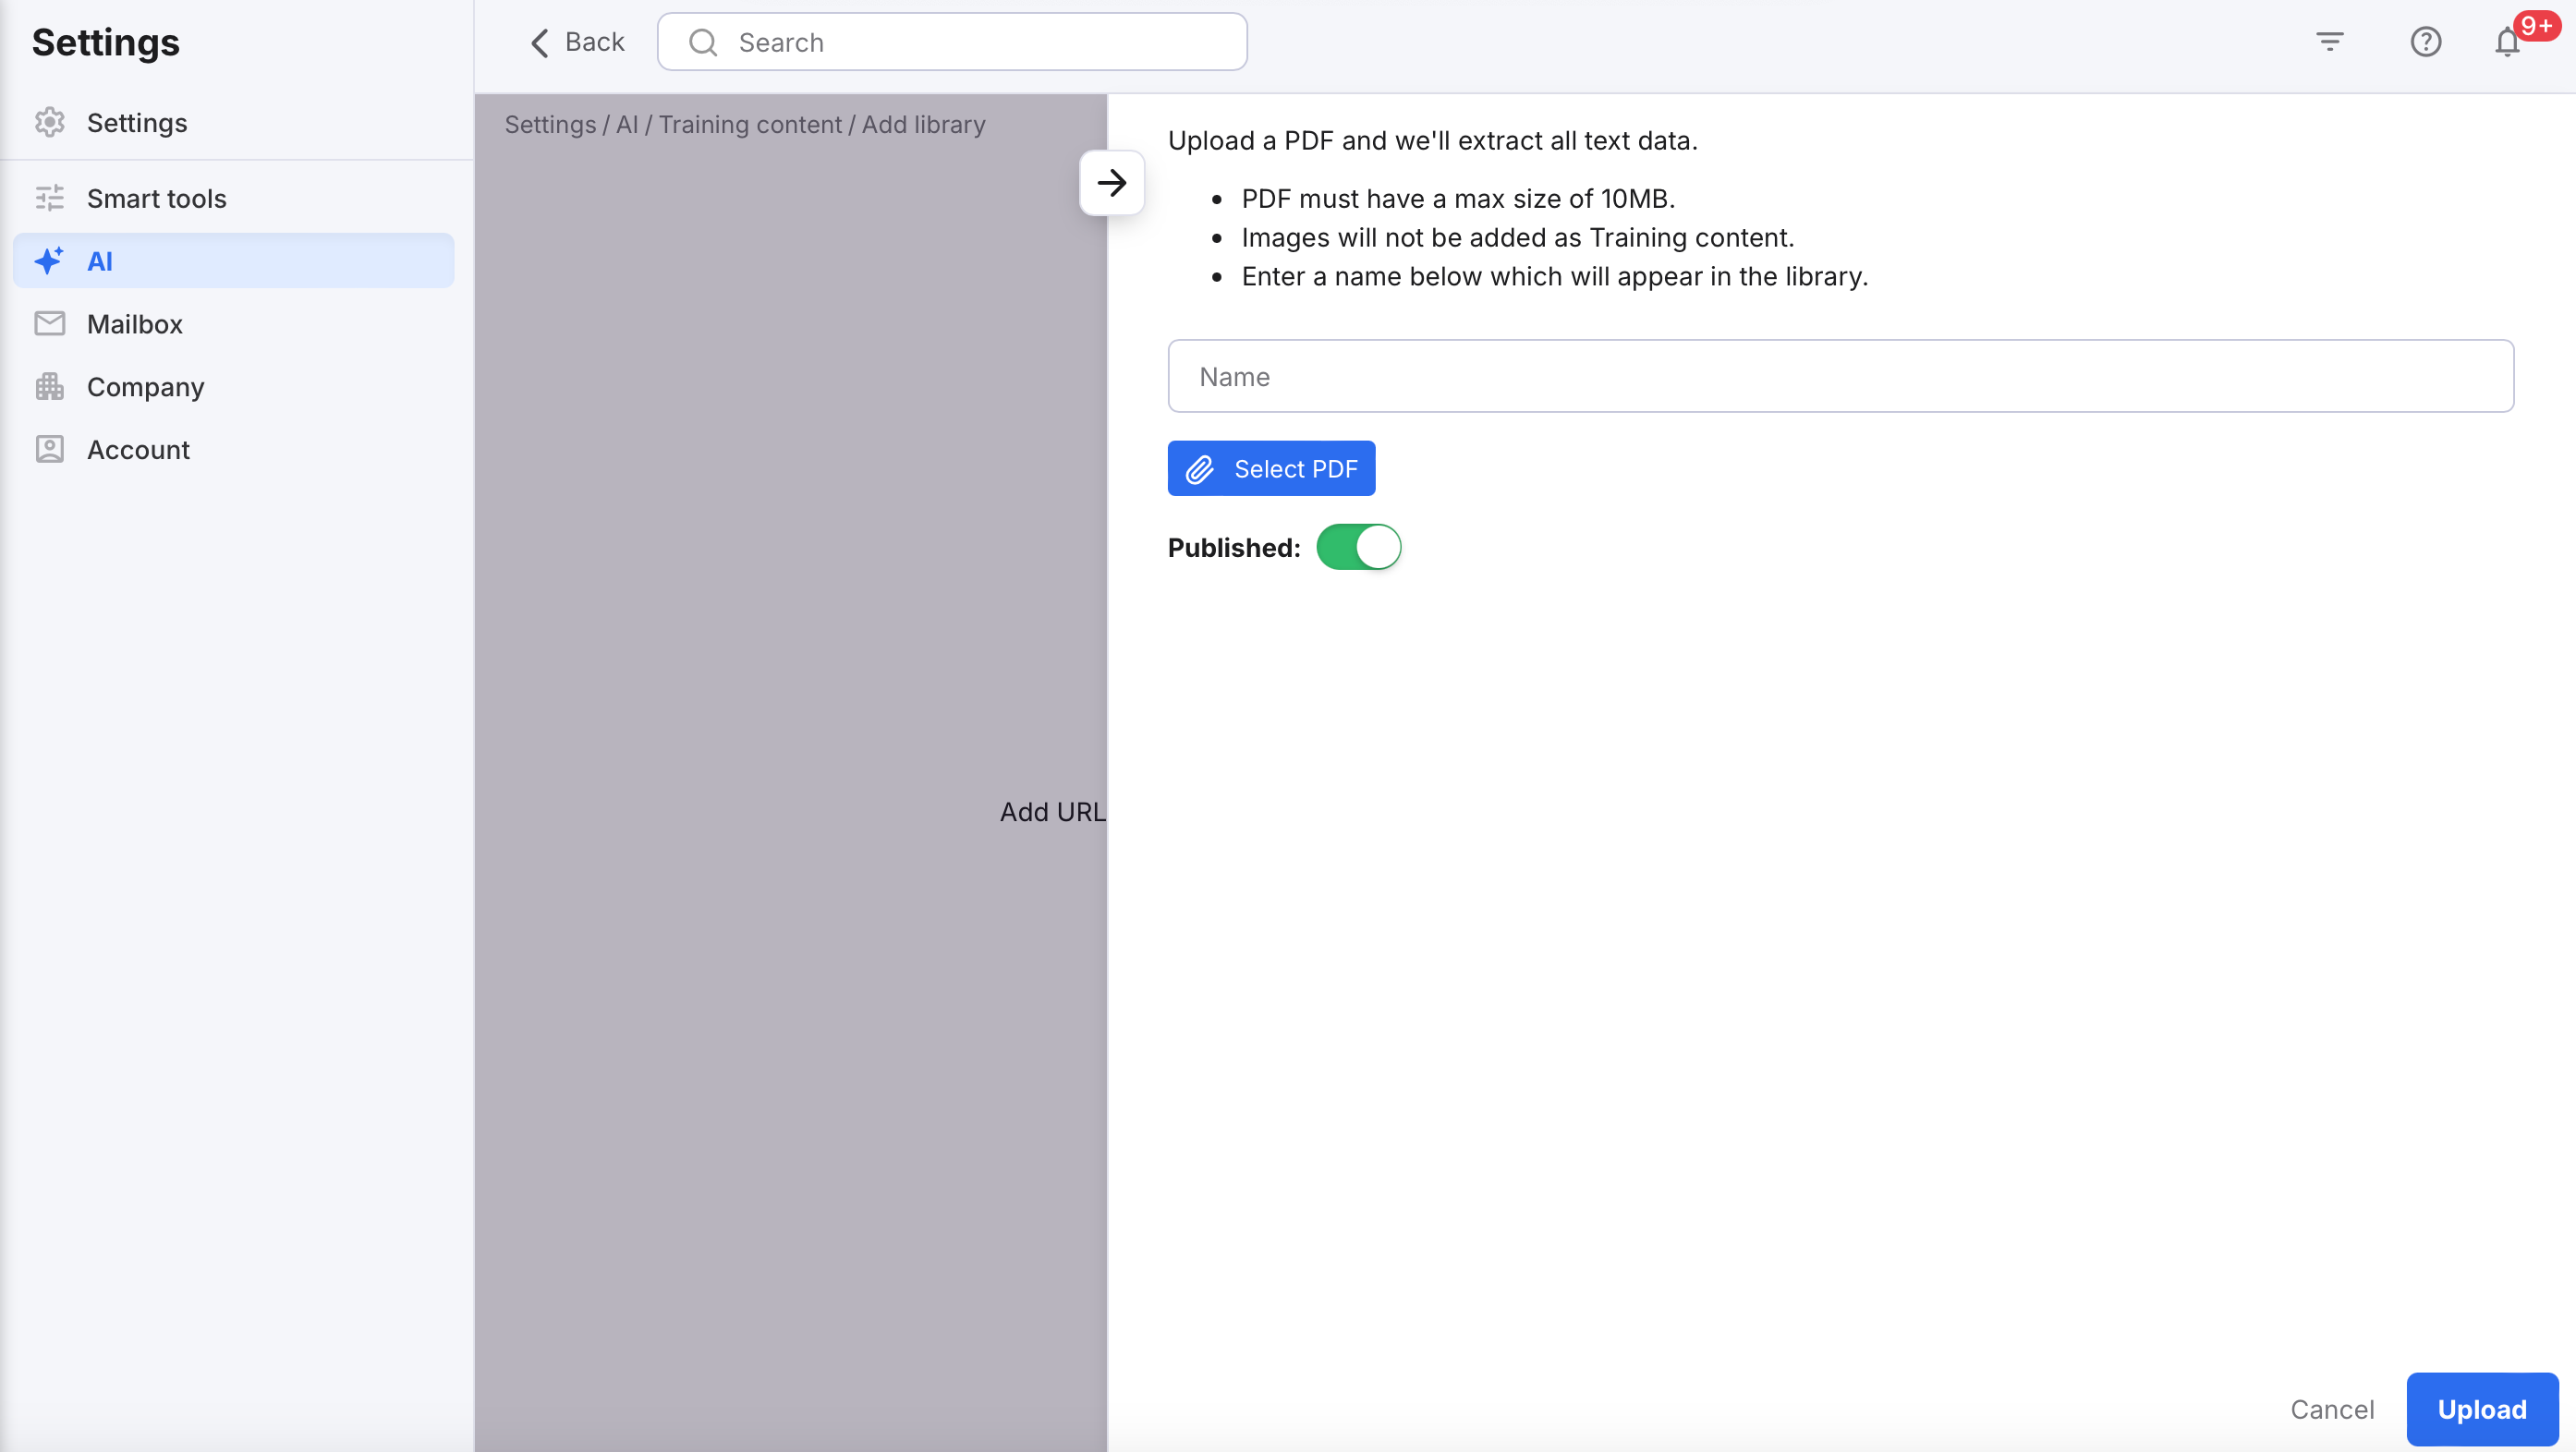 2. Enter a name for the PDF content in this library, e.g., Scooter Price List.
3. Select Select PDF to open a filesystem window that allows you to choose the file you want to upload.
4. Select the Published toggle if needed. If enabled, the PDF content will be made available immediately to the AI tools that use this Library. If not enabled, it won't be used by these AI tools.
5. Select Upload.
02 Creating a library from scratch
To get started, go to Settings > AI > Training Content > Add library.

Give the library a title. This will appear in the list of Training Content you create and will be used when selecting which Training Content to use in your Instructions. For more on Instructions, click here.
You can then add content to your new library as described in section 02 above.
03 Adding your Training Content library to the Instructions
If you're using the Sample Policies library and Sample Instructions provided in your account, your Training Content is already linked to your Sample Instructions.
If you’ve created a new library in your Training Content, you’ll need to assign it to your Instructions:
- Go to Settings > AI > Instructions.
- Click on the Instructions you want to use with the new Training Content.
- Under Training Content Libraries, select the library you want to link to these Instructions.
- If you want the Training Content to be used by the Smart Reply feature, select the Channels you want it to be used on.

04 Using the Training Content with AI
Once the Training Content has been populated and added to Instructions, it’s ready to use by your AI.For Smart Reply, the content will be used for any Instructions with the specific channels and Training Content selected. No more set-up is needed.
For more on the Smart Reply feature, click here.
For the Chatbot, the AI node - Have a conversation with Ava - is required in the flow to use your Training Content and once this node is added, you can select the Training Content you would like to use with it.
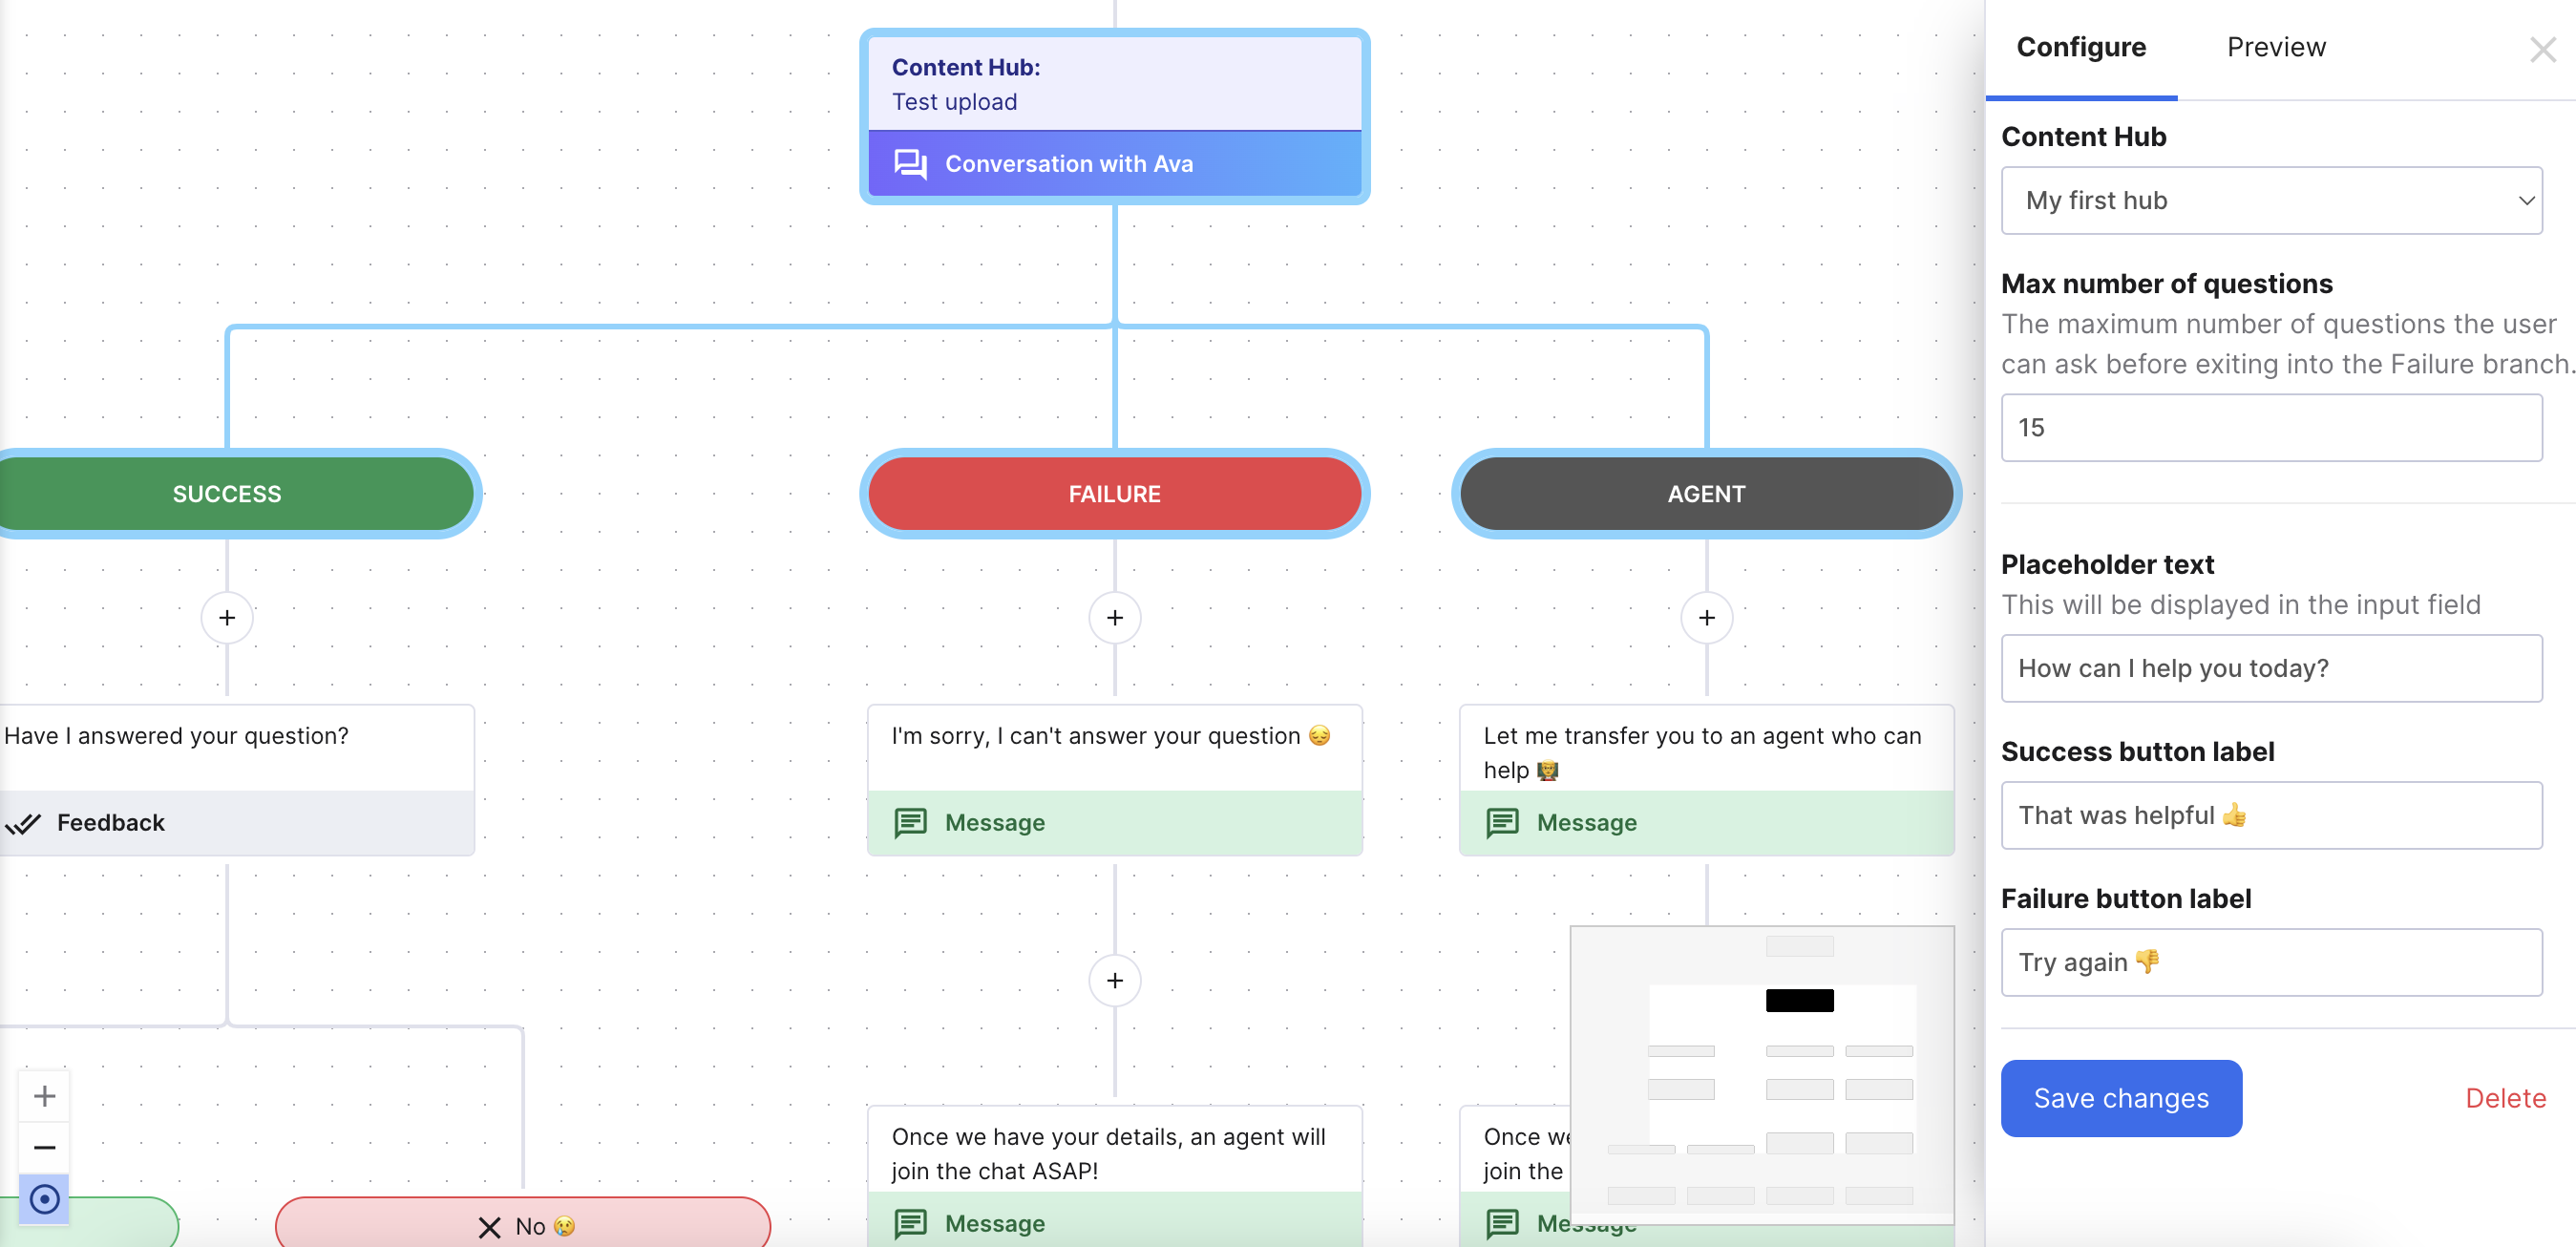 For more on creating the chatbot and building flows, see Creating and editing Chatbots.
05 Updating and deleting
Finding Content in the library
If your Training Content has a long list of content articles, you can use the Search field to quickly find the one you want to view, update, or delete. Click on the name of your Training Content to view the articles that are in it. At the top of this page is the Search field.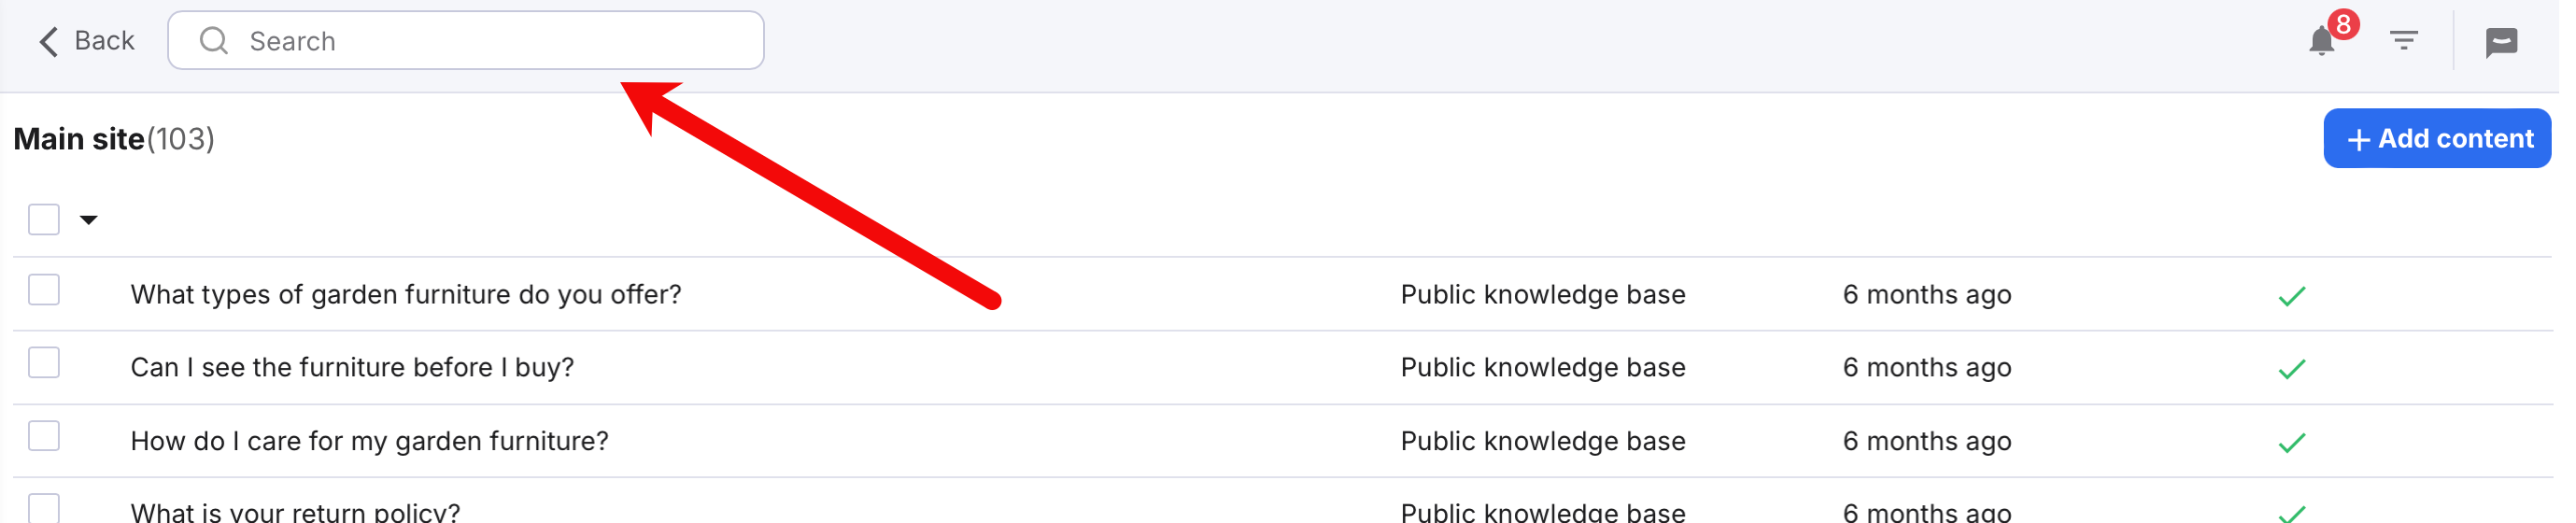
Into the Search field, type part of the content name. For example, type "ret" to display articles with names like "What is your return policy?" or "Are your pretzels gluten-free?". Then hit Return on the keyboard to display a list of articles that match the search term. To redisplay the full list of Content articles, select the X in the Search field.

Publishing/unpublishing articles
To prevent a chatbot or Smart Reply using a given article, you can unpublish it.Content is published by default but can be unpublished by deselecting the Published toggle. If unpublished, the Name will still be displayed on the list of articles, but it will not be used by the chatbot and an X will be displayed in the Published column.
To unpublish/publish an article:
1. Select the article in the list to open the preview.
2. Select Published toggle at the top of the pane.
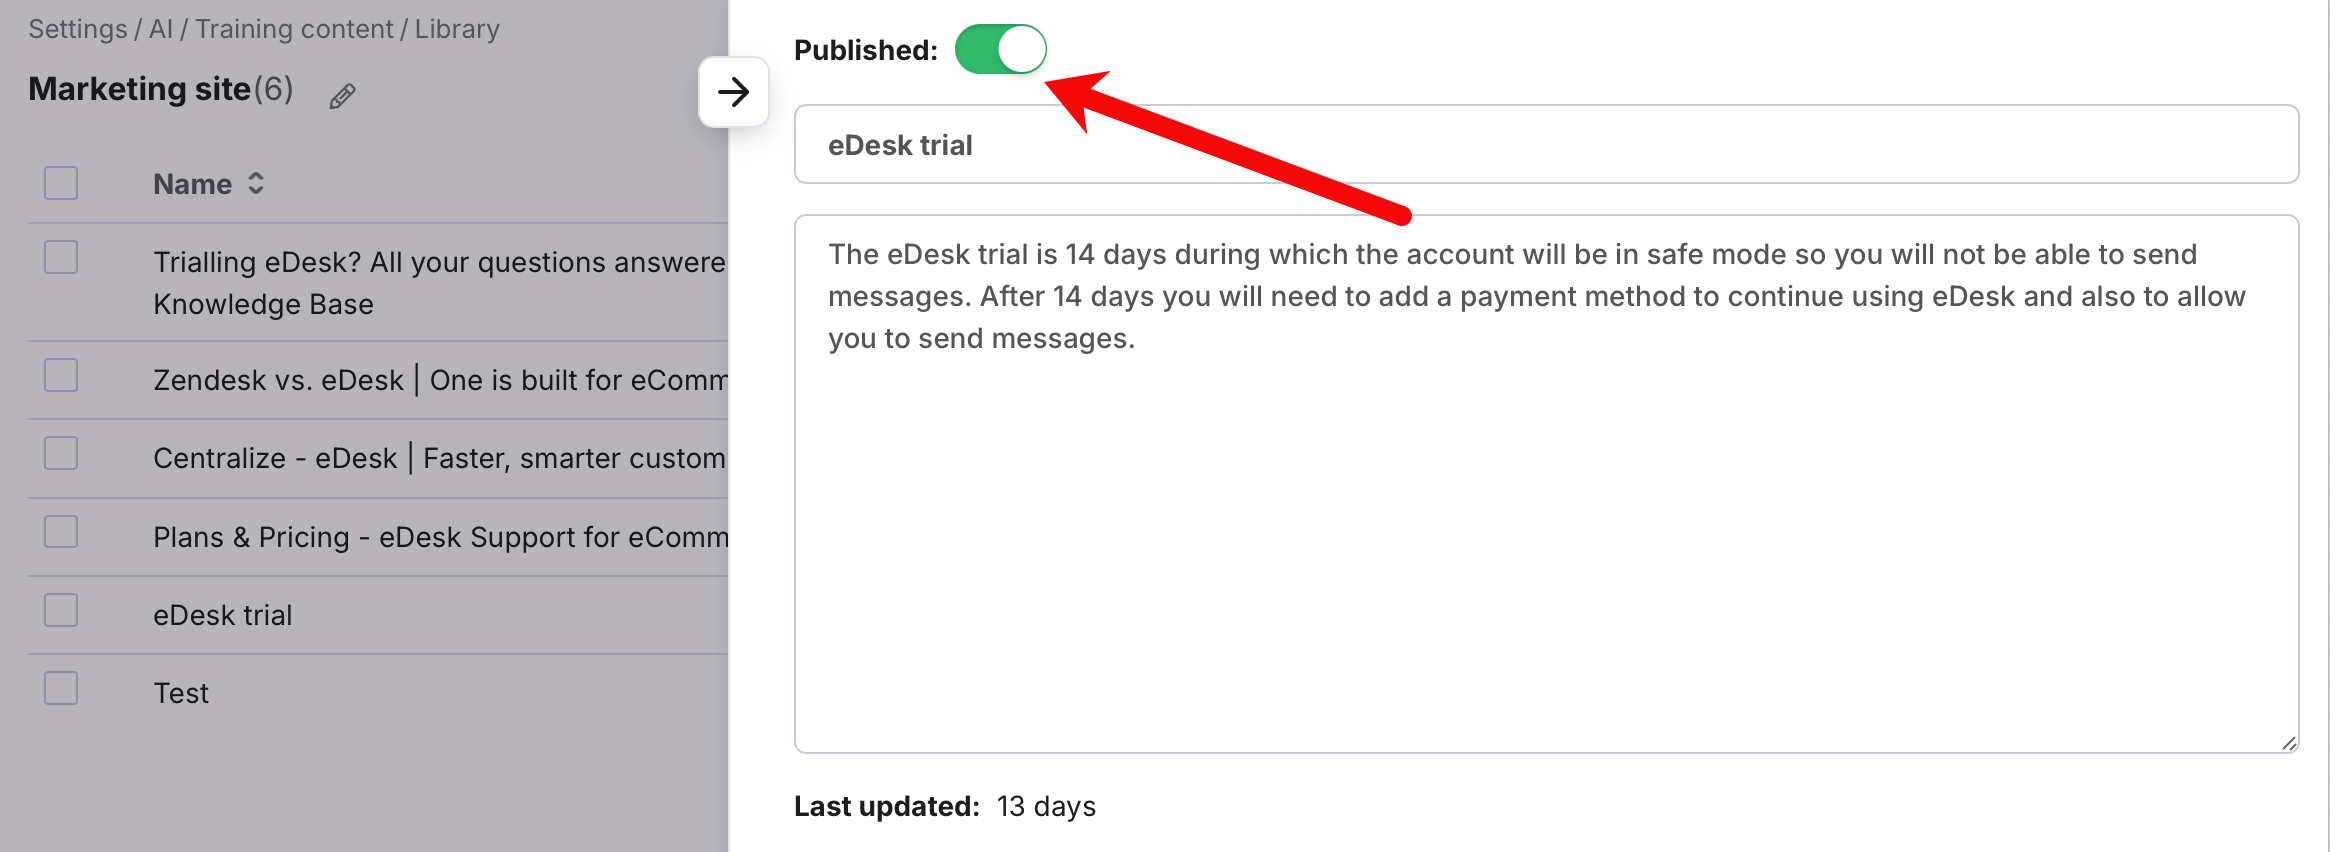 3. Select Save.
Updating an Existing Knowledge base
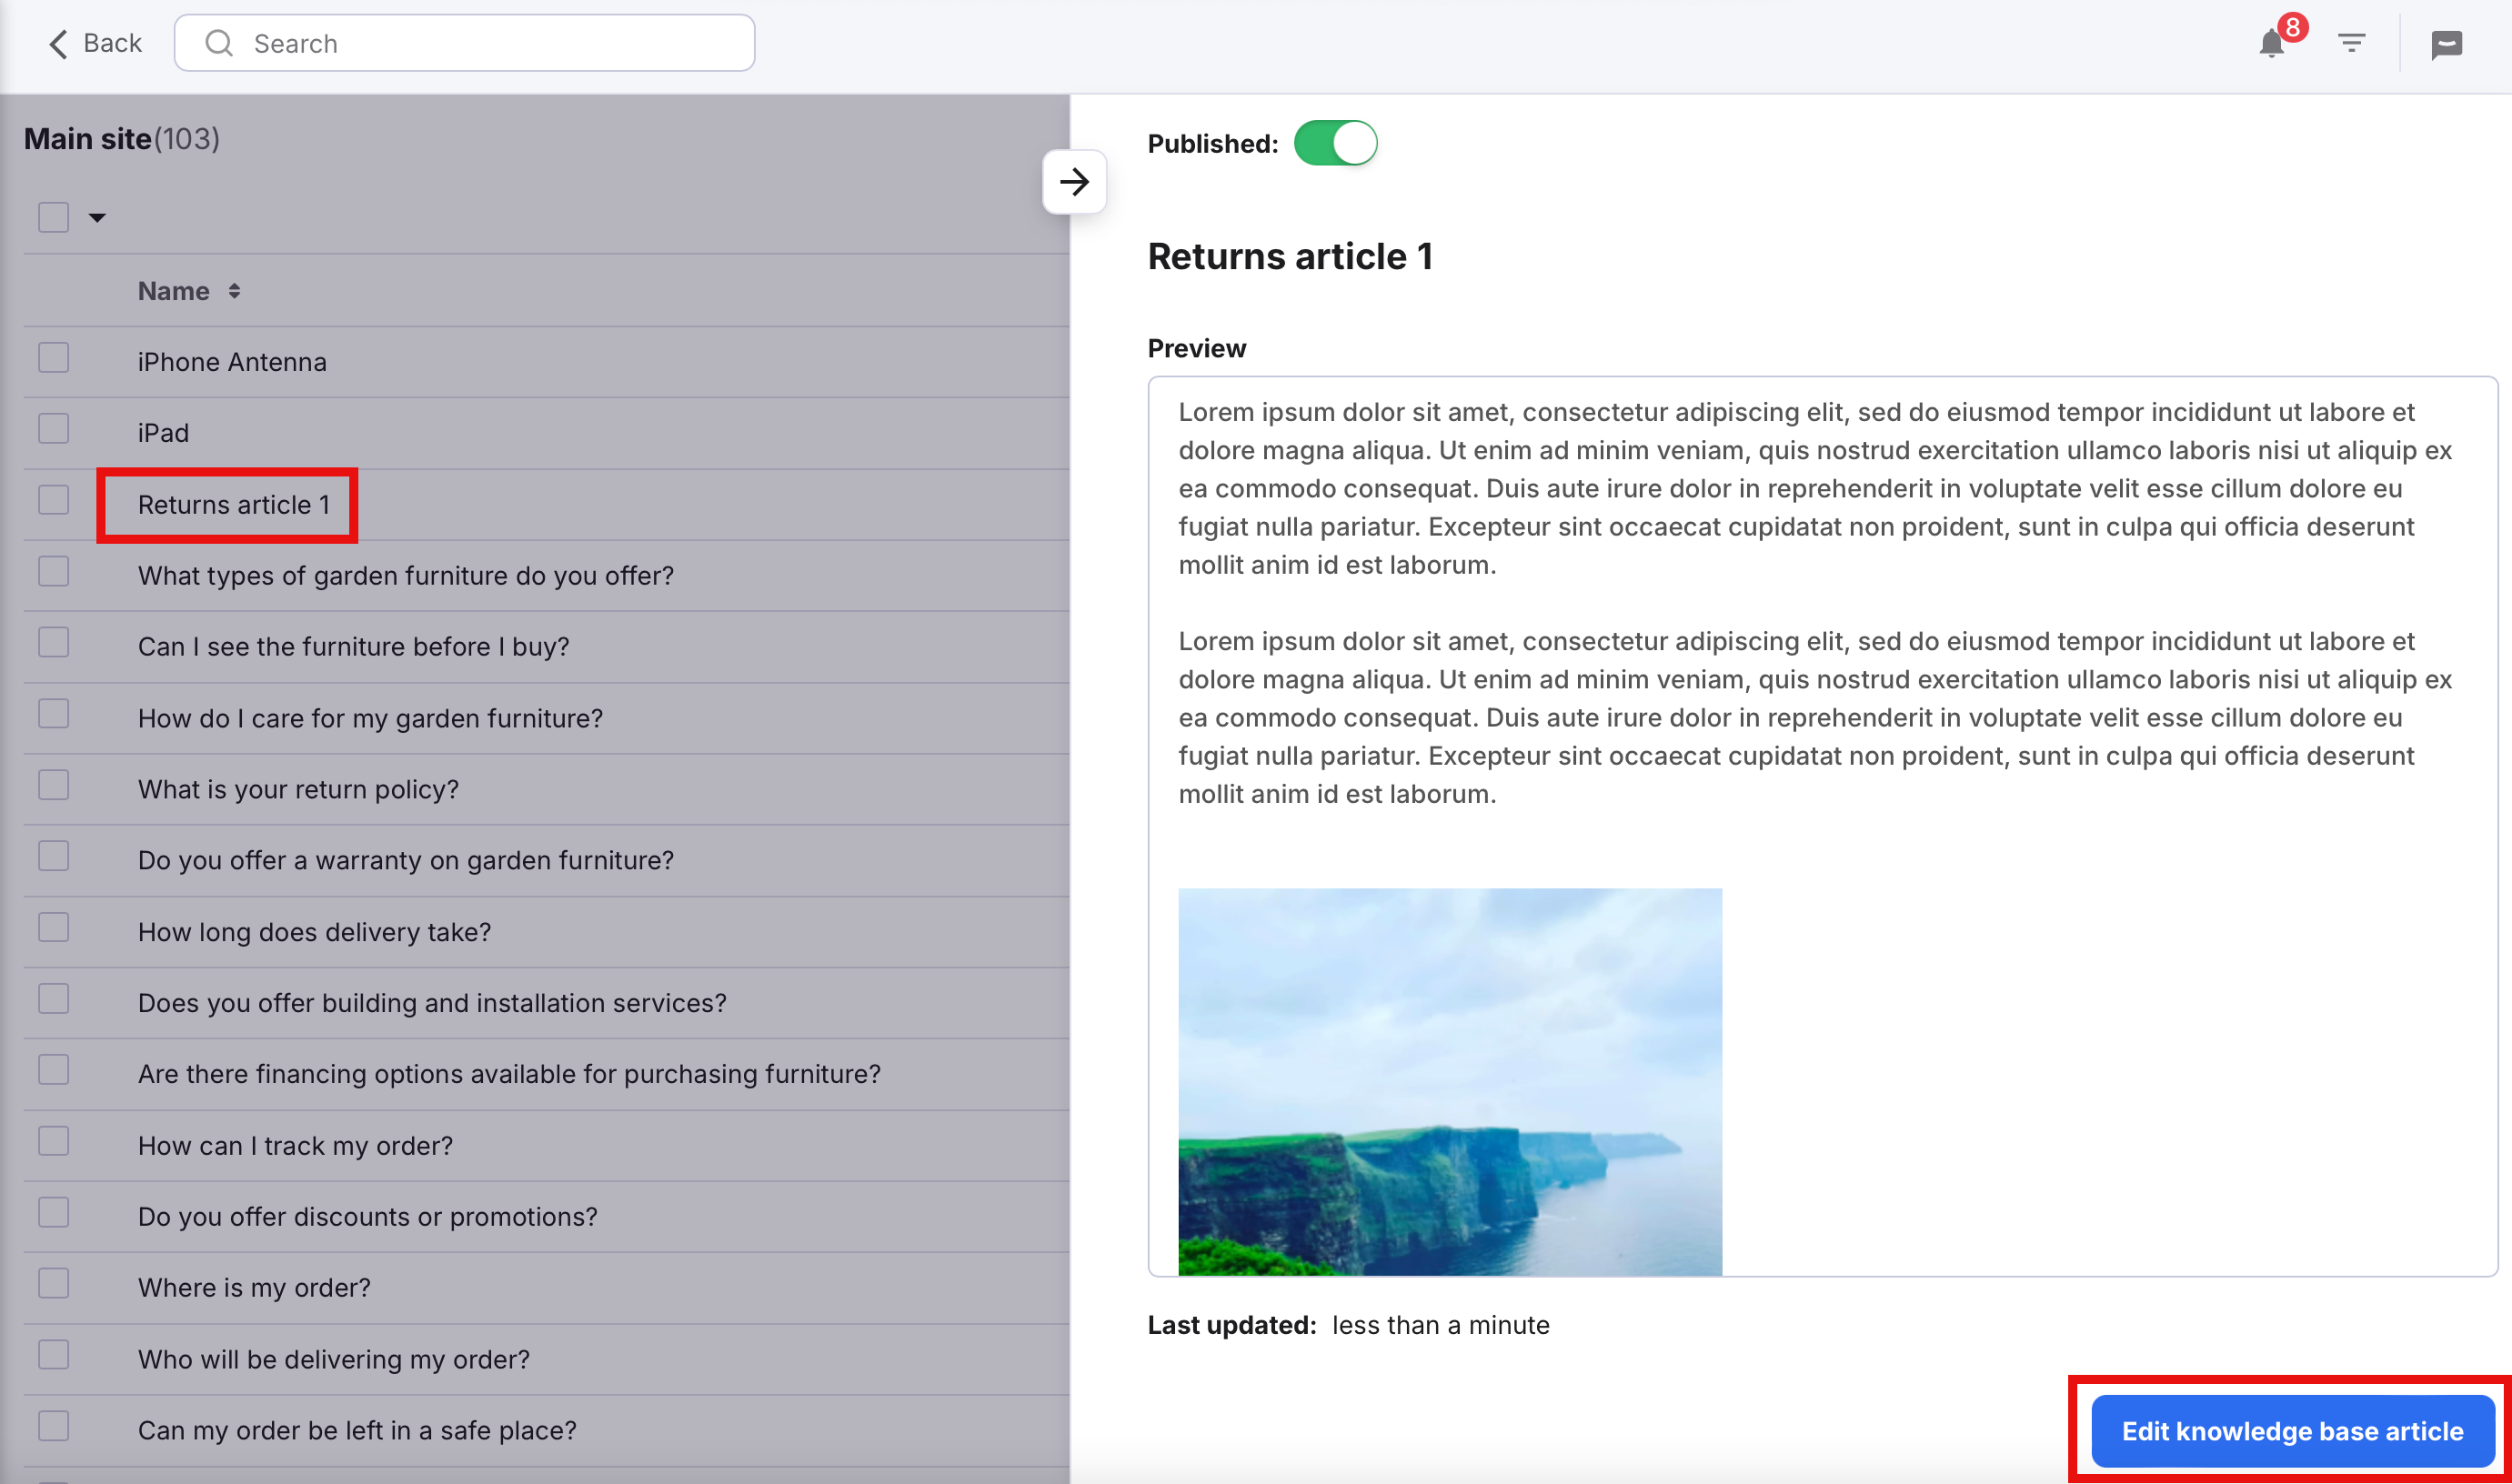
To edit a Knowledge base article that is in the Training Content, click on the name of the article and in the preview you will see a link to 'Edit knowledge base article'. Once saved in the Knowledge base, it will be automatically updated in the Training Content.Note: You cannot edit a Knowledge base article directly inside the Training Content itself.
Updating Custom content
To edit Custom content, you simply click on the name of the article, edit it directly in the Training Content and hit 'Save'.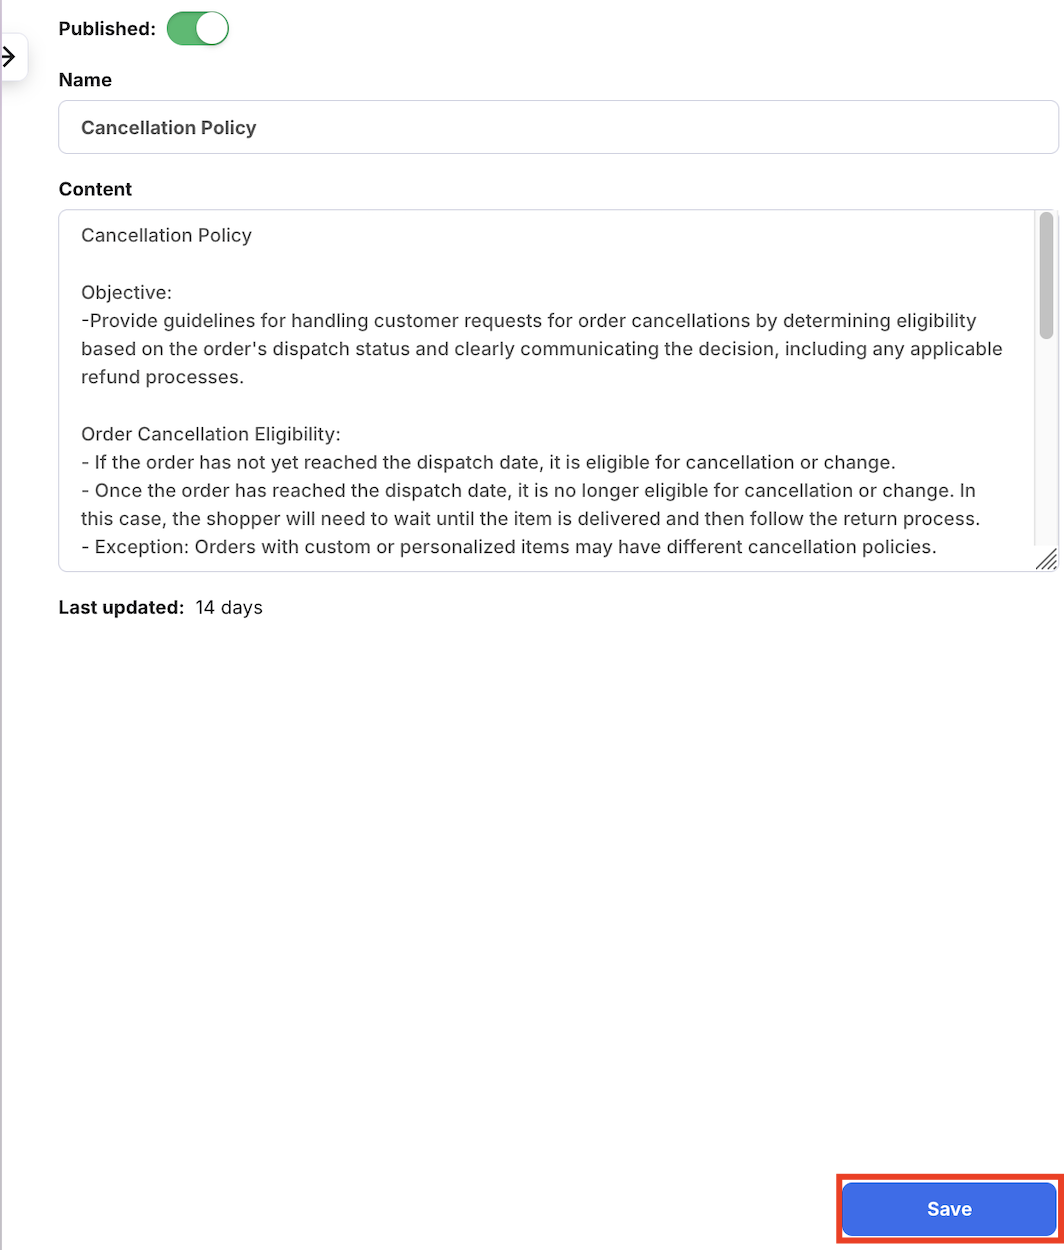
Updating an External web page
To edit an External web page, you need to do this at the source (i.e., within the web page itself). Once it is updated at the source, you must manually click on the name of the external content in the Training Content and then select Refresh content which will trigger the system to pull the new content in.
Bulk updating and deleting External web pages
If you have updated a number of pages on your website, you can bulk update by clicking into your Training Content, selecting the articles you want to refresh and clicking on the 'refresh external content' button. Please be aware that refreshing all your pages may take some time.To delete pages, choose the 'Remove content' option instead.

Note: If any Knowledge base articles are in the bulk selection, they will not be deleted. They must be managed from within the Knowledge base section itself.
Updating synced Shopify product feed
You cannot edit Shopify product information directly in the library in eDesk; instead you must edit the product information in your Shopify store and then sync the articles in eDesk to pull the updated information into your Training Content.Deleting a library
Note: You cannot delete a library while it's being used by Instructions for a Chatbot, so you must remove the library from the Instructions before you try to delete it.To delete a library:
1. Go to Settings > AI > Training Content to view a list of the existing libraries.
2. In the row for the library you want to delete, select the More Actions (three dots) button, to display a menu.
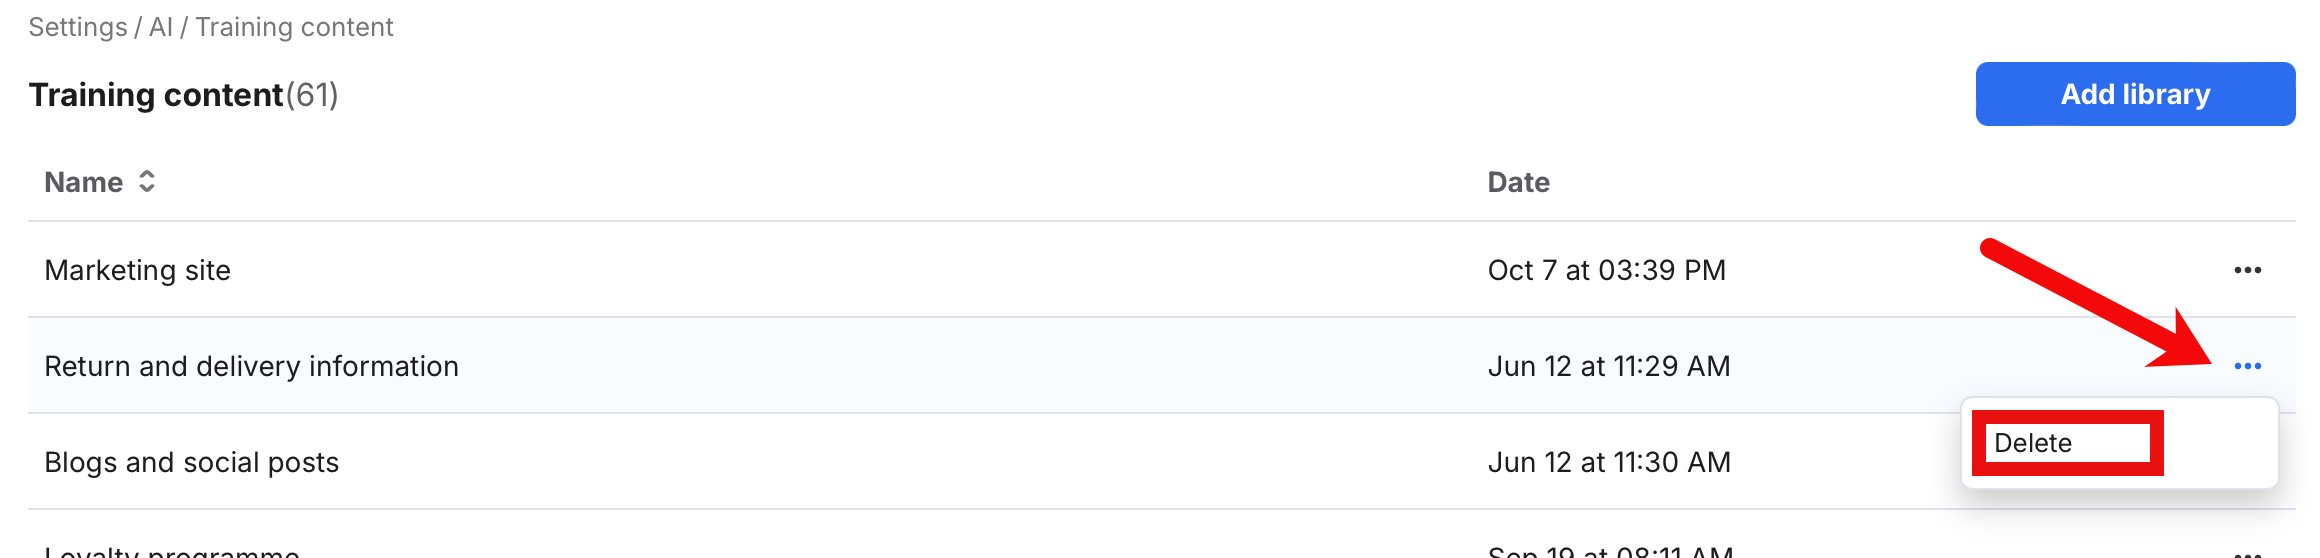
3. Select Delete.
4. A confirmation modal window is displayed. Select Ok to confirm that you want to delete the library.
5. The library is deleted from the list and a success message is displayed.
Further reading
Learn more about Smart Reply hereFor a full overview of the chatbot see here
To see all of our AI features, click here