Automated reports let you schedule data extracts on areas like Agents, Tickets, Channels, Chats or AI. Set them to run daily, weekly, or monthly, and simply log in to view the latest report.
This help file will explain how to how to create and access automated report extracts in eDesk.
Before you start
- Report extracts are available to customers on our Professional and Enterprise plans. Learn more about our plans here.
01 Report extracts recap
Just in case you're not familiar with the Report extracts feature, you can learn all about it here. In a nutshell, you can create reports that contain only the information you're interested in and then download them as a .csv file.You can set them up to extract very specific information, and as a result, they often throw light on issues or areas of your customer support that could be improved.
02 Automated report extracts
Automated reports let you schedule a report to run automatically. The report will appear in the Current reports tab for download and you can choose to get a reminder email when they’re ready.
03 Setting up an automated report extract
- Go to Insights > Reports > Report extracts.
The page opens showing the Current reports tab. All reports that have been generated in the last month are listed here. - Select the Automations tab.
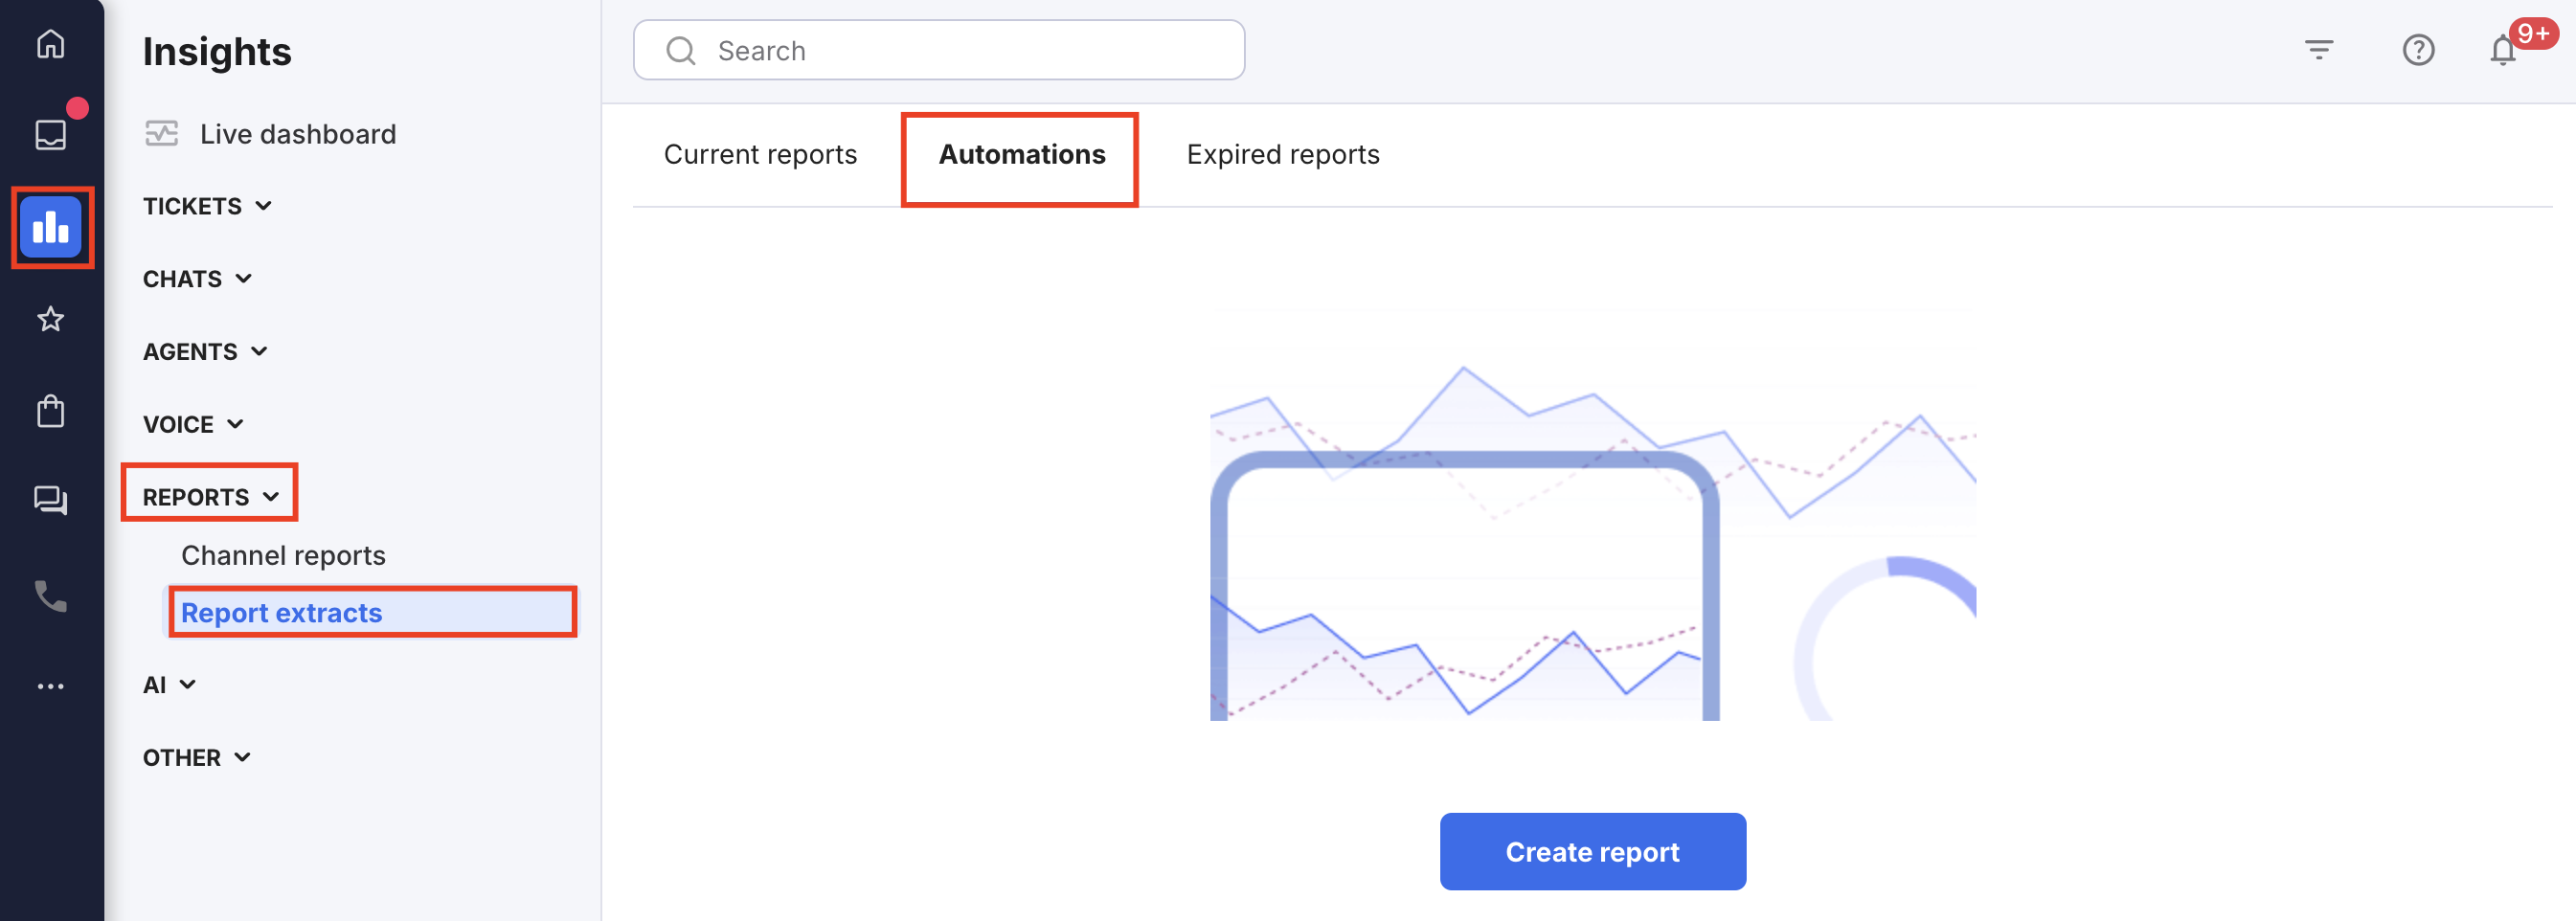
Note: If you have already created Automated reports, they will be listed here. - Select Create report.
The Create report window opens.
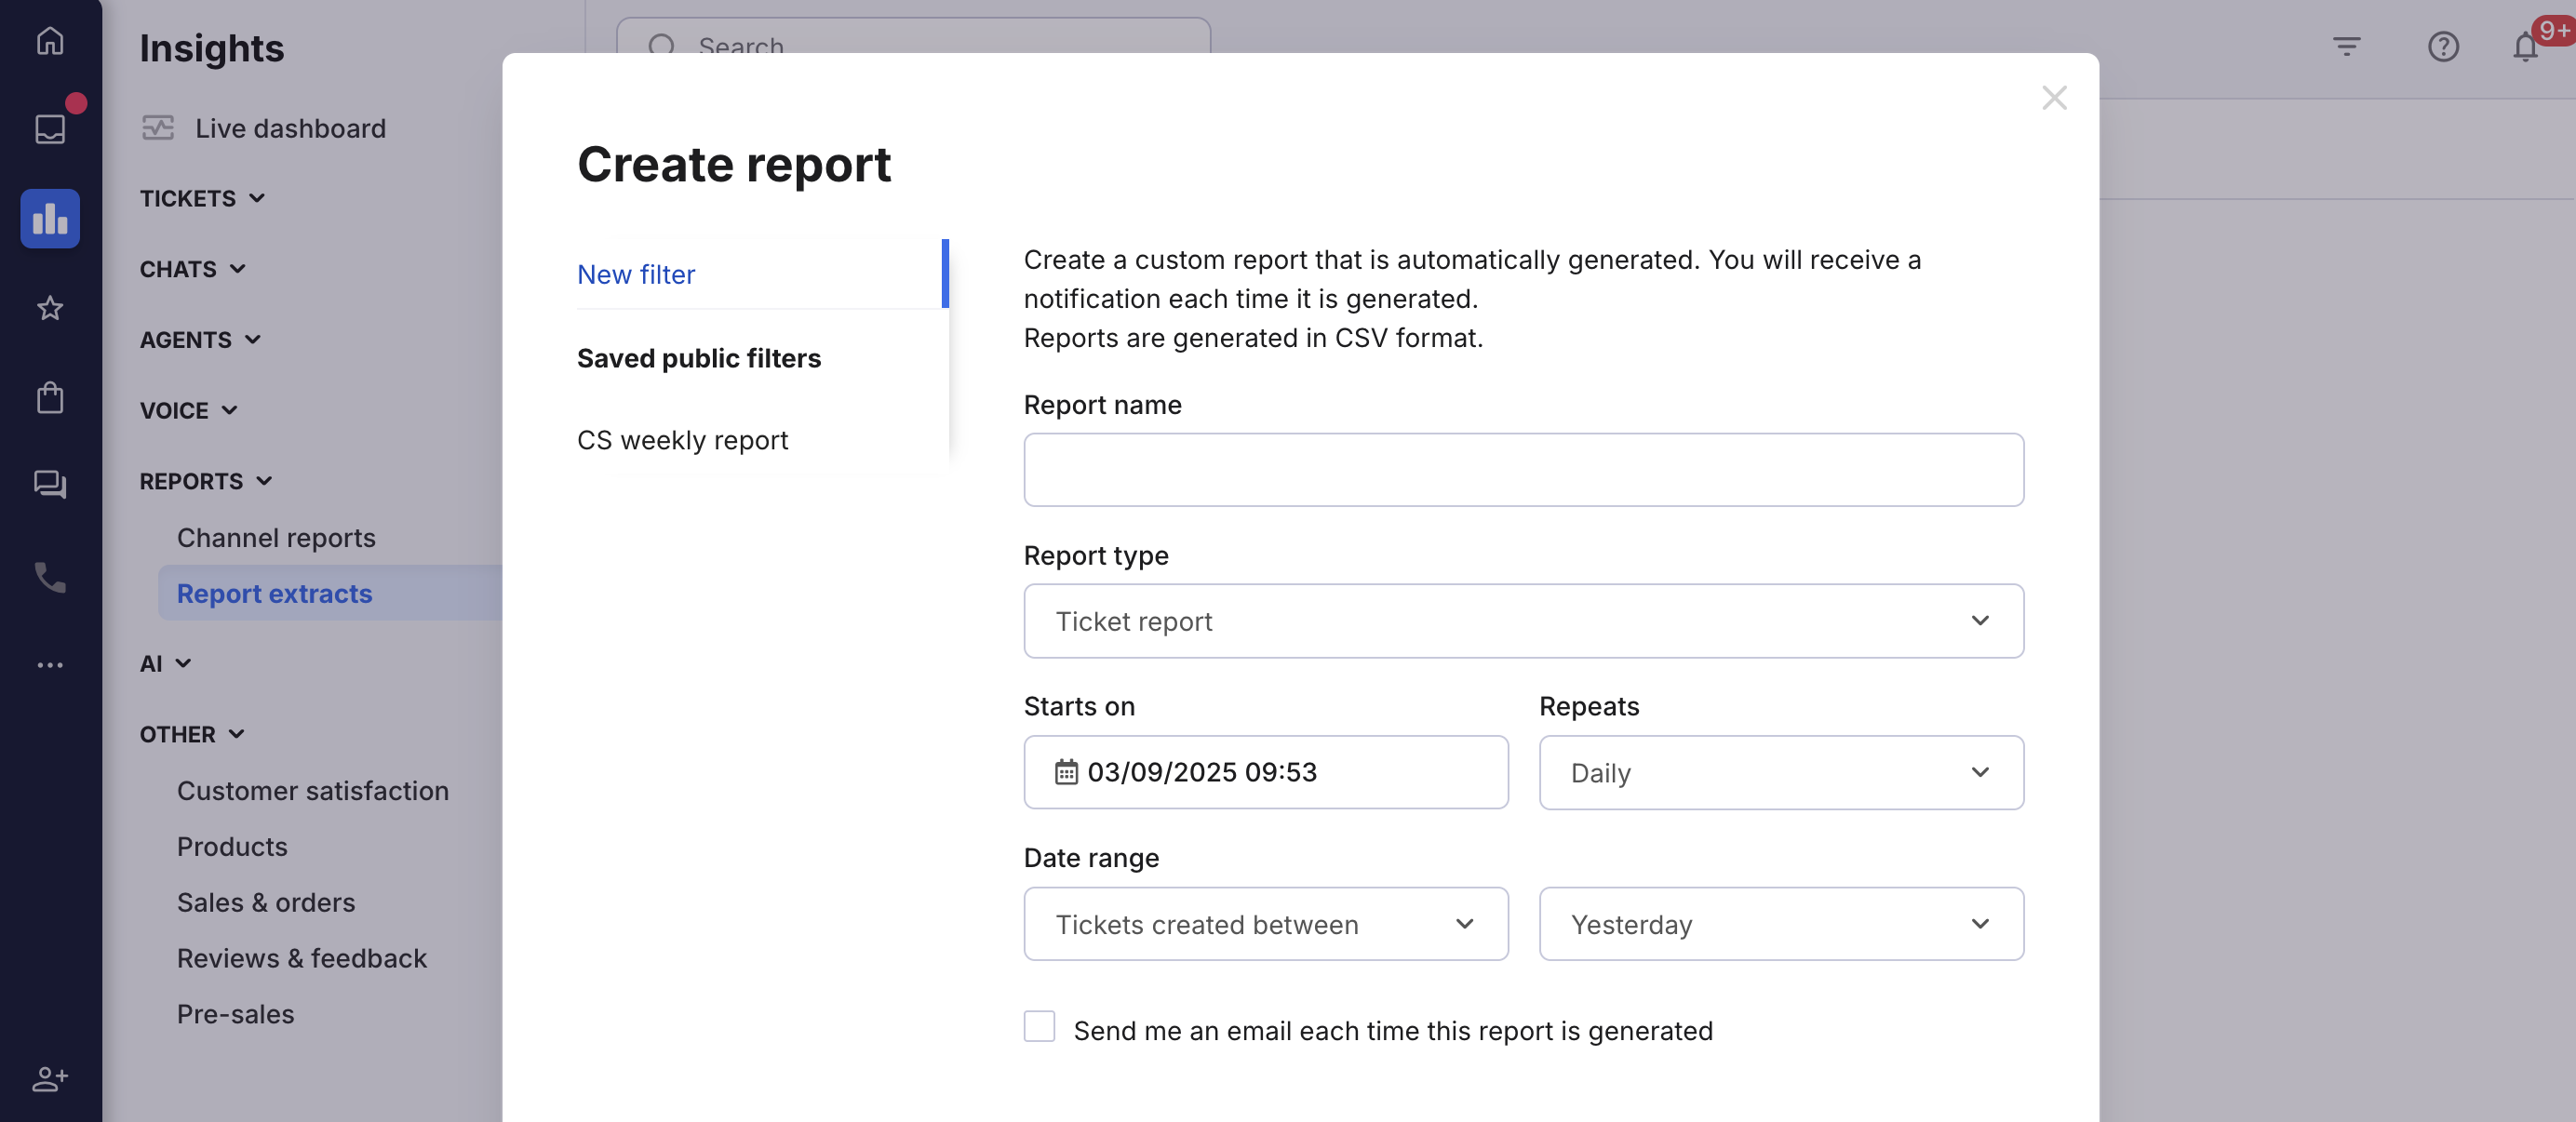
Complete the fields:- Report name
Enter a name for your report, e.g. Monthly Agent report. - Report type
Select the type of report you want to generate: Ticket report, Pre-sales report (available if Pre-sales is enabled), HandsFree report (available if HandsFree is enabled), Channel report, Tag report, Language report, Agent report, Chat report, Chatbot Q&A report (available if Chatbots are enabled), SLA breach report, Custom field report, User Log report, AI Automations report (available if AI automations are enabled), Feedback report (available if Feedback is enabled), Templates report or Agent session report. Learn more about all of the Report extracts in this help file. - Starts on
Select the date and time that the first report in the series will be generated. - Repeats
Select how frequently to run the report: Daily, Weekly, Monthly, Every 3 months from the start date. - Date range
Choose the time period that the report will cover: Yesterday, Last 7 days, Last month, or Last 3 months. - Send me an email each time this report is generated
Tick this box if you want to be notified by email when a report is generated.
- Report name
- Depending on the report type you selected, filter options will be displayed. Choose your preferred filters.
Note: All filters you choose will be applied together.-
Example 1: If you run a Ticket report and select both a ticket type and a channel, the report will only show that ticket type from that channel.
-
Example 2: If you run an Agent report and select a channel, the report will show all agents but only include their data for that channel.
-
- Select Create report.
The Create report window closes and the new report is saved to the list of reports in the Automations report tab.
04 Viewing an automated report extract
Once generated, the user that created the automated report will receive a notification under the bell icon alerting them that a report has been generated. The generated report will be displayed in the Current reports tab.
If you’ve selected the email notification option, you’ll receive an email as soon as the report is ready.
Note: Generated automated reports behave the same way as any report extract and will expire after 30 days, at which point they will be moved to the Expired reports tab.
05 To edit an automated report
To edit an automated report:- Go to Insights > Reports > Report extracts.
- Select the Automations report tab.
- Click on the ellipsis icon (the 3 dots) for the report you would like to modify.
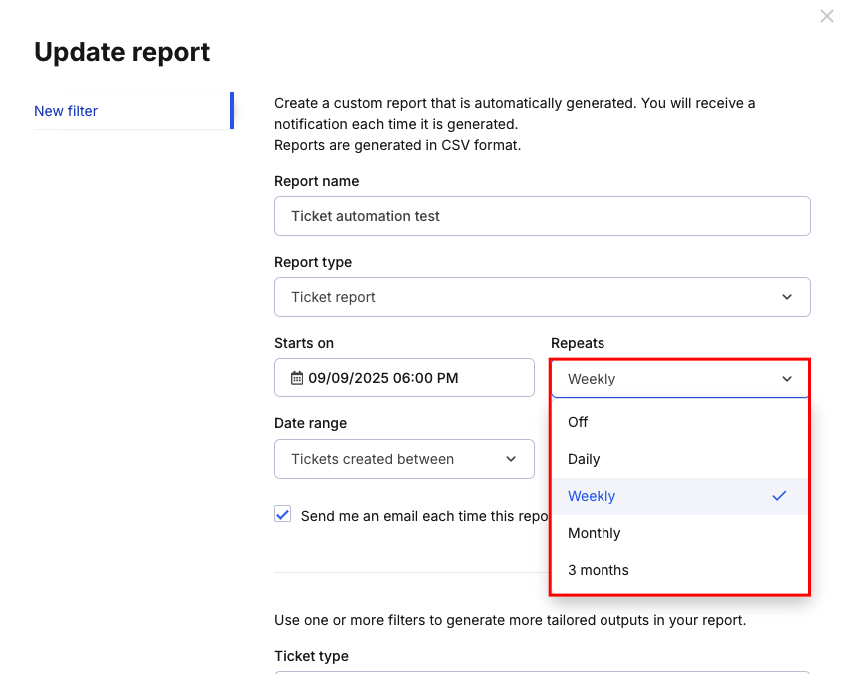
- The Update Report modal window will open.
- Use the Repeats dropdown to turn the report off or schedule it Daily, Weekly, Monthly or every 3 months.
- To make other changes, click into the relevant field and update the information as needed.
- Don't forget to save your changes!
Your updates will take effect the next time the report is generated.
06 To delete an automated report
To delete an automated report:- Go to Insights > Reports > Report extracts.
- Select the Automations report tab.
- Click on the ellipsis icon (the 3 dots) for the report you would like to delete and choose Delete from the dropdown there.
- Click OK in the modal window to confirm deletion.
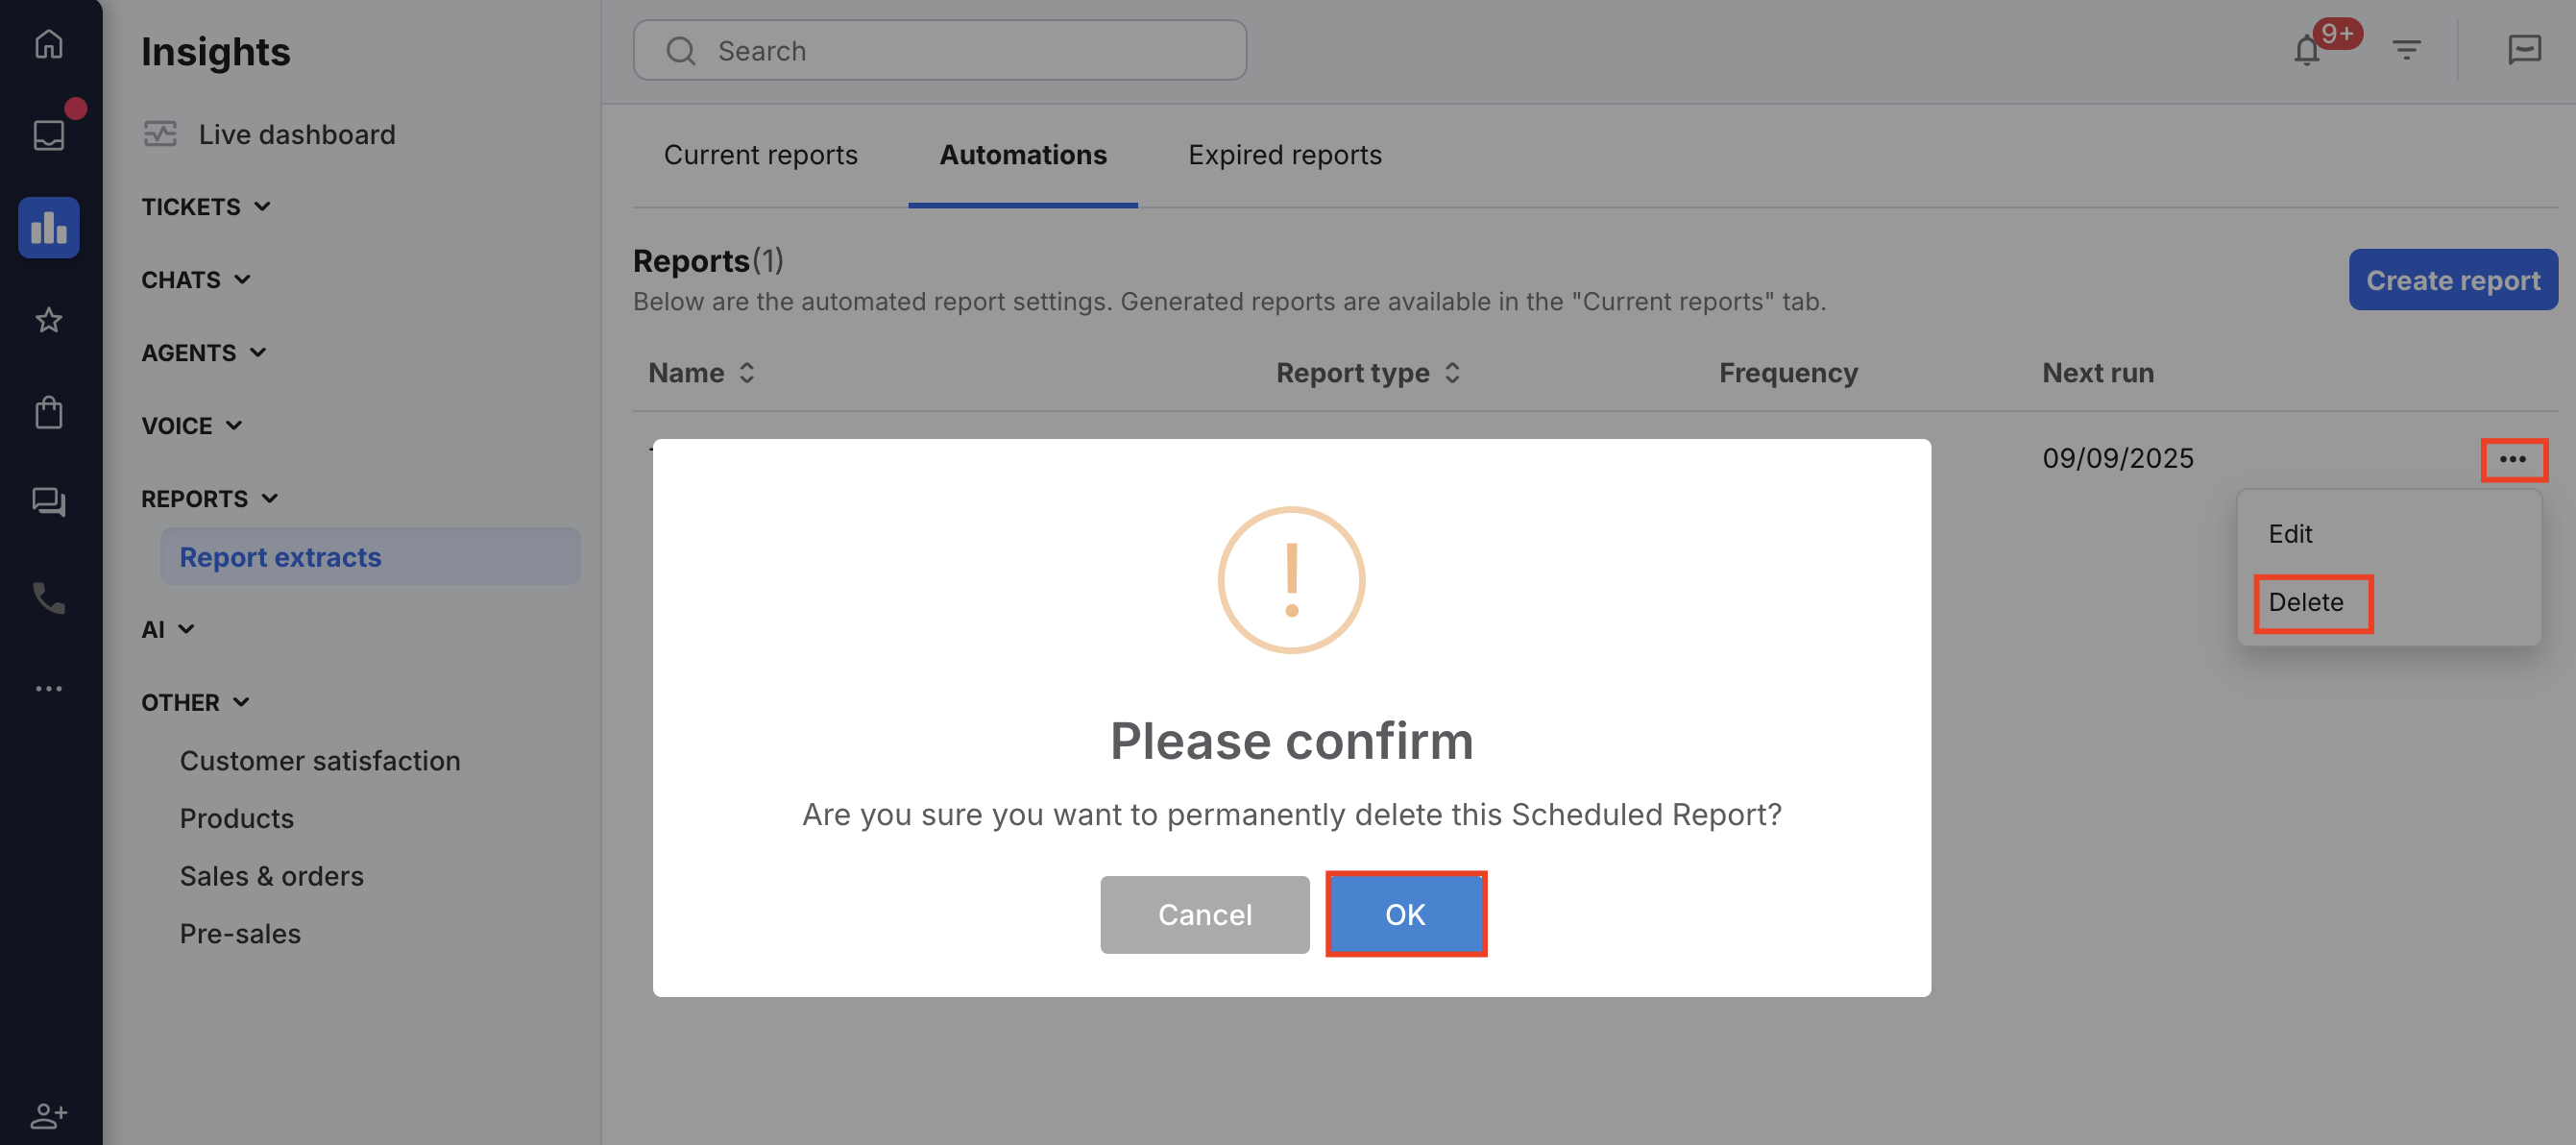
The report will be deleted immediately.
Further Reading
To find out more about CSAT, see here.Interested in learning more about eDesk's Report extracts? See here