This help file explains how to set up an AI Agent to help with or handle tickets in eDesk.
Before you start
- To add an AI Agent, you’ll need an Admin or Team lead account.
- If you don't already use eDesk, our free trial includes a limited version of the AI Agent. Existing customers should contact Support to trial the AI Agent.
01 Creating an Agent
1. Go to the AI section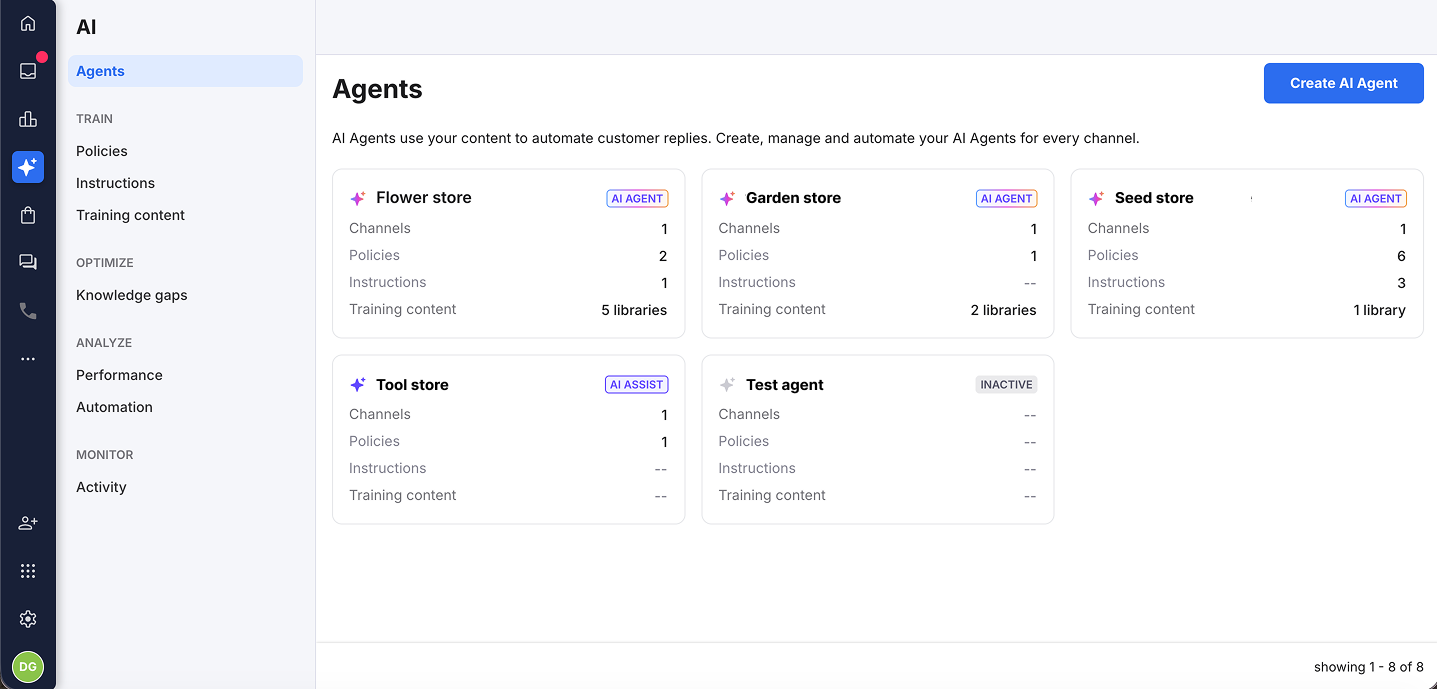
This page lists existing Agent profiles.
2. Select Create AI Agent
3. Complete the fields in the following sections. As you save each section, the summary on the right-hand side updates to show the settings you've chosen.
- Name
Enter a name to identify the agent within your account. This name is internal only and will appear in your list of profiles, it is not visible to customers. - Signature name
Enter the name the AI Agent will use to sign off automated messages. This will only appear in replies if your channel signature includes the #agent_full_name# or #agent_first_name# snippet. - Channels
Select one or more channels from the menu. A channel can only be associated with one profile. If a channel is not specified in a profile, the AI Agent will not be enabled on that channel. - Policies
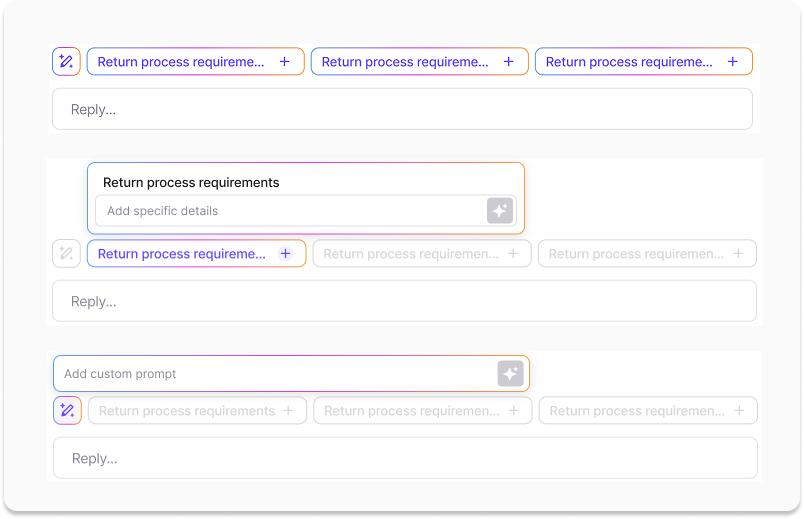
Select one or more policies from the menu. - Instructions
Select one or more instructions from the menu. - Training content
Select a Training content library from the menu.
After saving, you will see the Settings tab. You can find this later within each agent.
02 Choose how you want the AI Agent to reply
Select one of the following options:
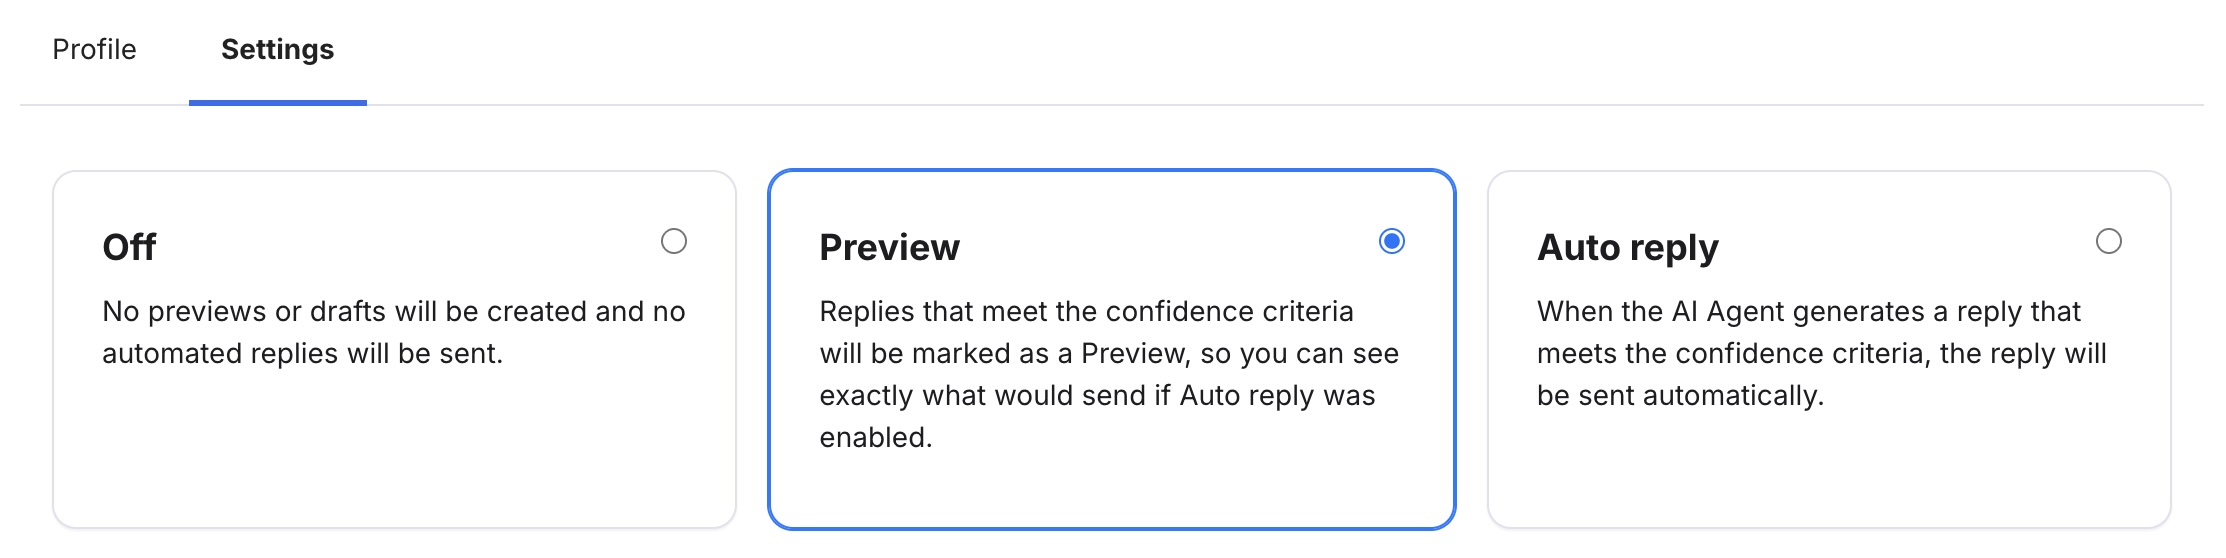
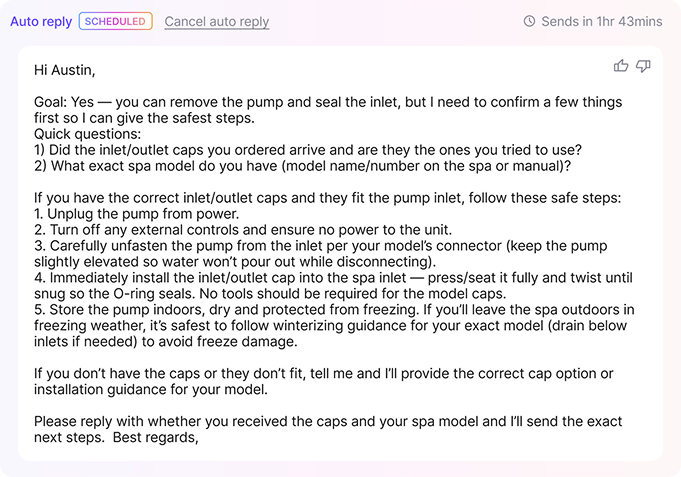
- Auto reply
The AI Agent will assess the query and calculate how well it can answer. If it is highly confident that it can answer accurately, the AI Agent will send a reply. If it isn't confident that it can answer the query with absolute accuracy, it will create a Draft for a human agent to review.
- Preview
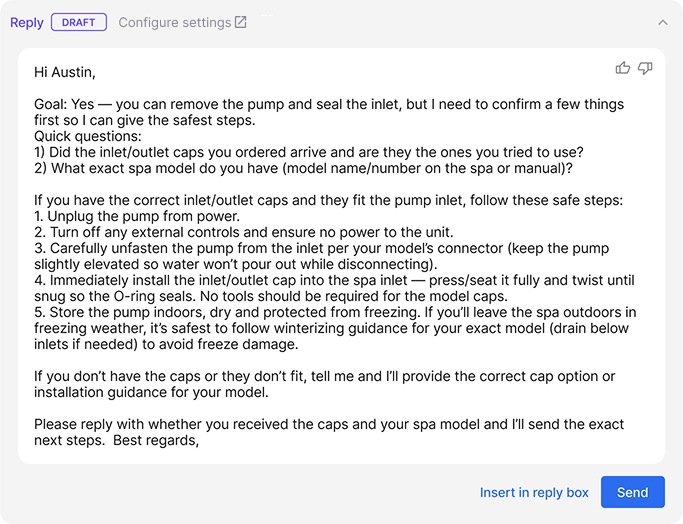
The AI Agent will assess the query and calculate how well it can answer. If it is highly confident that it can answer accurately, the AI Agent will create a reply and display it in the ticket with a Preview tag. If it doesn't have high confidence, it will create a Draft. This option is a good way to test the AI Agent 's replies before enabling Auto reply.

If confidence is lower, the AI Agent will create a reply, which is displayed as a Draft in the ticket. A human agent can review and send the reply or add it to the reply box to edit.
- Off
The AI Agent will not generate replies. No drafts or previews will be displayed and no automated replies will send.
Below the options are exclusion rules that allow you to instruct the AI Agent to ignore certain tickets, so that a human agent can handle them instead. Select a setting to apply it:
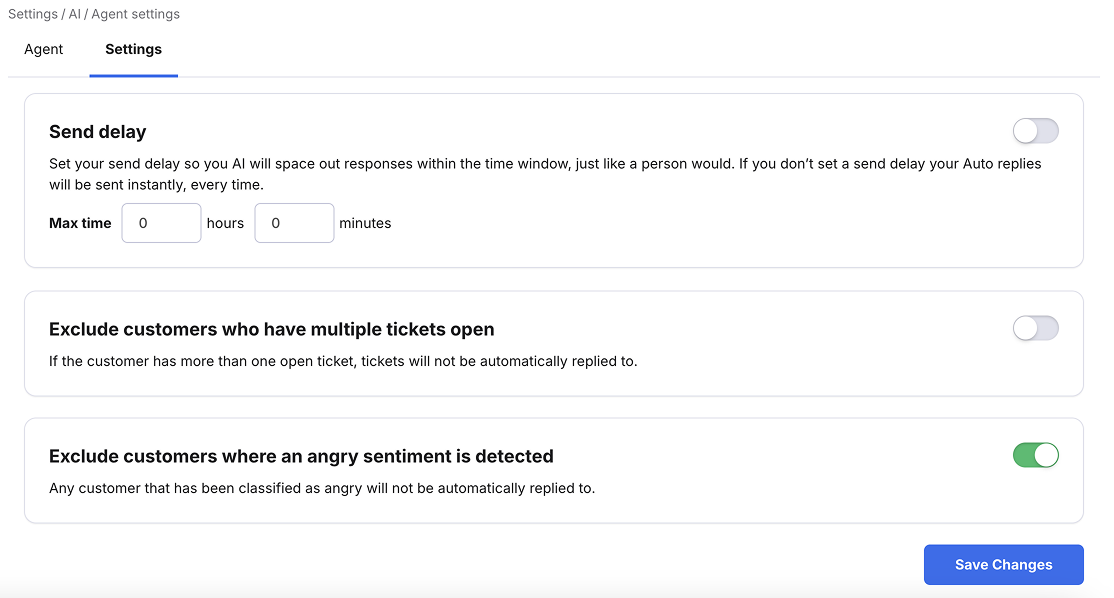
- Send delay
Set a send delay to make AI Agent replies appear more human. If no delay is set, messages will be sent instantly (Auto reply only). - Exclude customers who have multiple tickets open
If the customer has more than one open ticket. - Exclude customers where angry sentiment is detected
Where the sentiment analysis produces a Negative result.
Select Save changes.
Important things to note:
- As soon as you save these settings, they will apply to all profiles but to improve response quality, you must provide more information - Training content, policies, instructions.
- If you do not want the AI Agent to work on a certain channel, simply remove it as a selected channel from the profile.
- If you want to disable Auto reply on a particular ticket, uncheck the Auto reply checkbox at the top of the ticket to prevent automated replies from sending.

03 Provide content
AI Agents learn from content that you've provided, which is in the form of:
- Training content
- Policies
- Instructions
For more information on providing your AI Agent with information, see here.
04 Editing or viewing Agent profiles
To edit (or view) the settings of an existing Agent:
1. Go to the AI section
2. Select the agent to open the Edit page.
3. Make your changes and select Save profile.
Further reading:
For more on content and the information you should provide for your AI Agent, see here.
To learn about the AI Agent and how it works, see here.